
Case #1
This patient lost his front tooth due to a failing endodontically treated #8, and also has some past periodontal disease. He is blessed with a long upper lip and although we made him a transitional partial denture to wear as a “Hollywood” tooth, he didn’t like it at all. We then treatment planned an implant/crown the next day. The bold text below is the actual text from the patient’s chart made with a Carestream/Kodak PracticeWorks note.
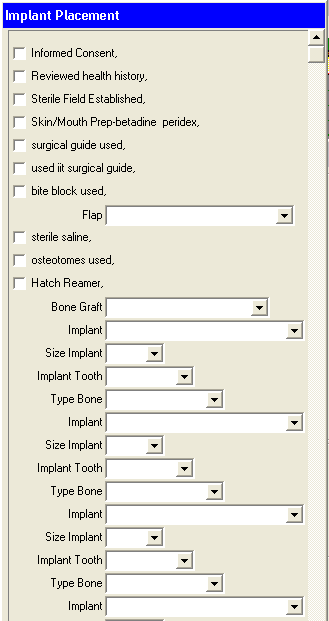
Informed Consent, Reviewed health history, Sterile Field Established, Skin/Mouth Prep-betadine & peridex, Elevated full thickness flap (Noted facial dehisence, curetted out old healing granulation tissue, sterile saline, DynaBlast, Astra OsseoSpeed 4.0S 15mm in #8 area, bone level implant cover screw (decorticated the facial cortical plate around dehisence and placed dynoblast with BioMend Extend membrane), 5.0 black silk suture, primary closure, Post-op PA(2), Oral Hygiene Instructions, Topical anesthetic 20% lido/4% Tetra/2% phenylephrine with 1 carpule (68mg/1.7ml) of 4% Articaine w/1:100000 epi infiltration, Pt informed not to eat food, bite or chew on lips or tongue while anesthetic is still working. Treatment was tolerated well. Next Visit: Suture removal in 1 week
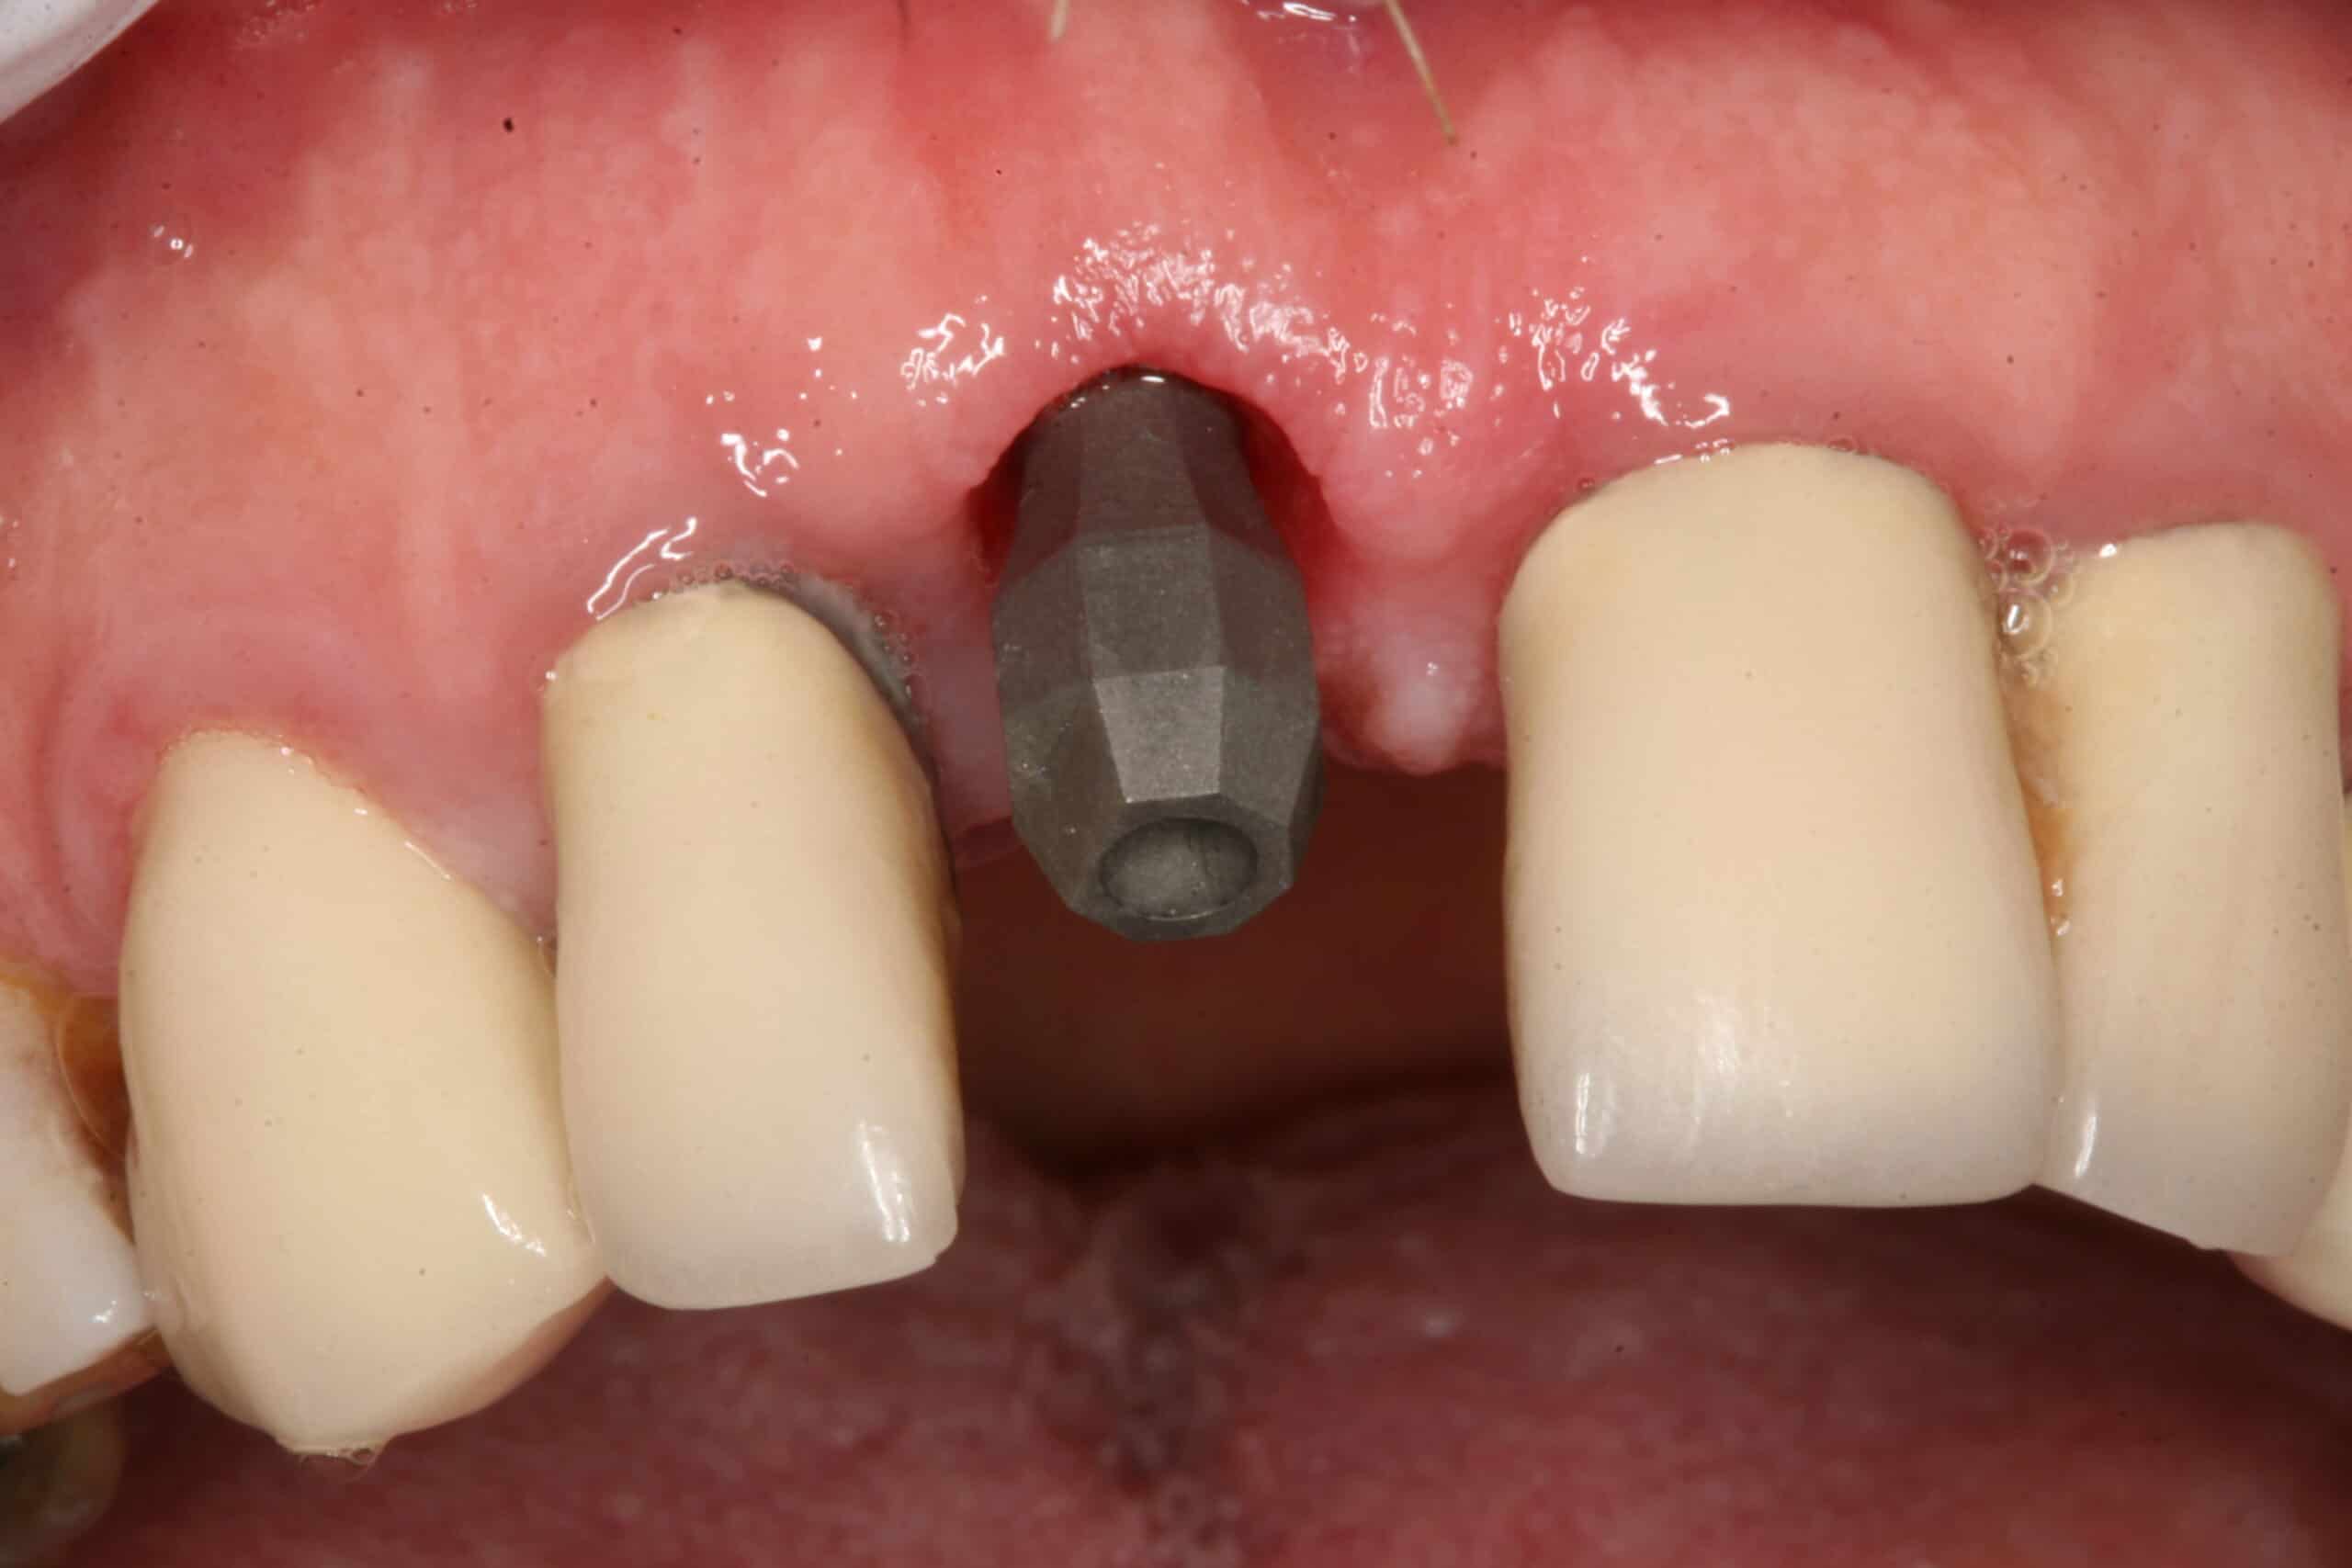
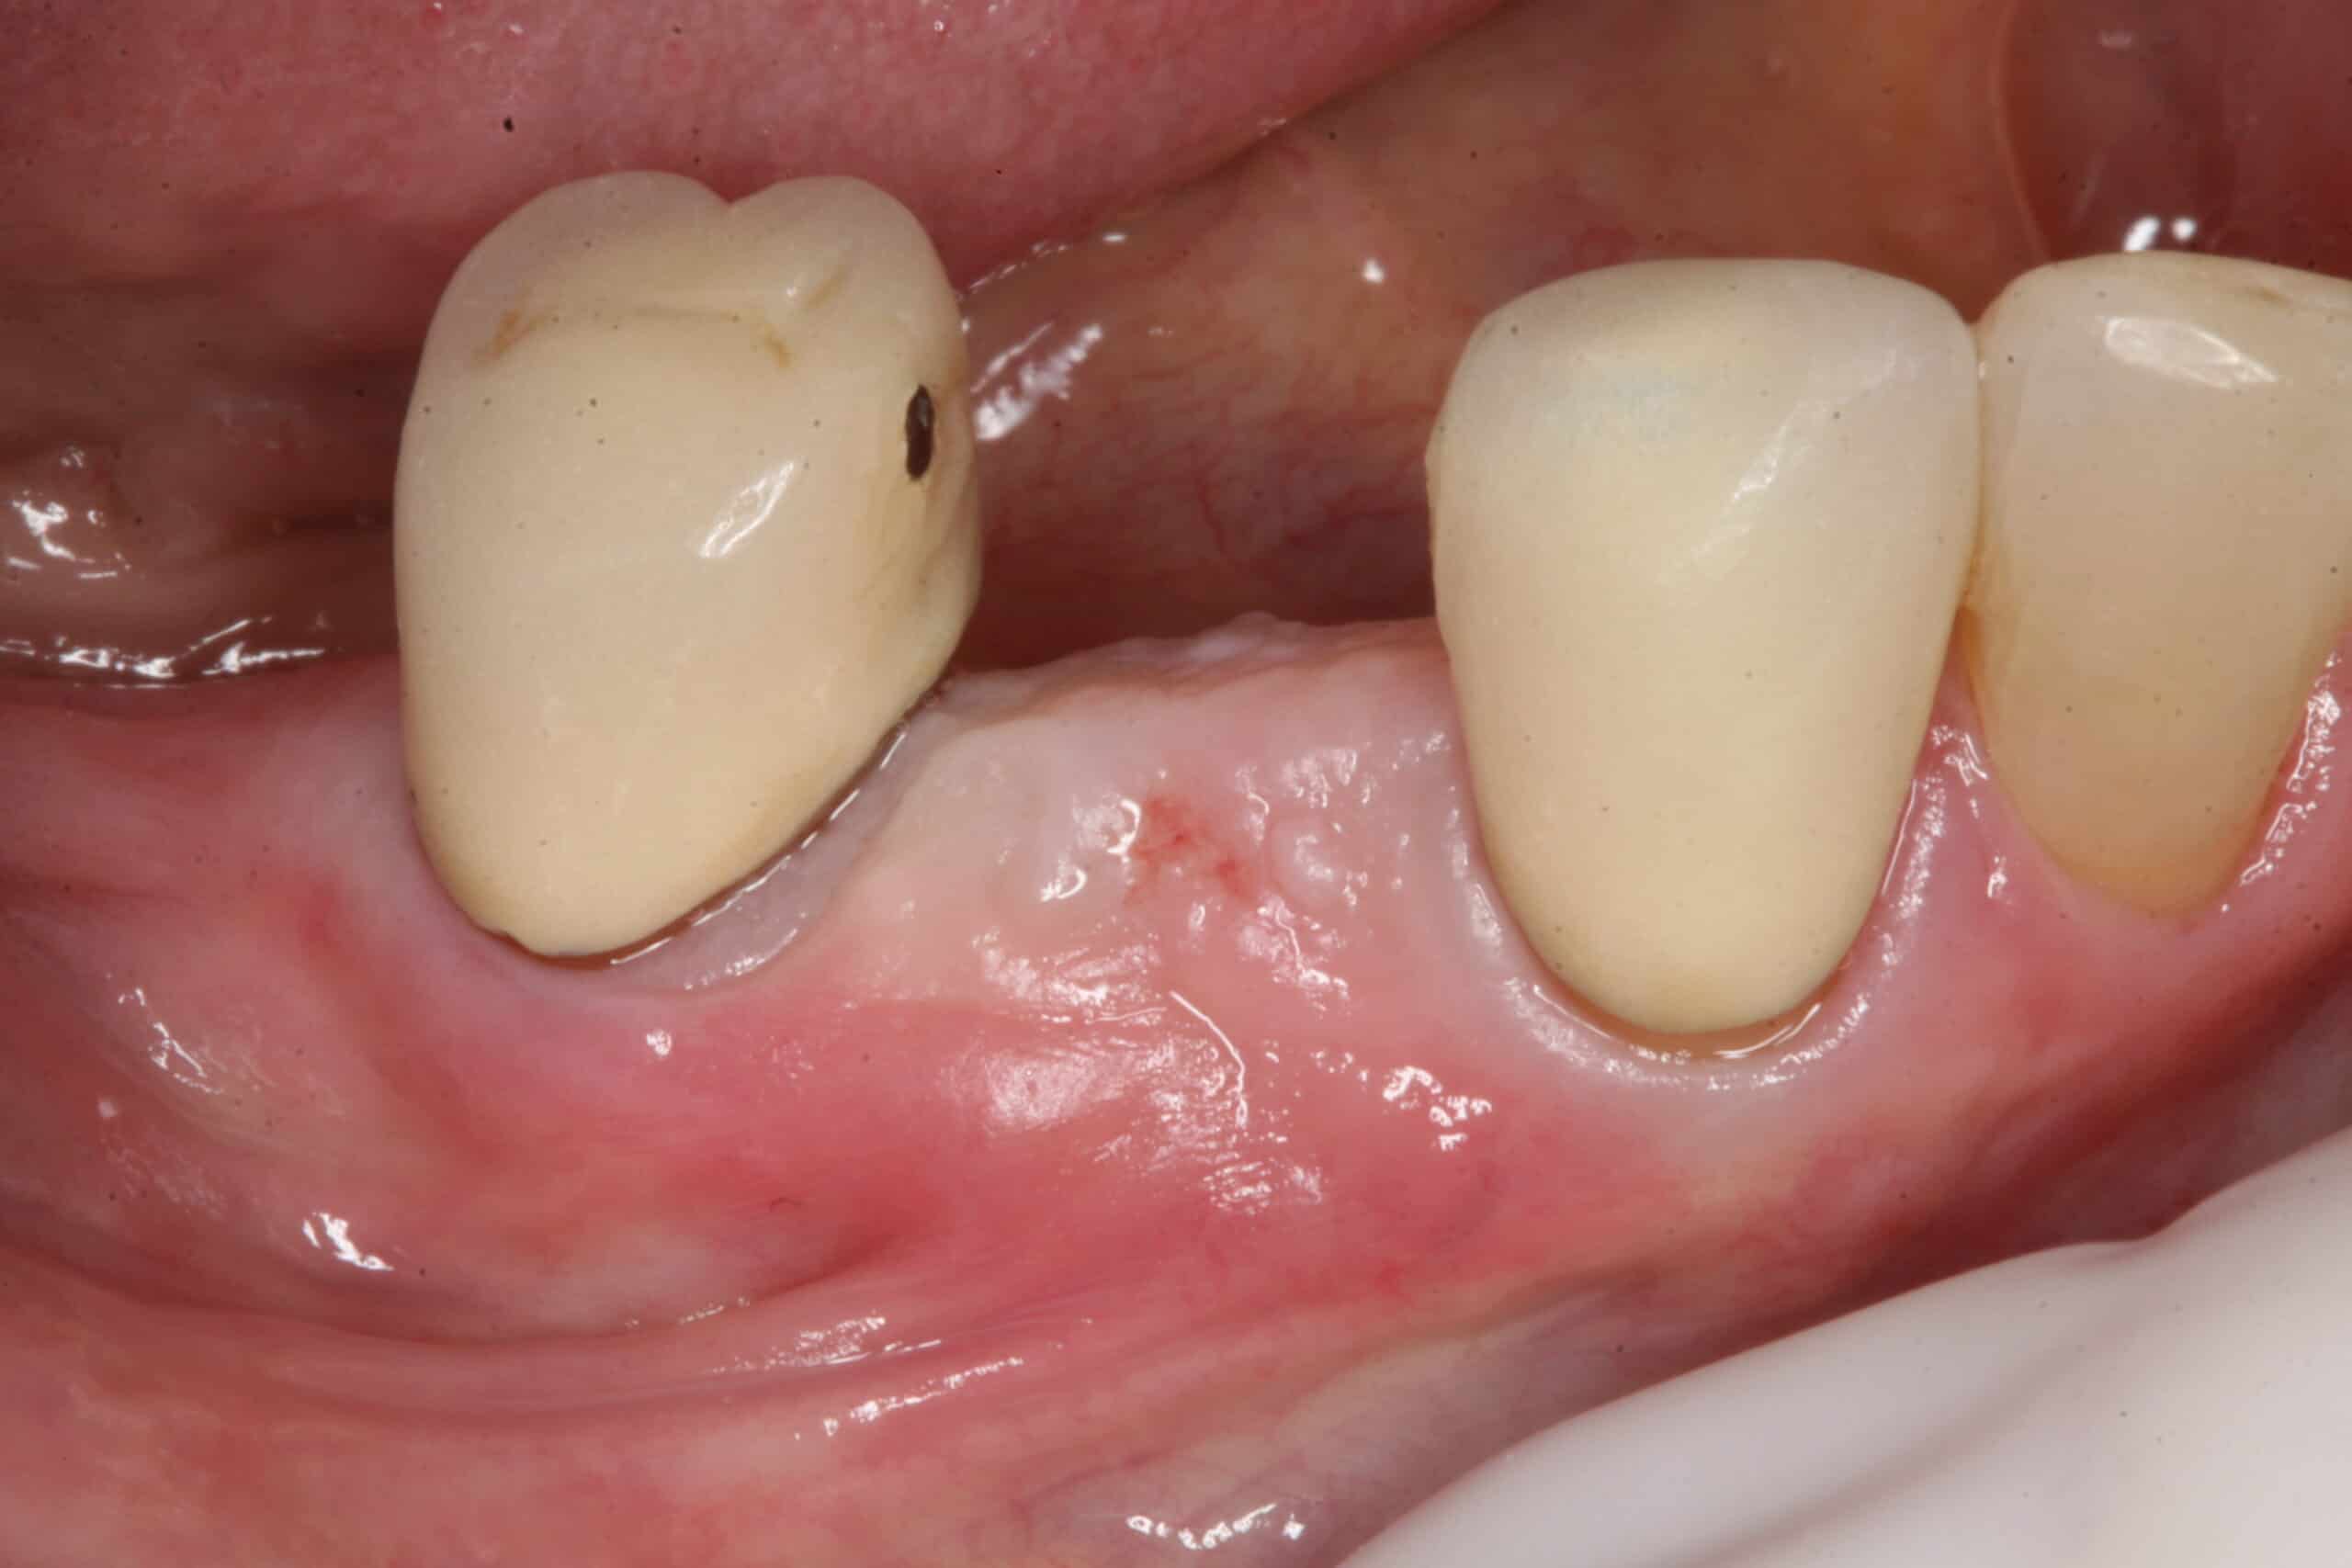
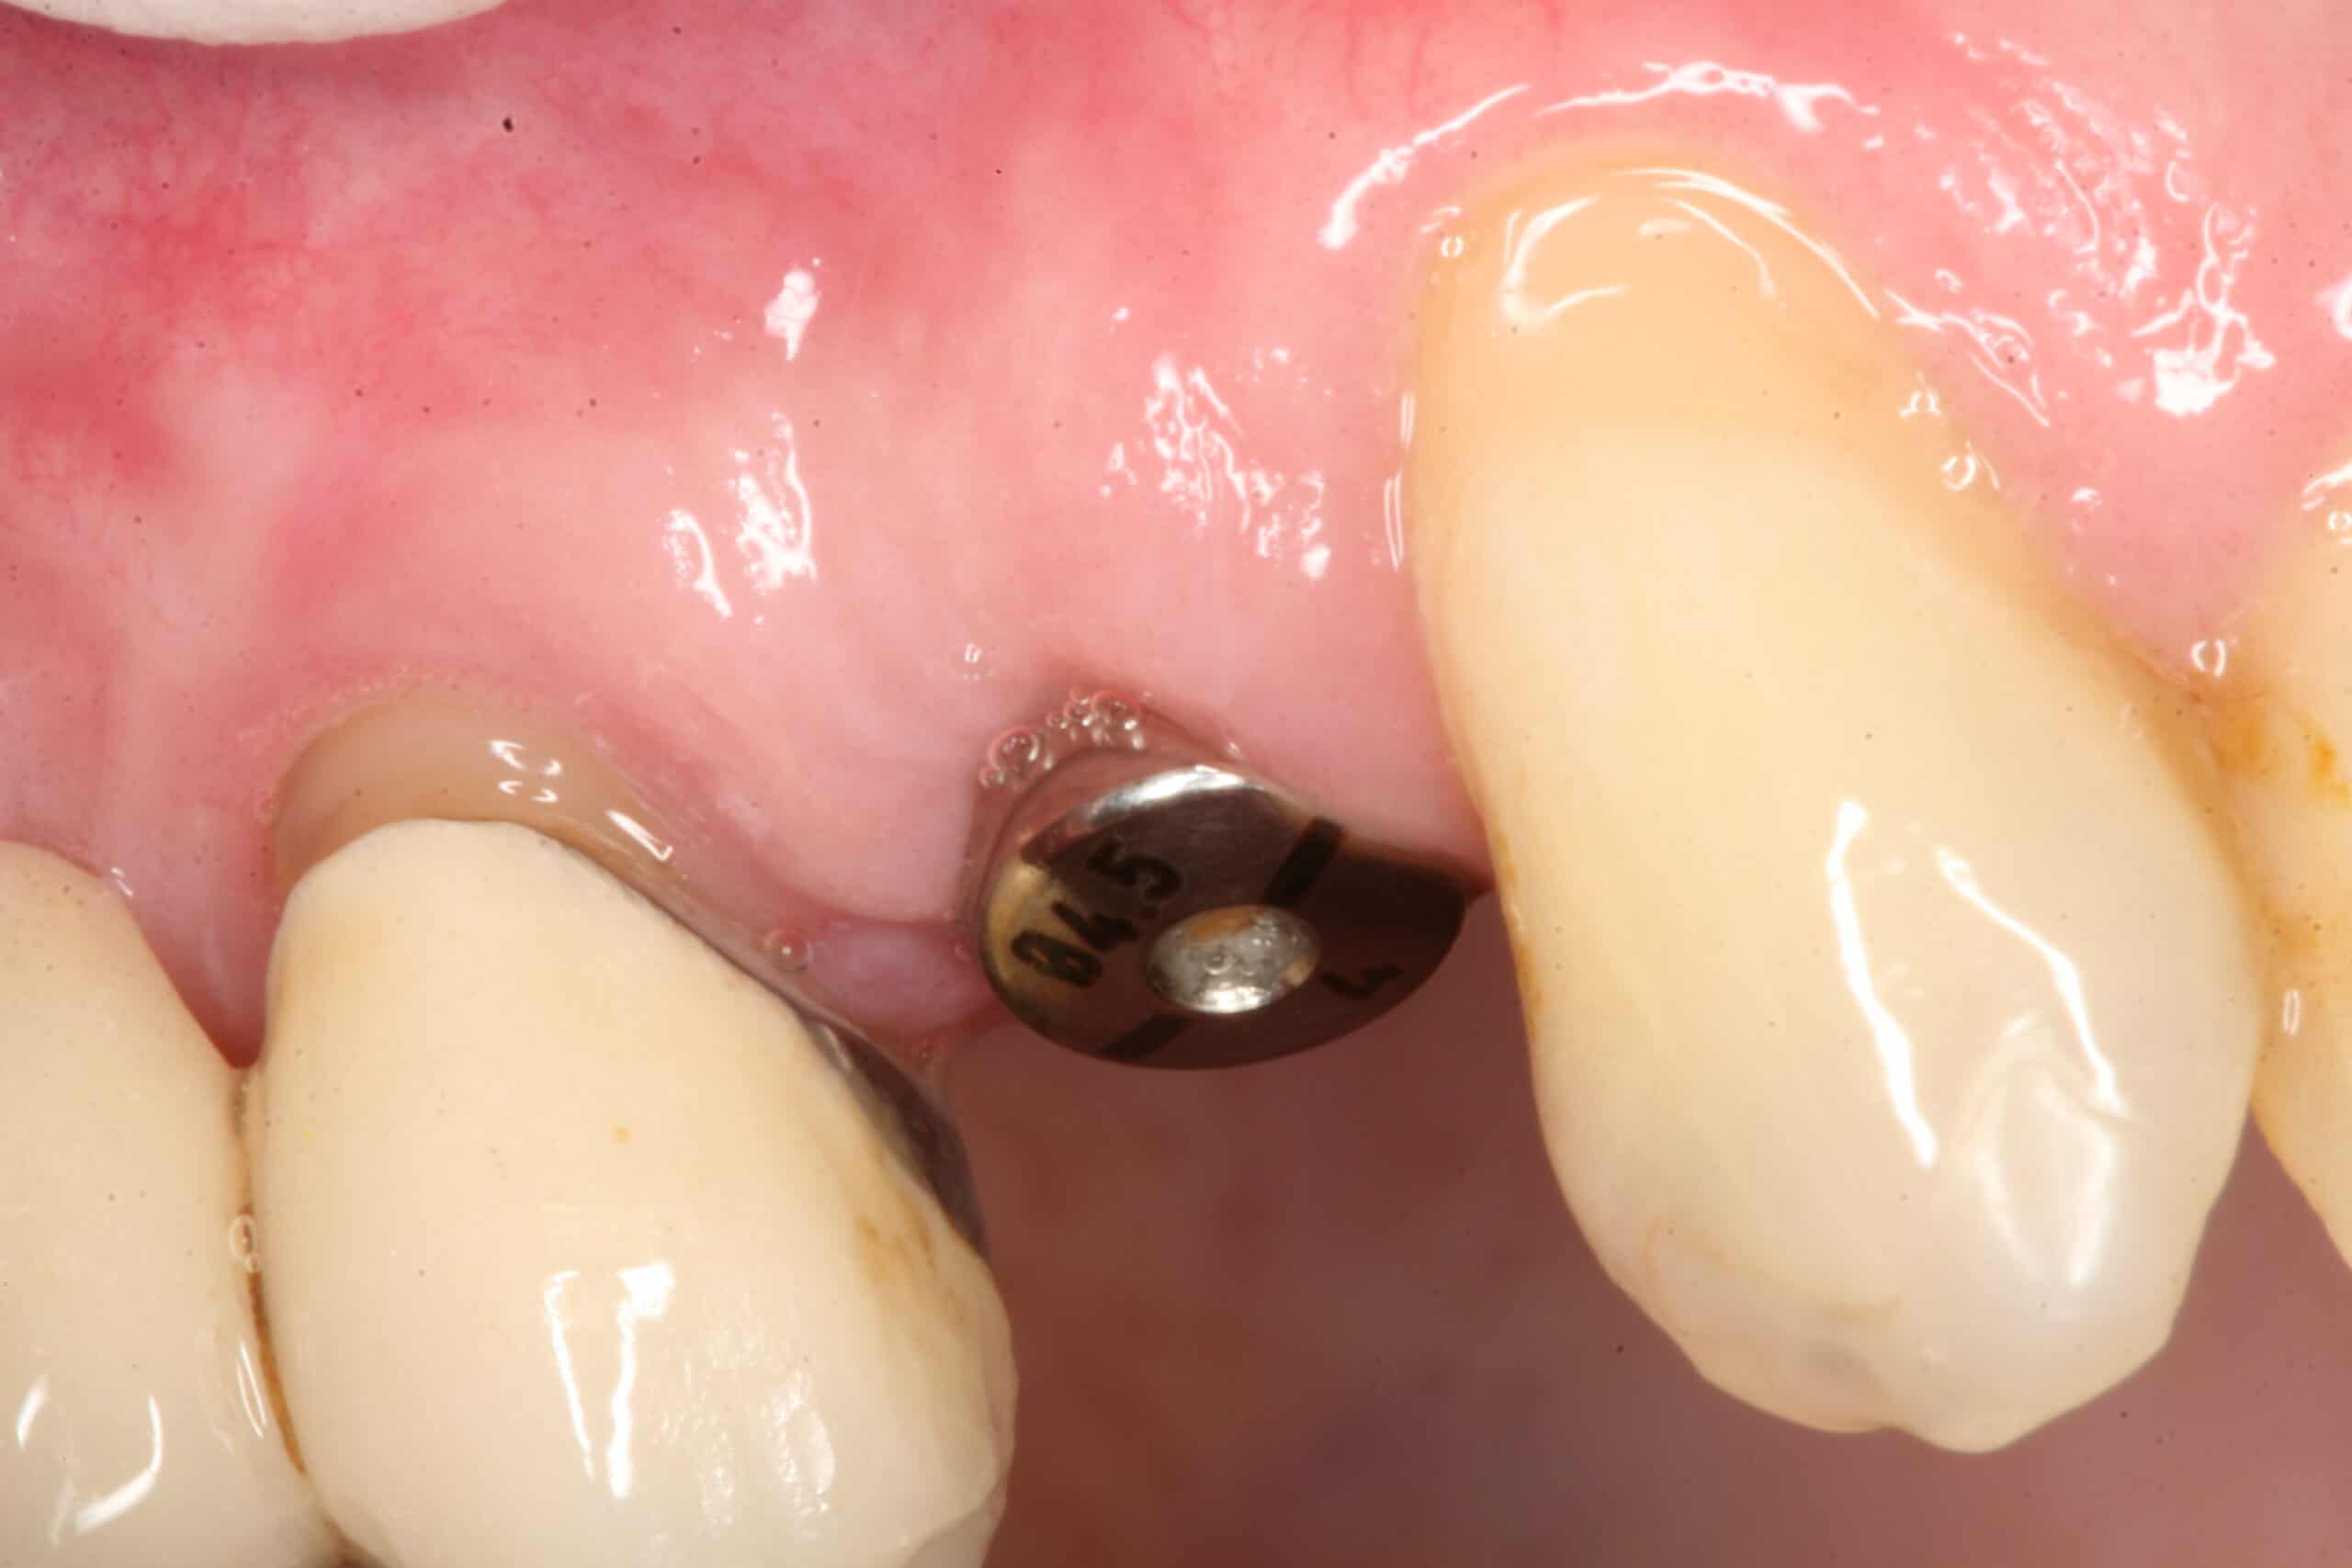
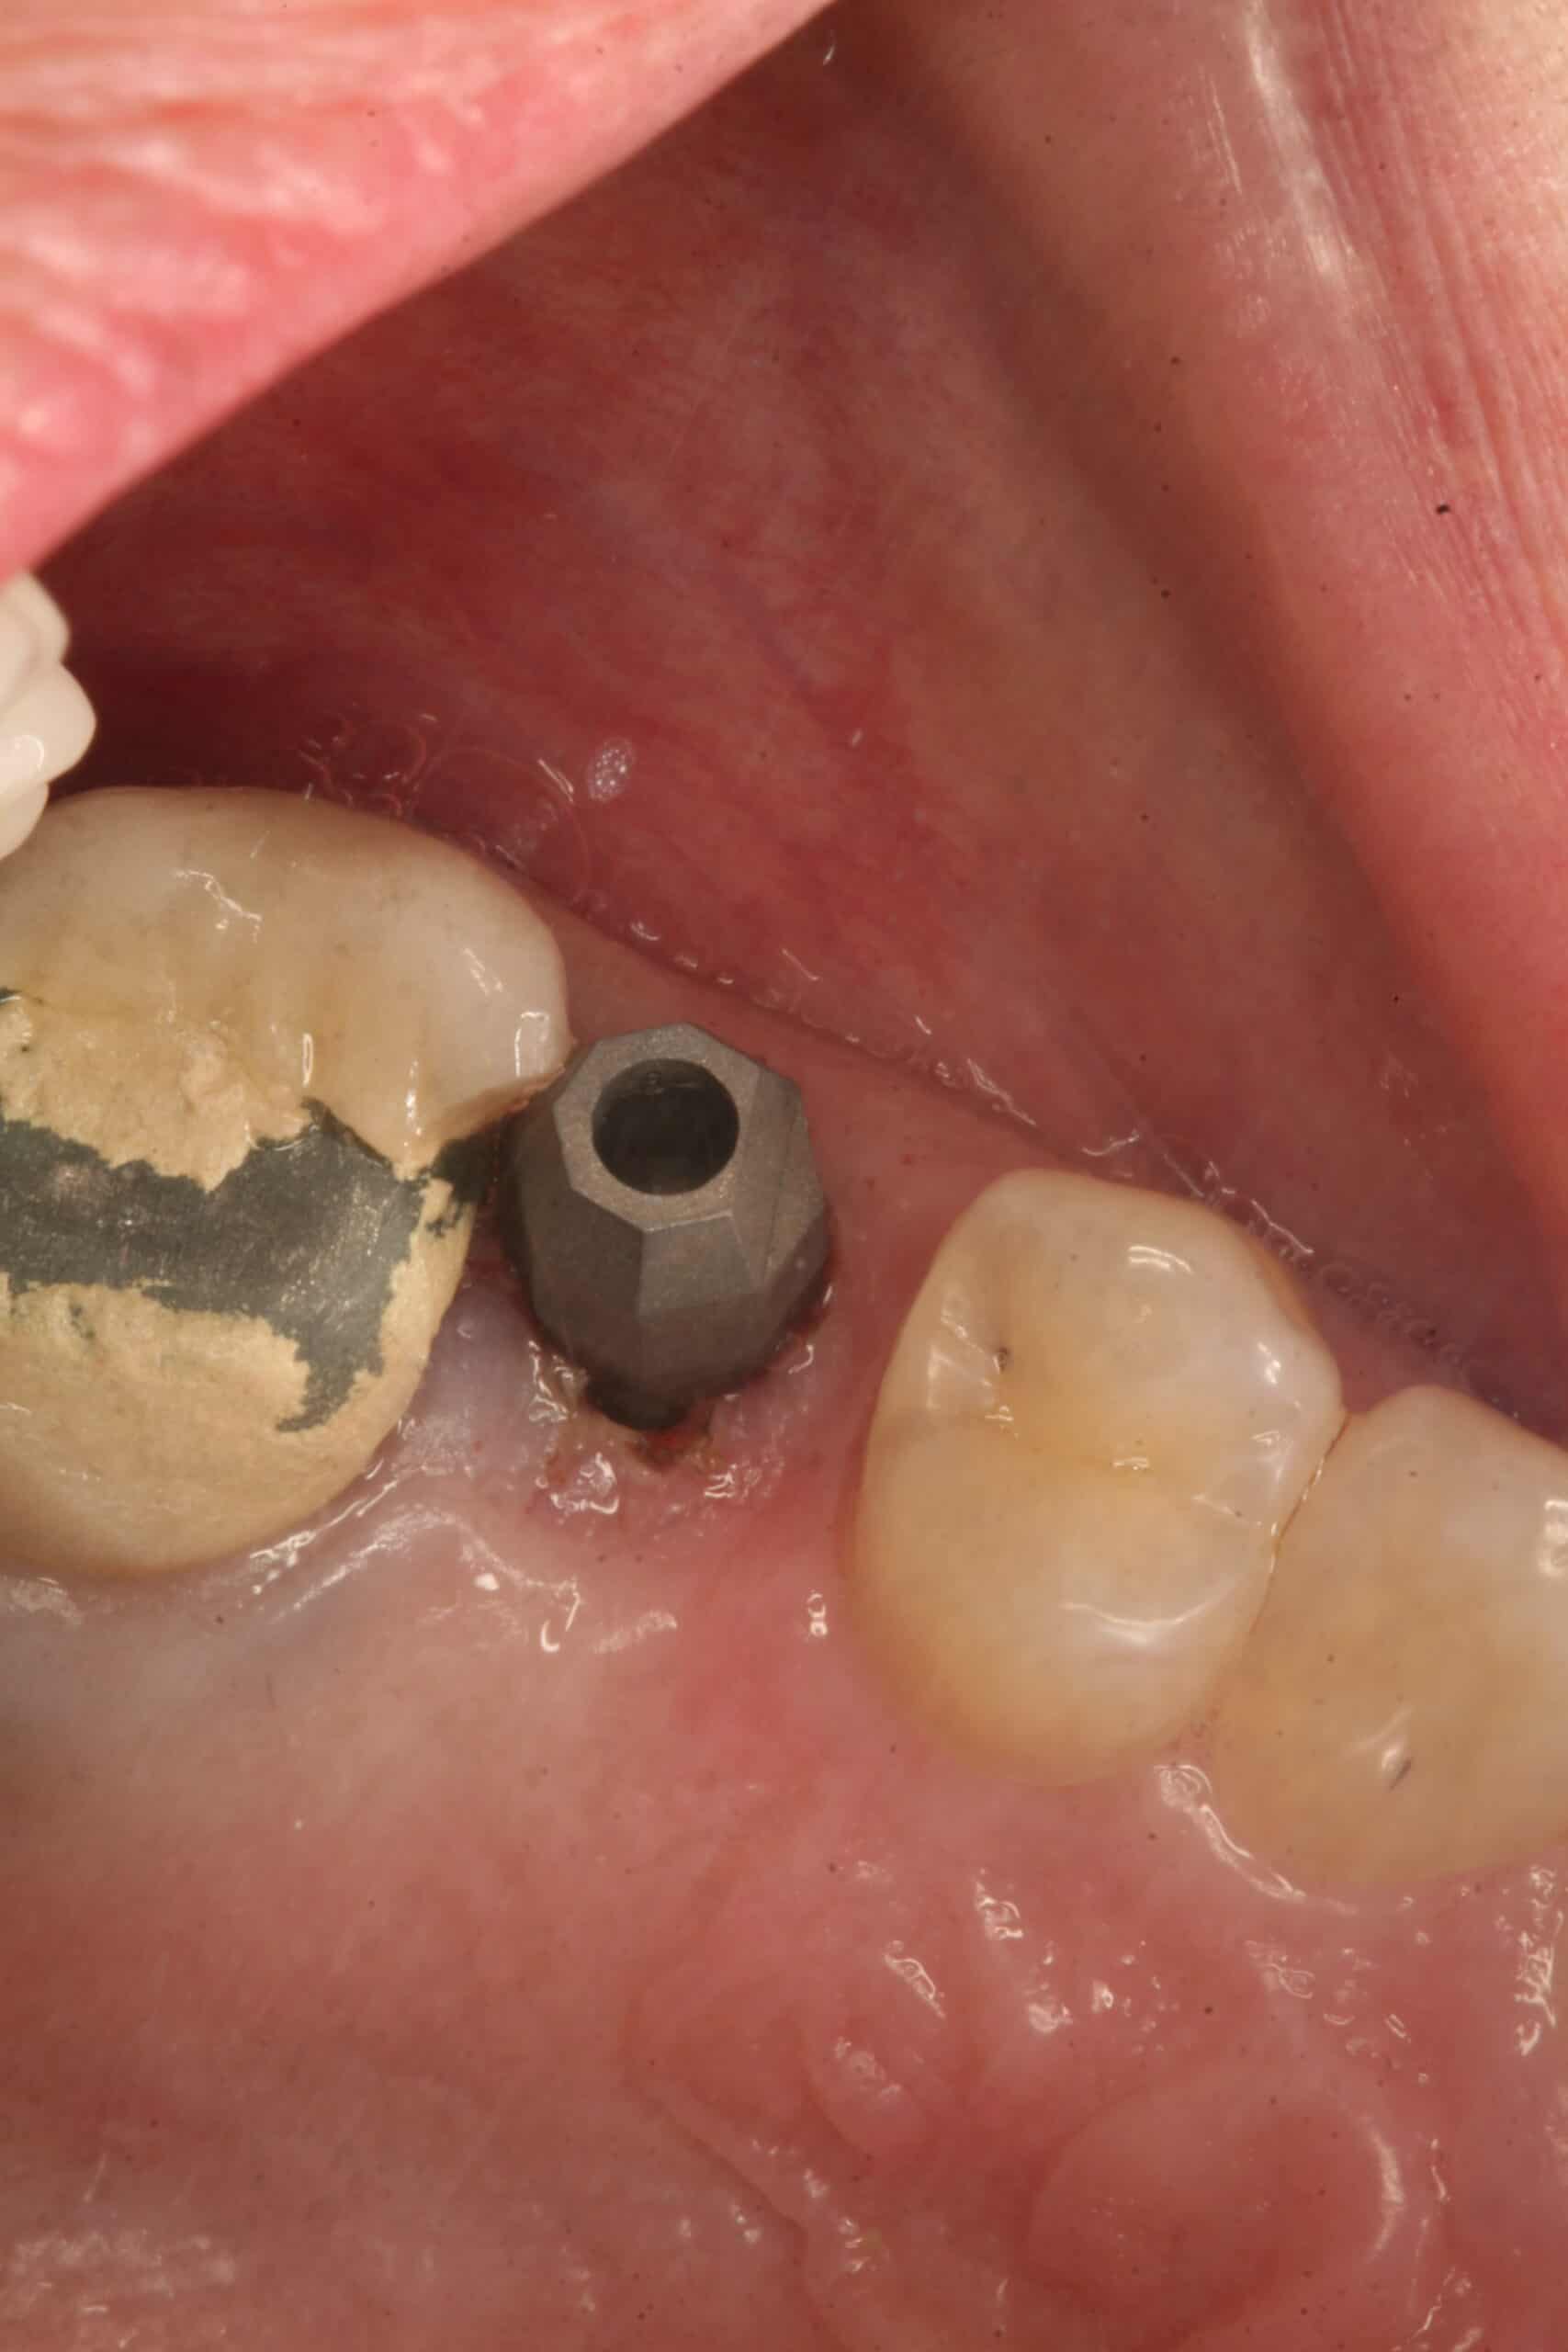
The above photo is 4 months post implant placement with a 5 Axis Dental Design Center scanning jig in place.
Reviewed health history, Topical anesthetic 20% lido/4% Tetra/2% phenylephrine with exposed implant with laser, Er:YAG with eye protection, (300us, 40mJ, 40Hz, 600u straight), removed healing cap, placed Astra scanning jig, implant(#8) sounds good, x-ray verification, Cadent Itero digital impression, Virtual bite, sent to 5 Axis Dental Design Center, healing collar Astra 3.5/4.0 5.5-4mm, adjusted denture, Oral Hygiene Instructions, Pt informed not to eat food, bite or chew on lips or tongue while anesthetic is still working. Next Visit: place CAD/CAM, cement crown
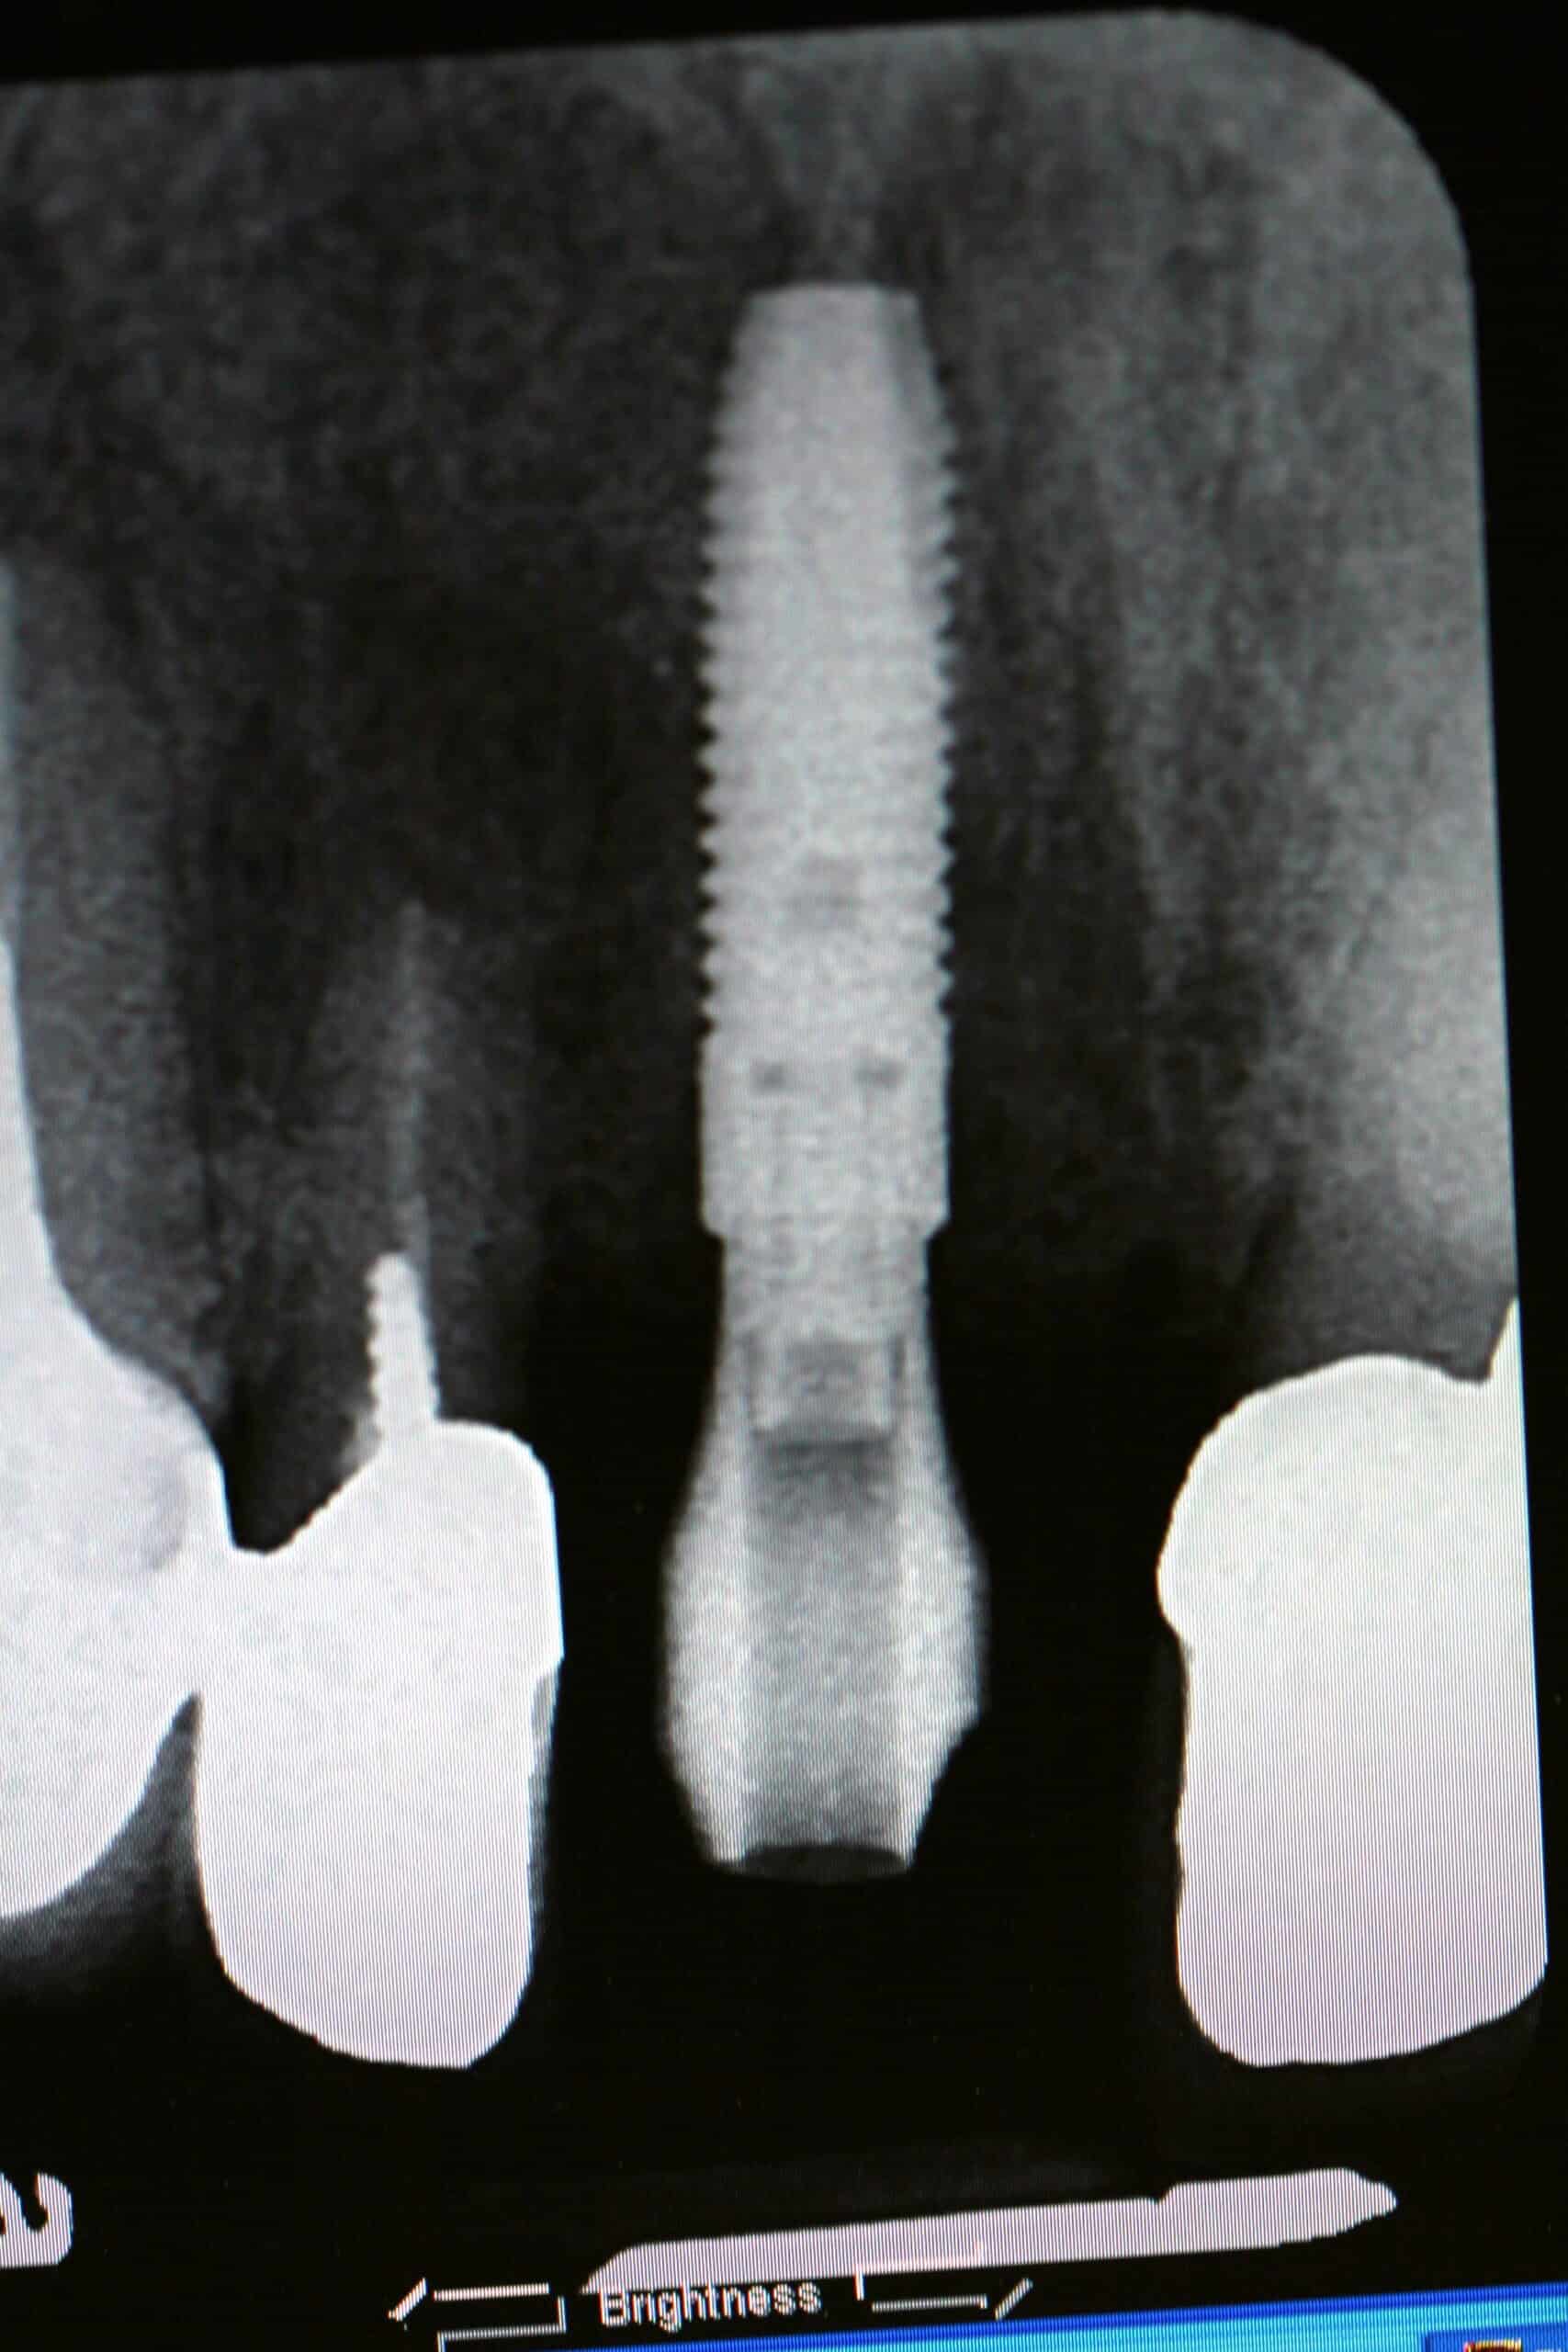
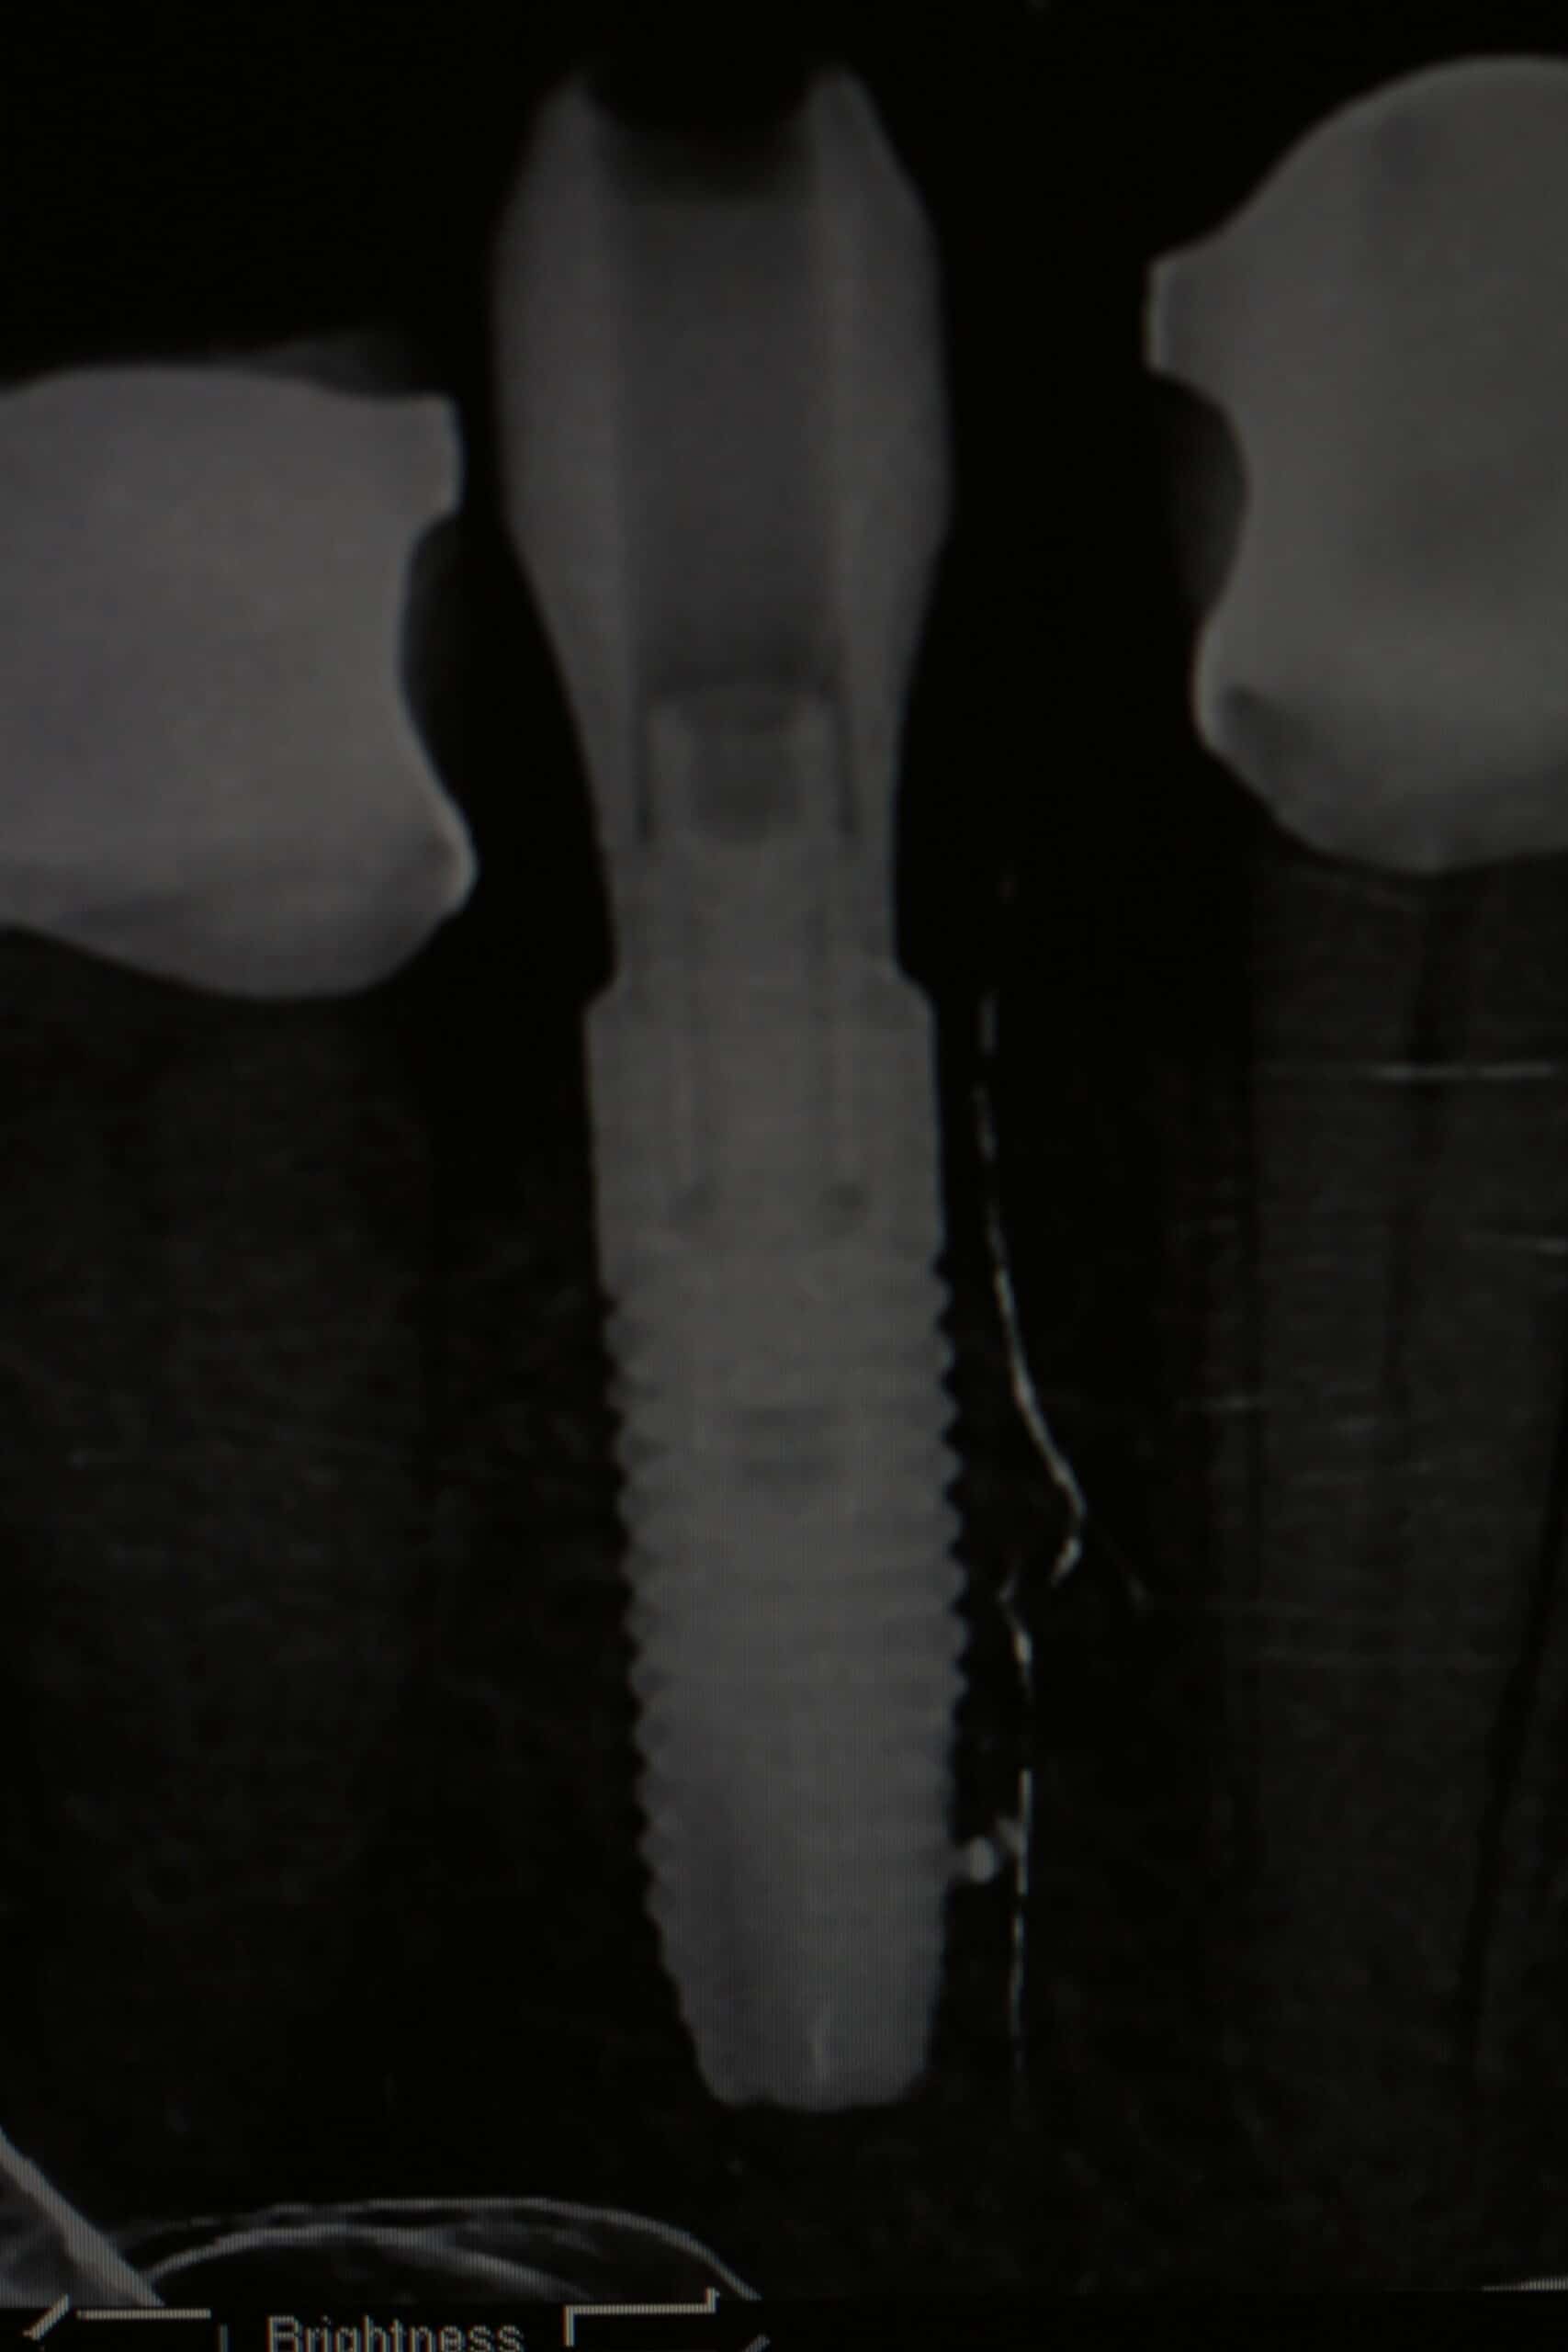
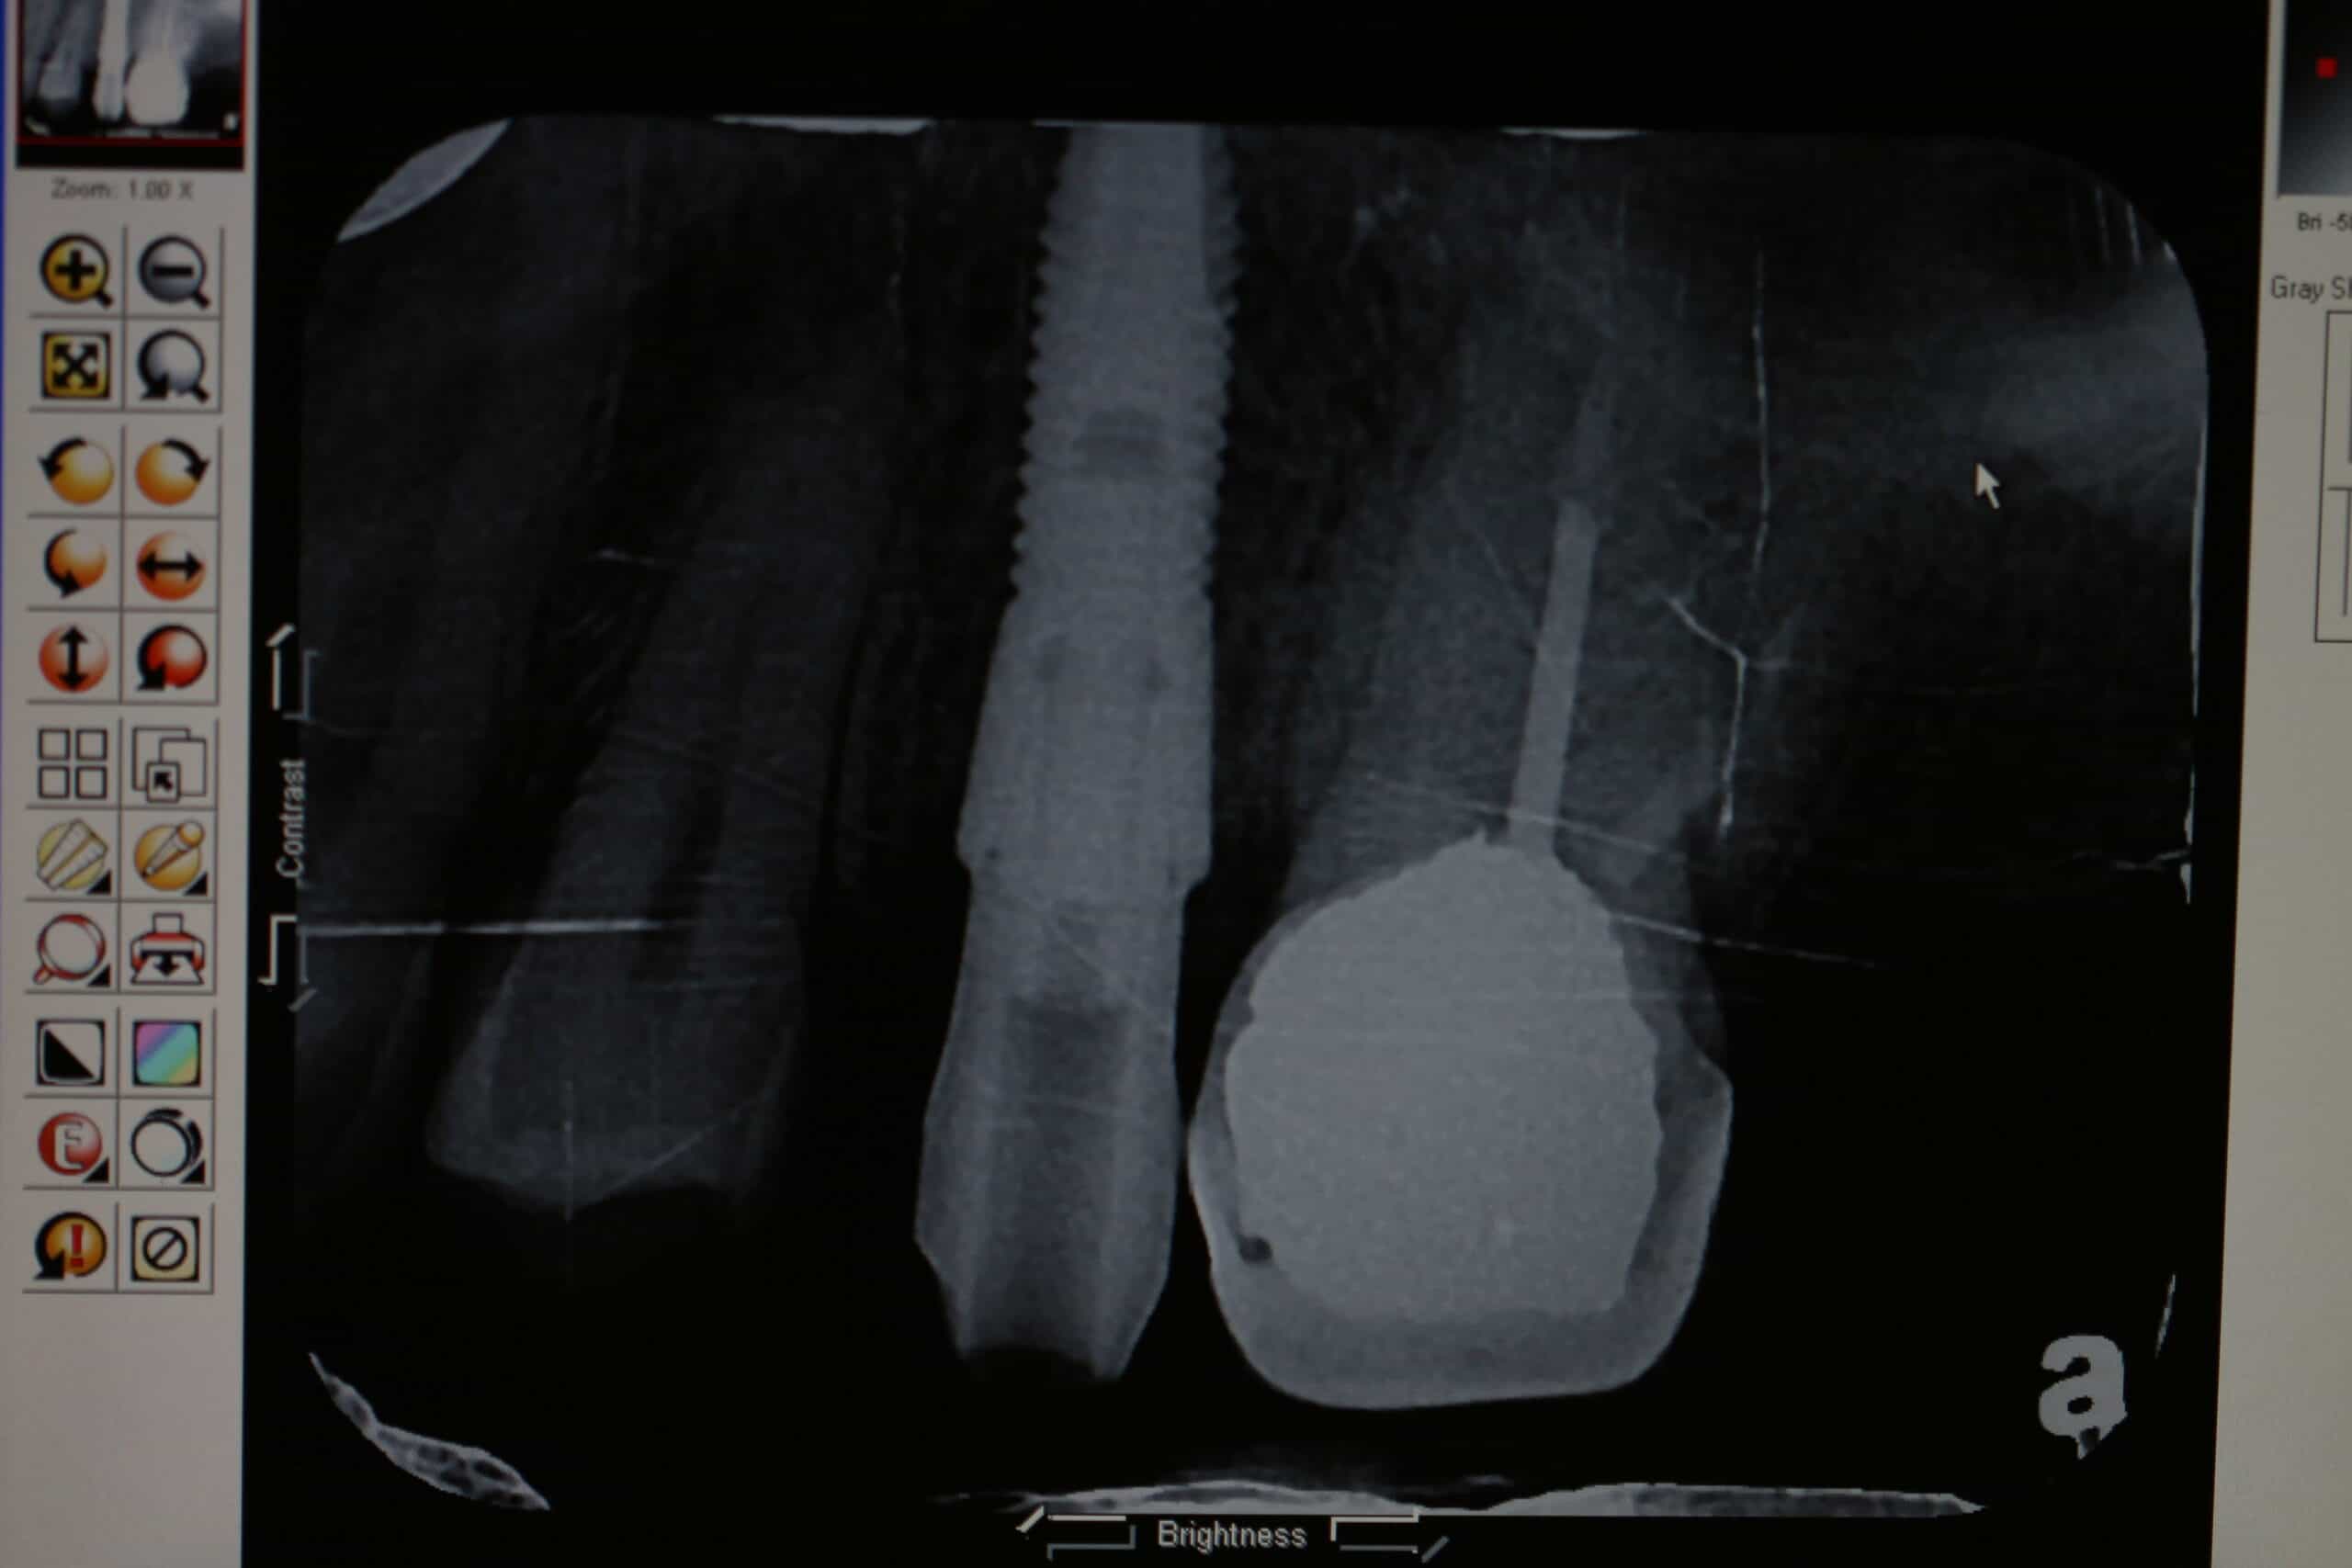
X-ray verification of scanning jig.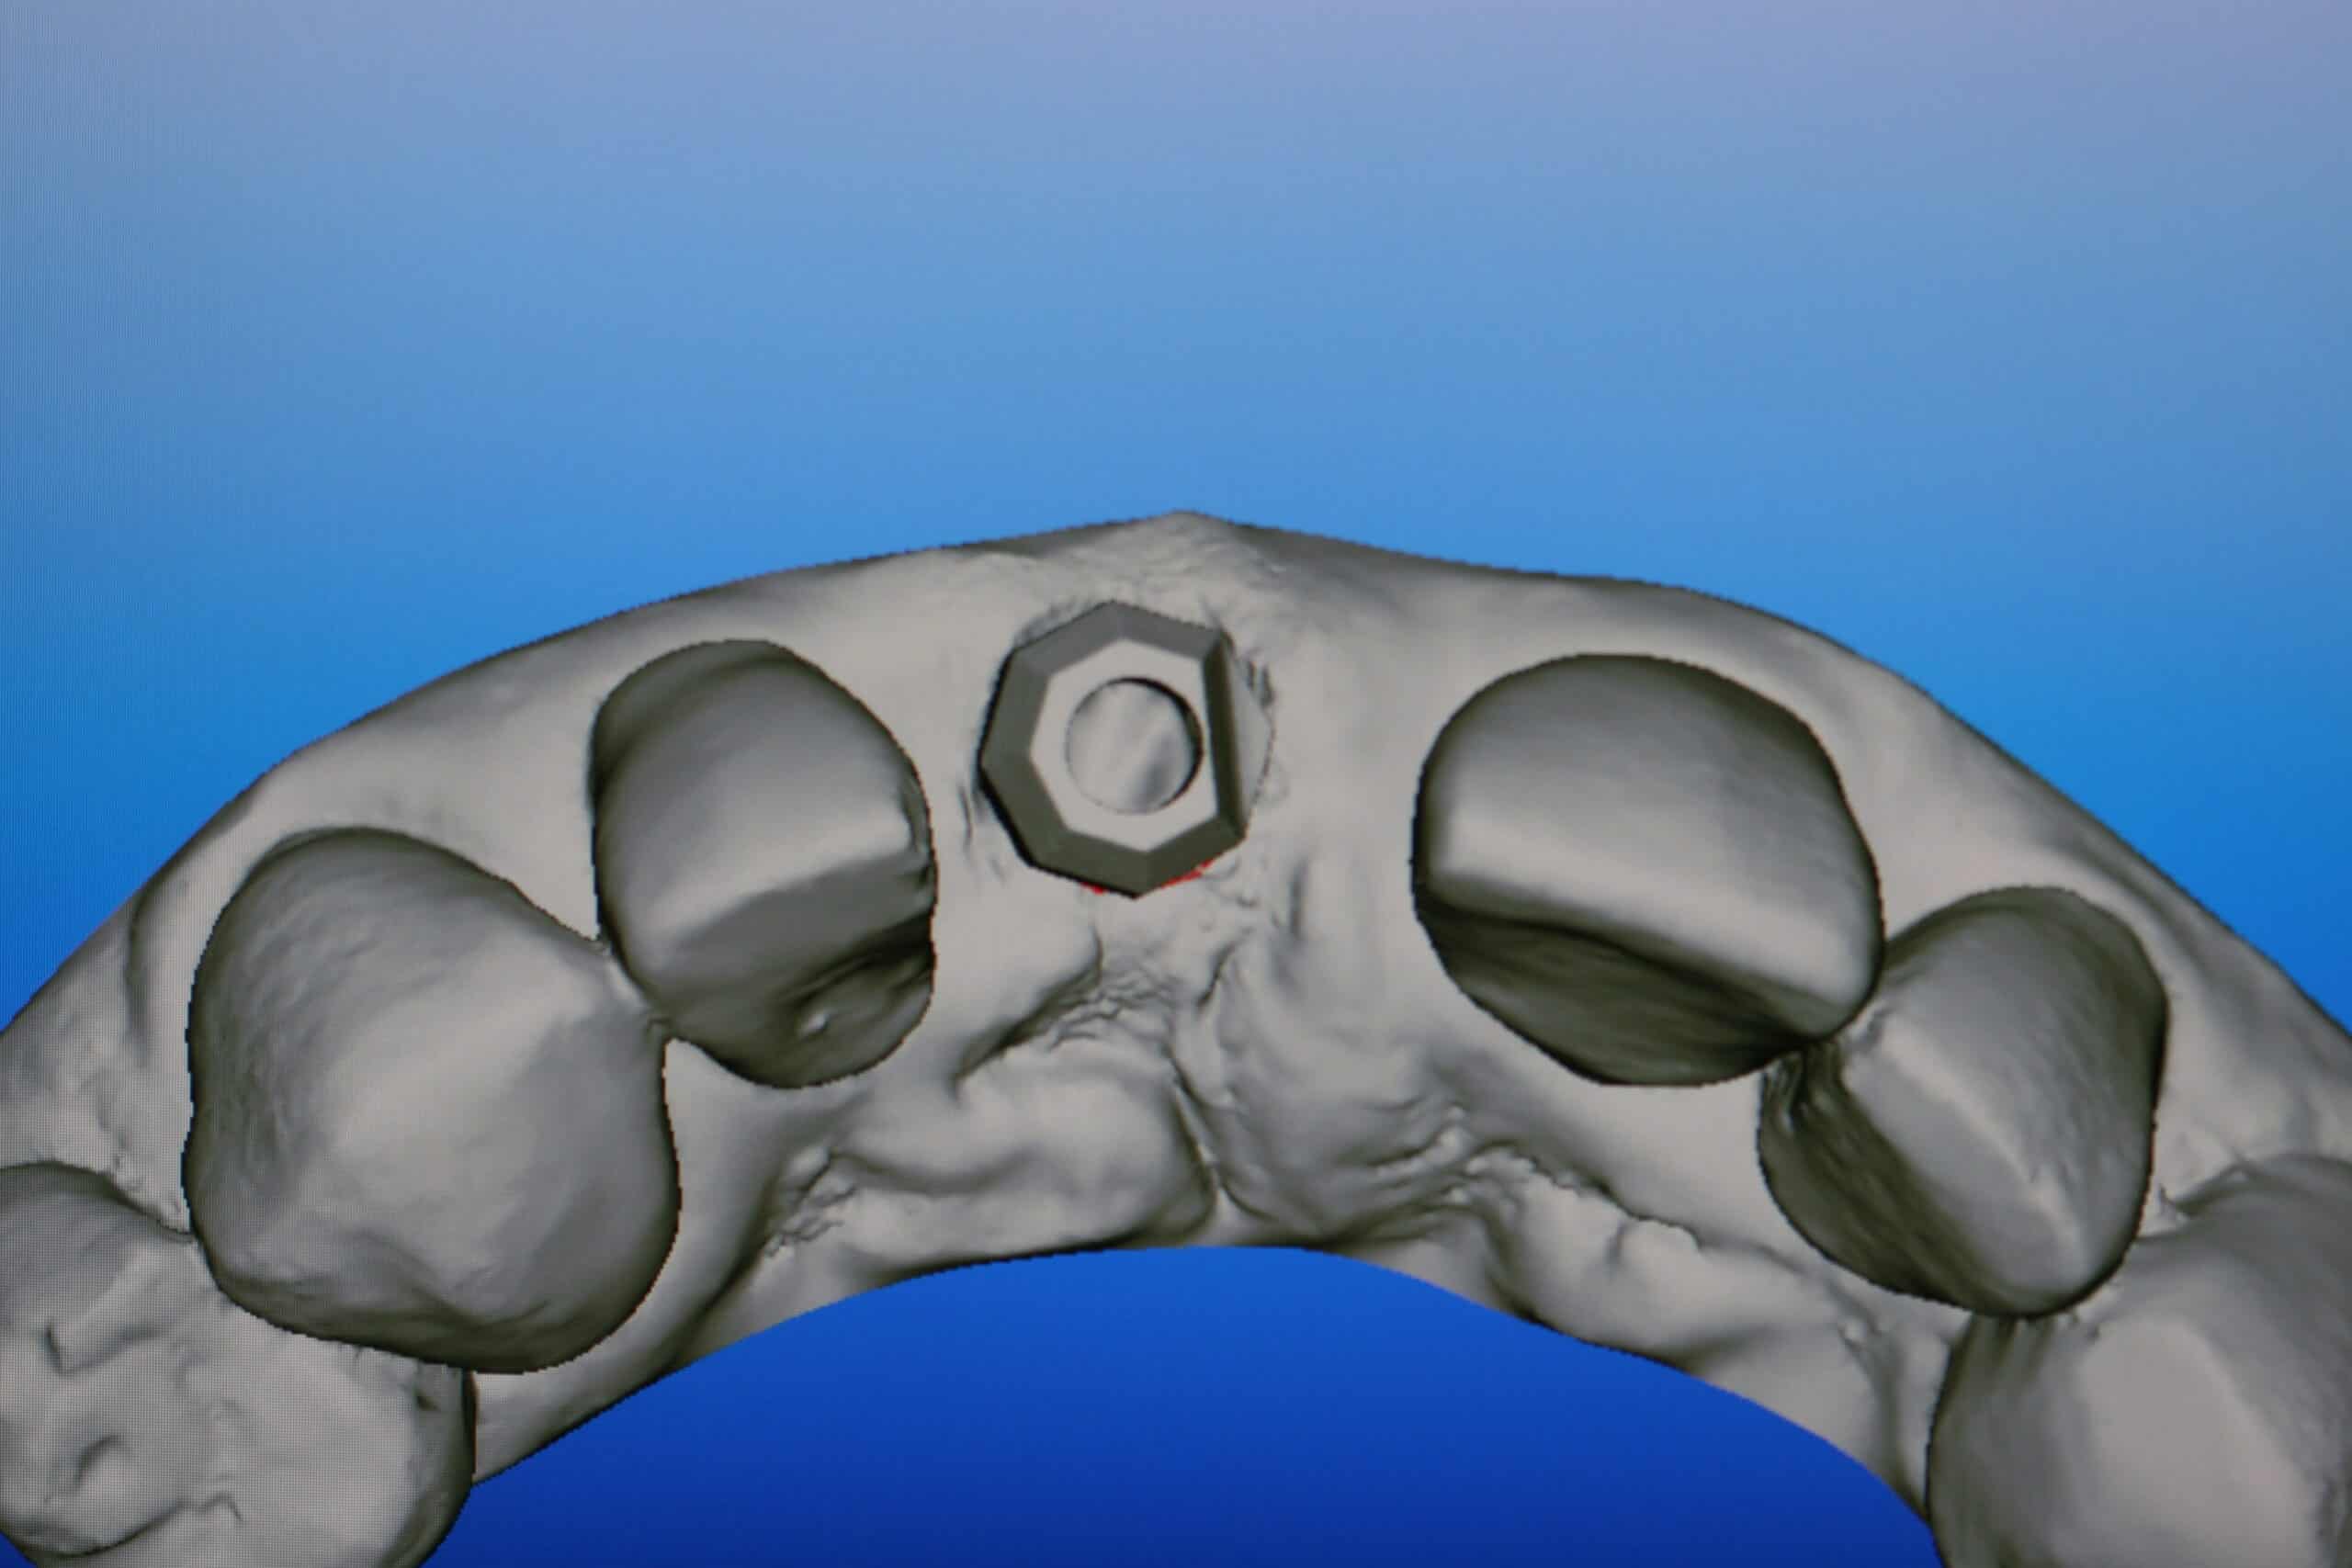
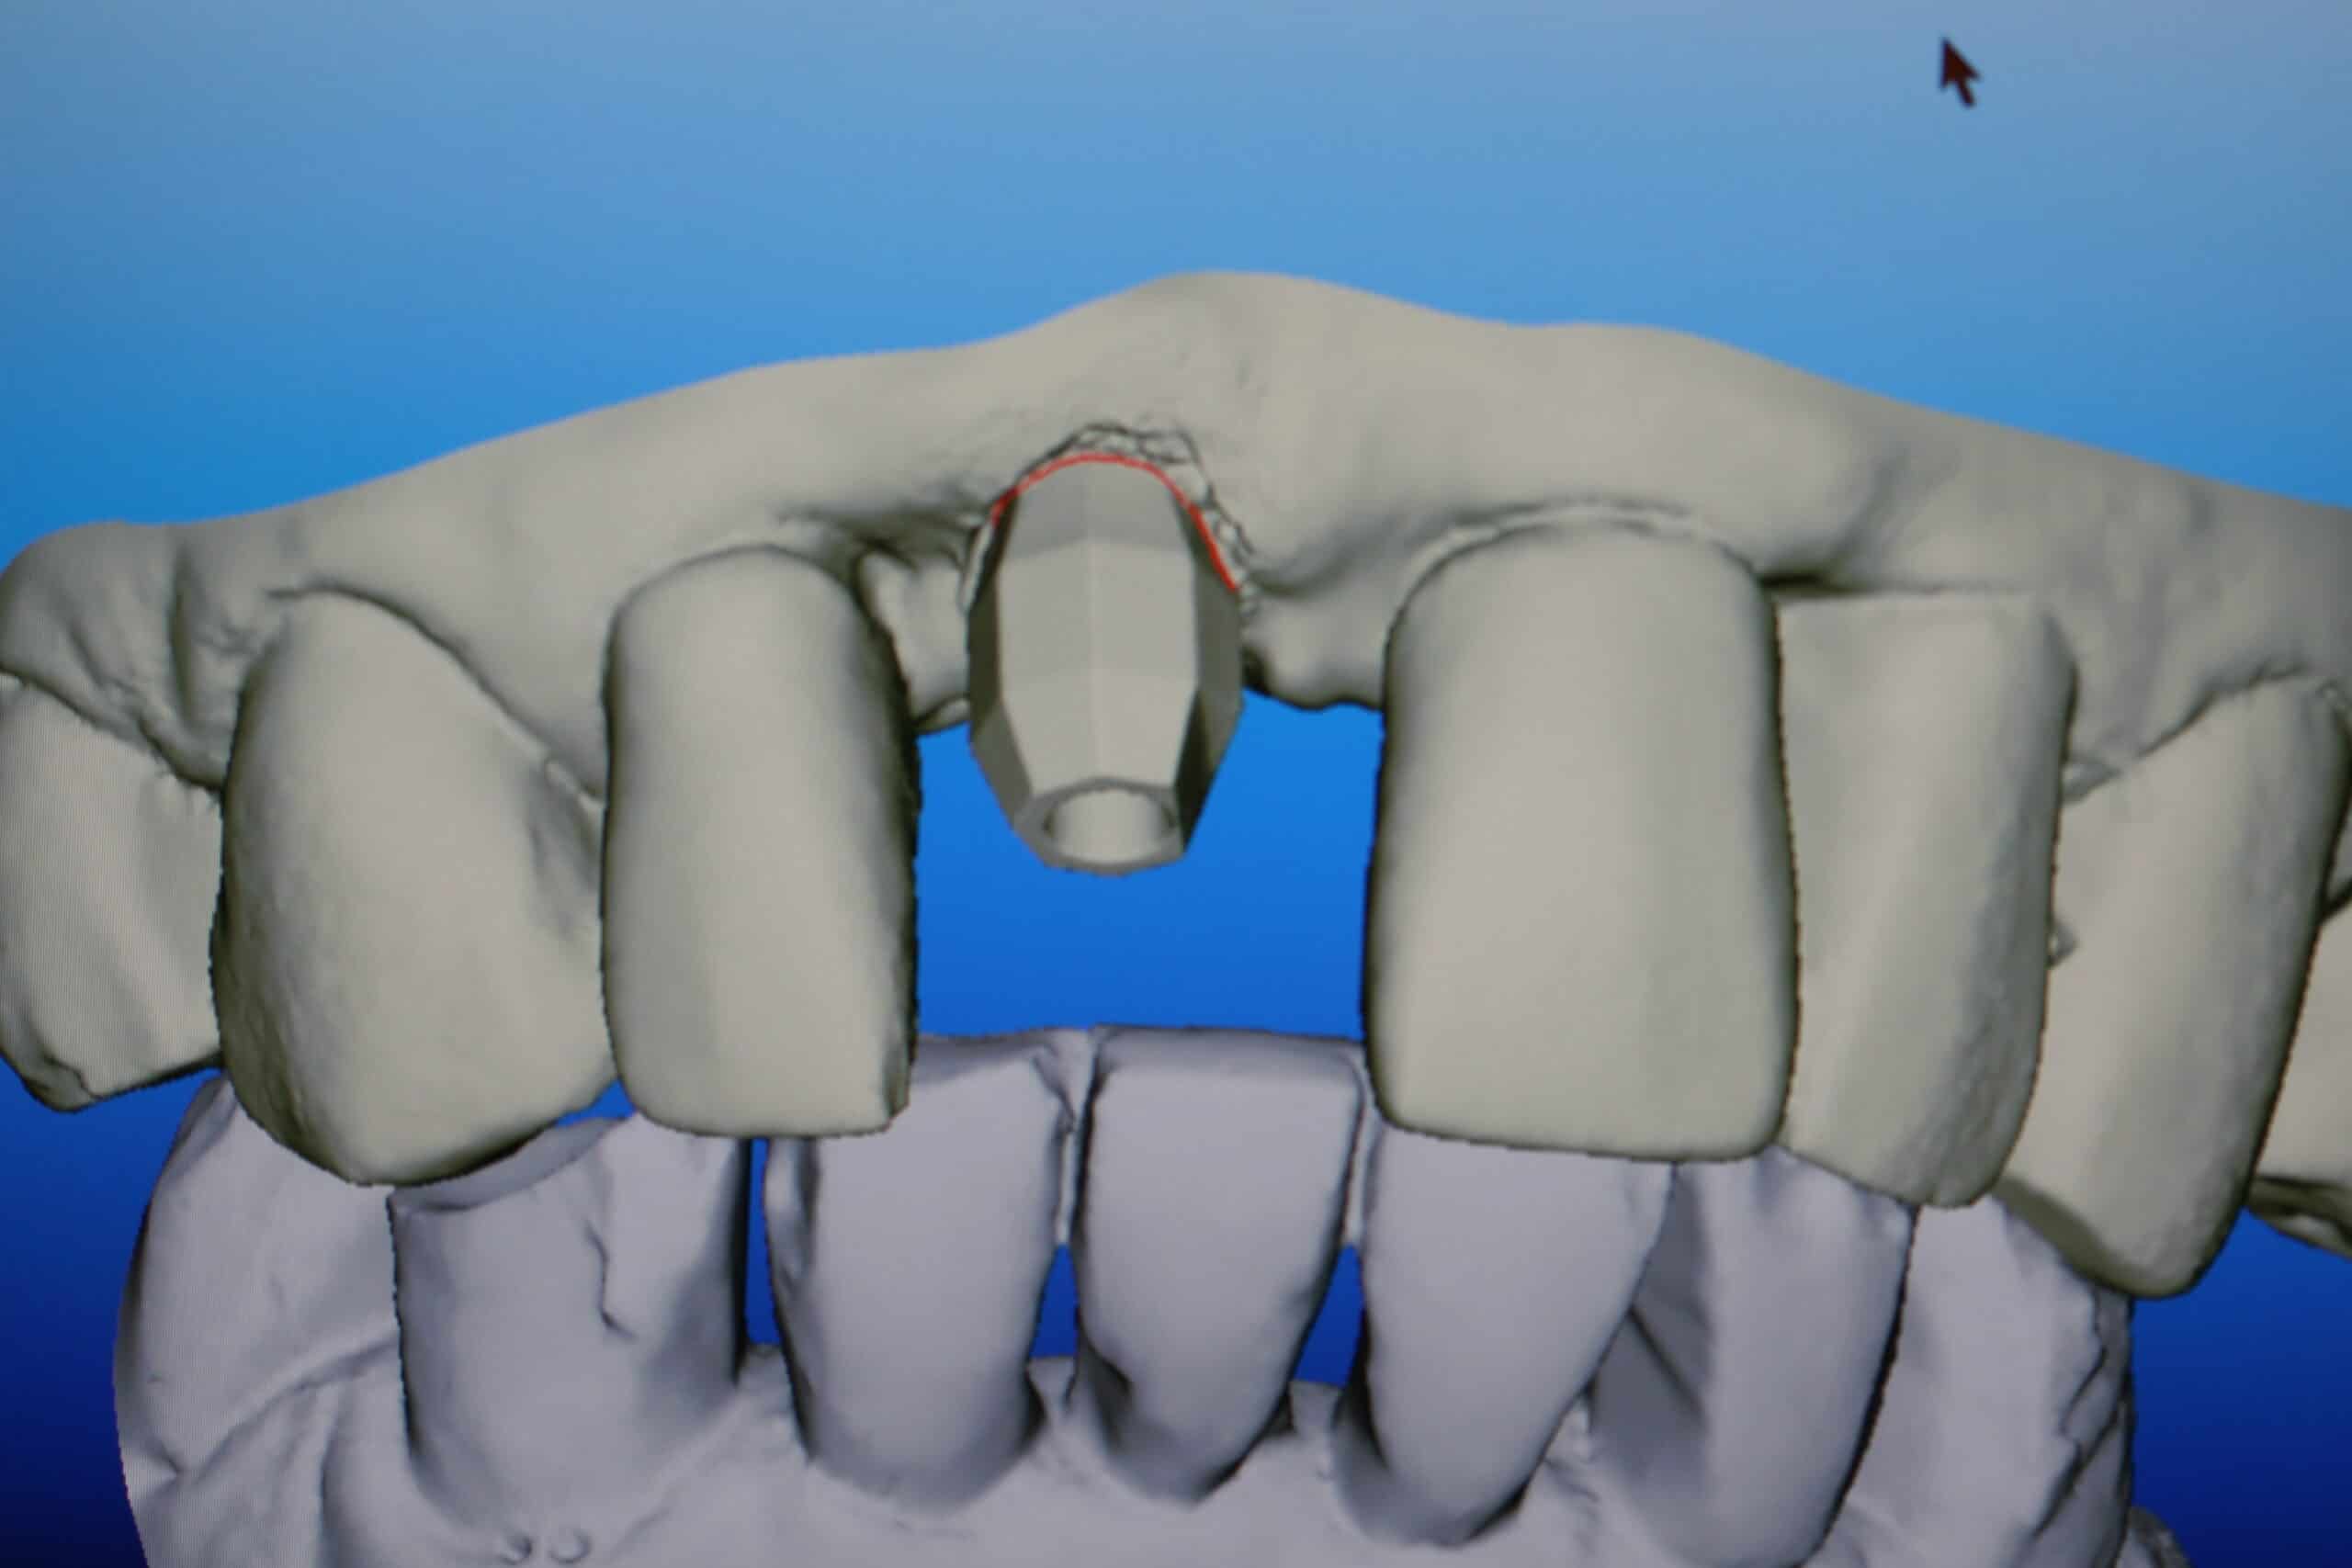
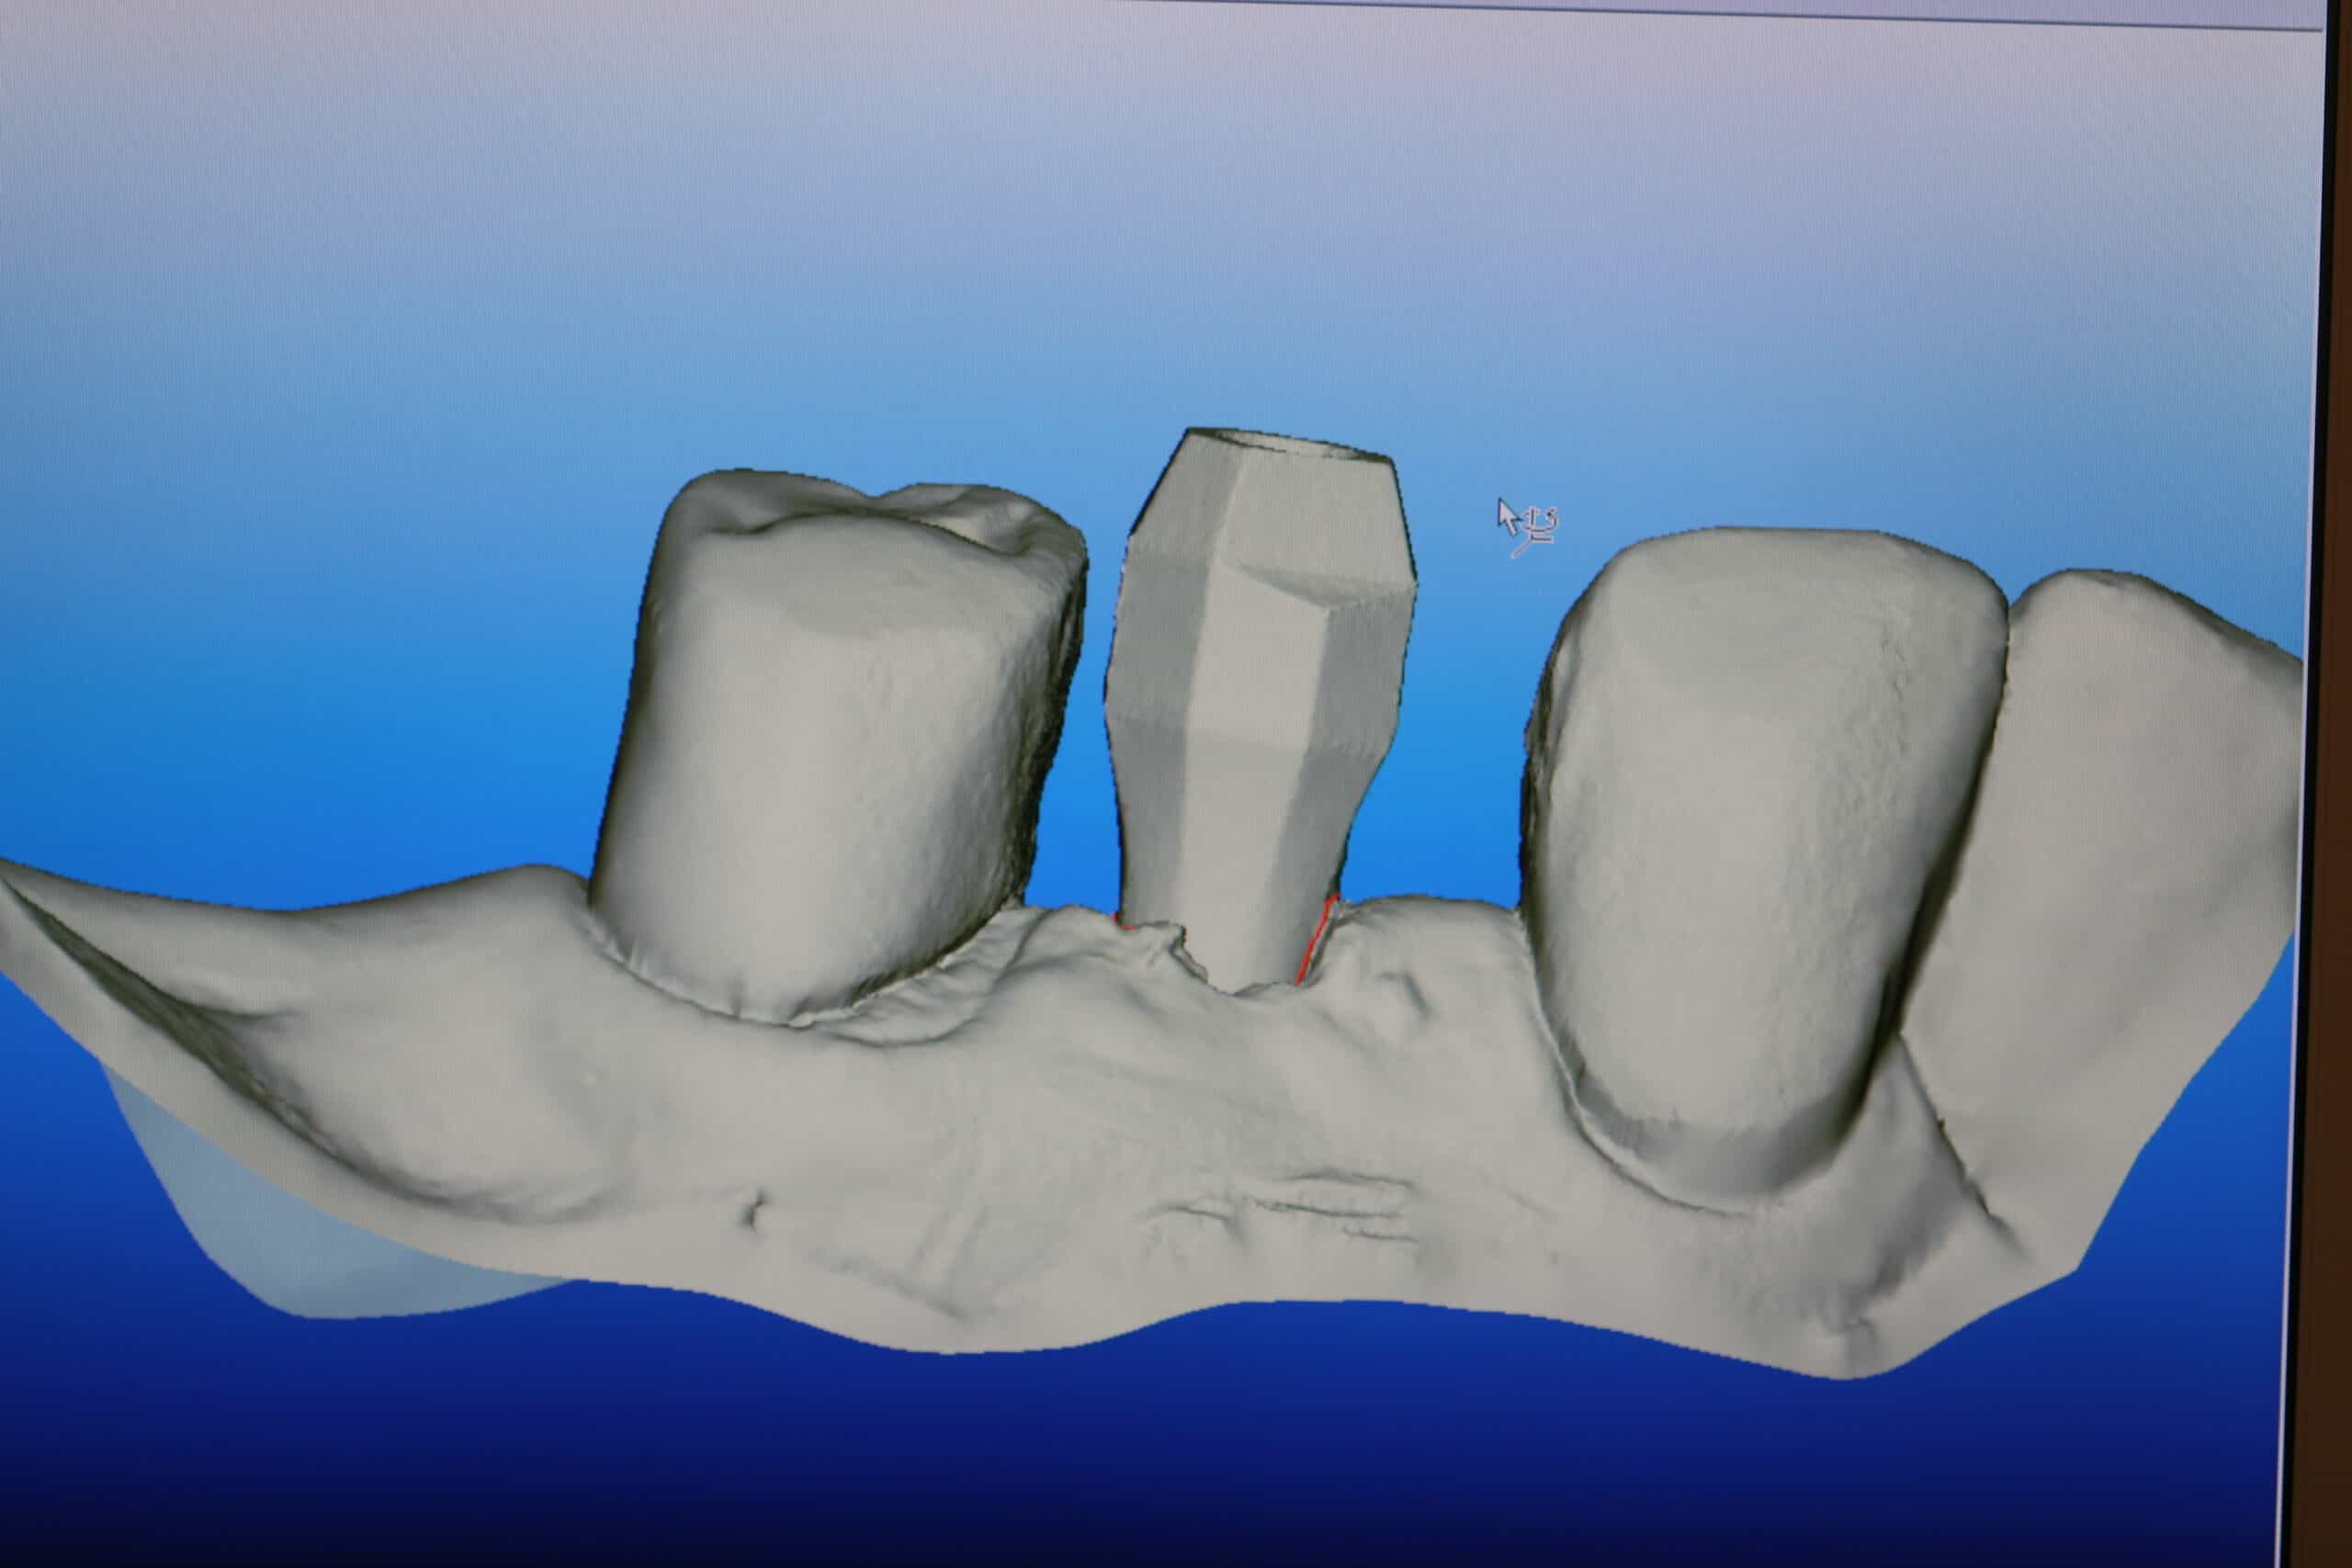
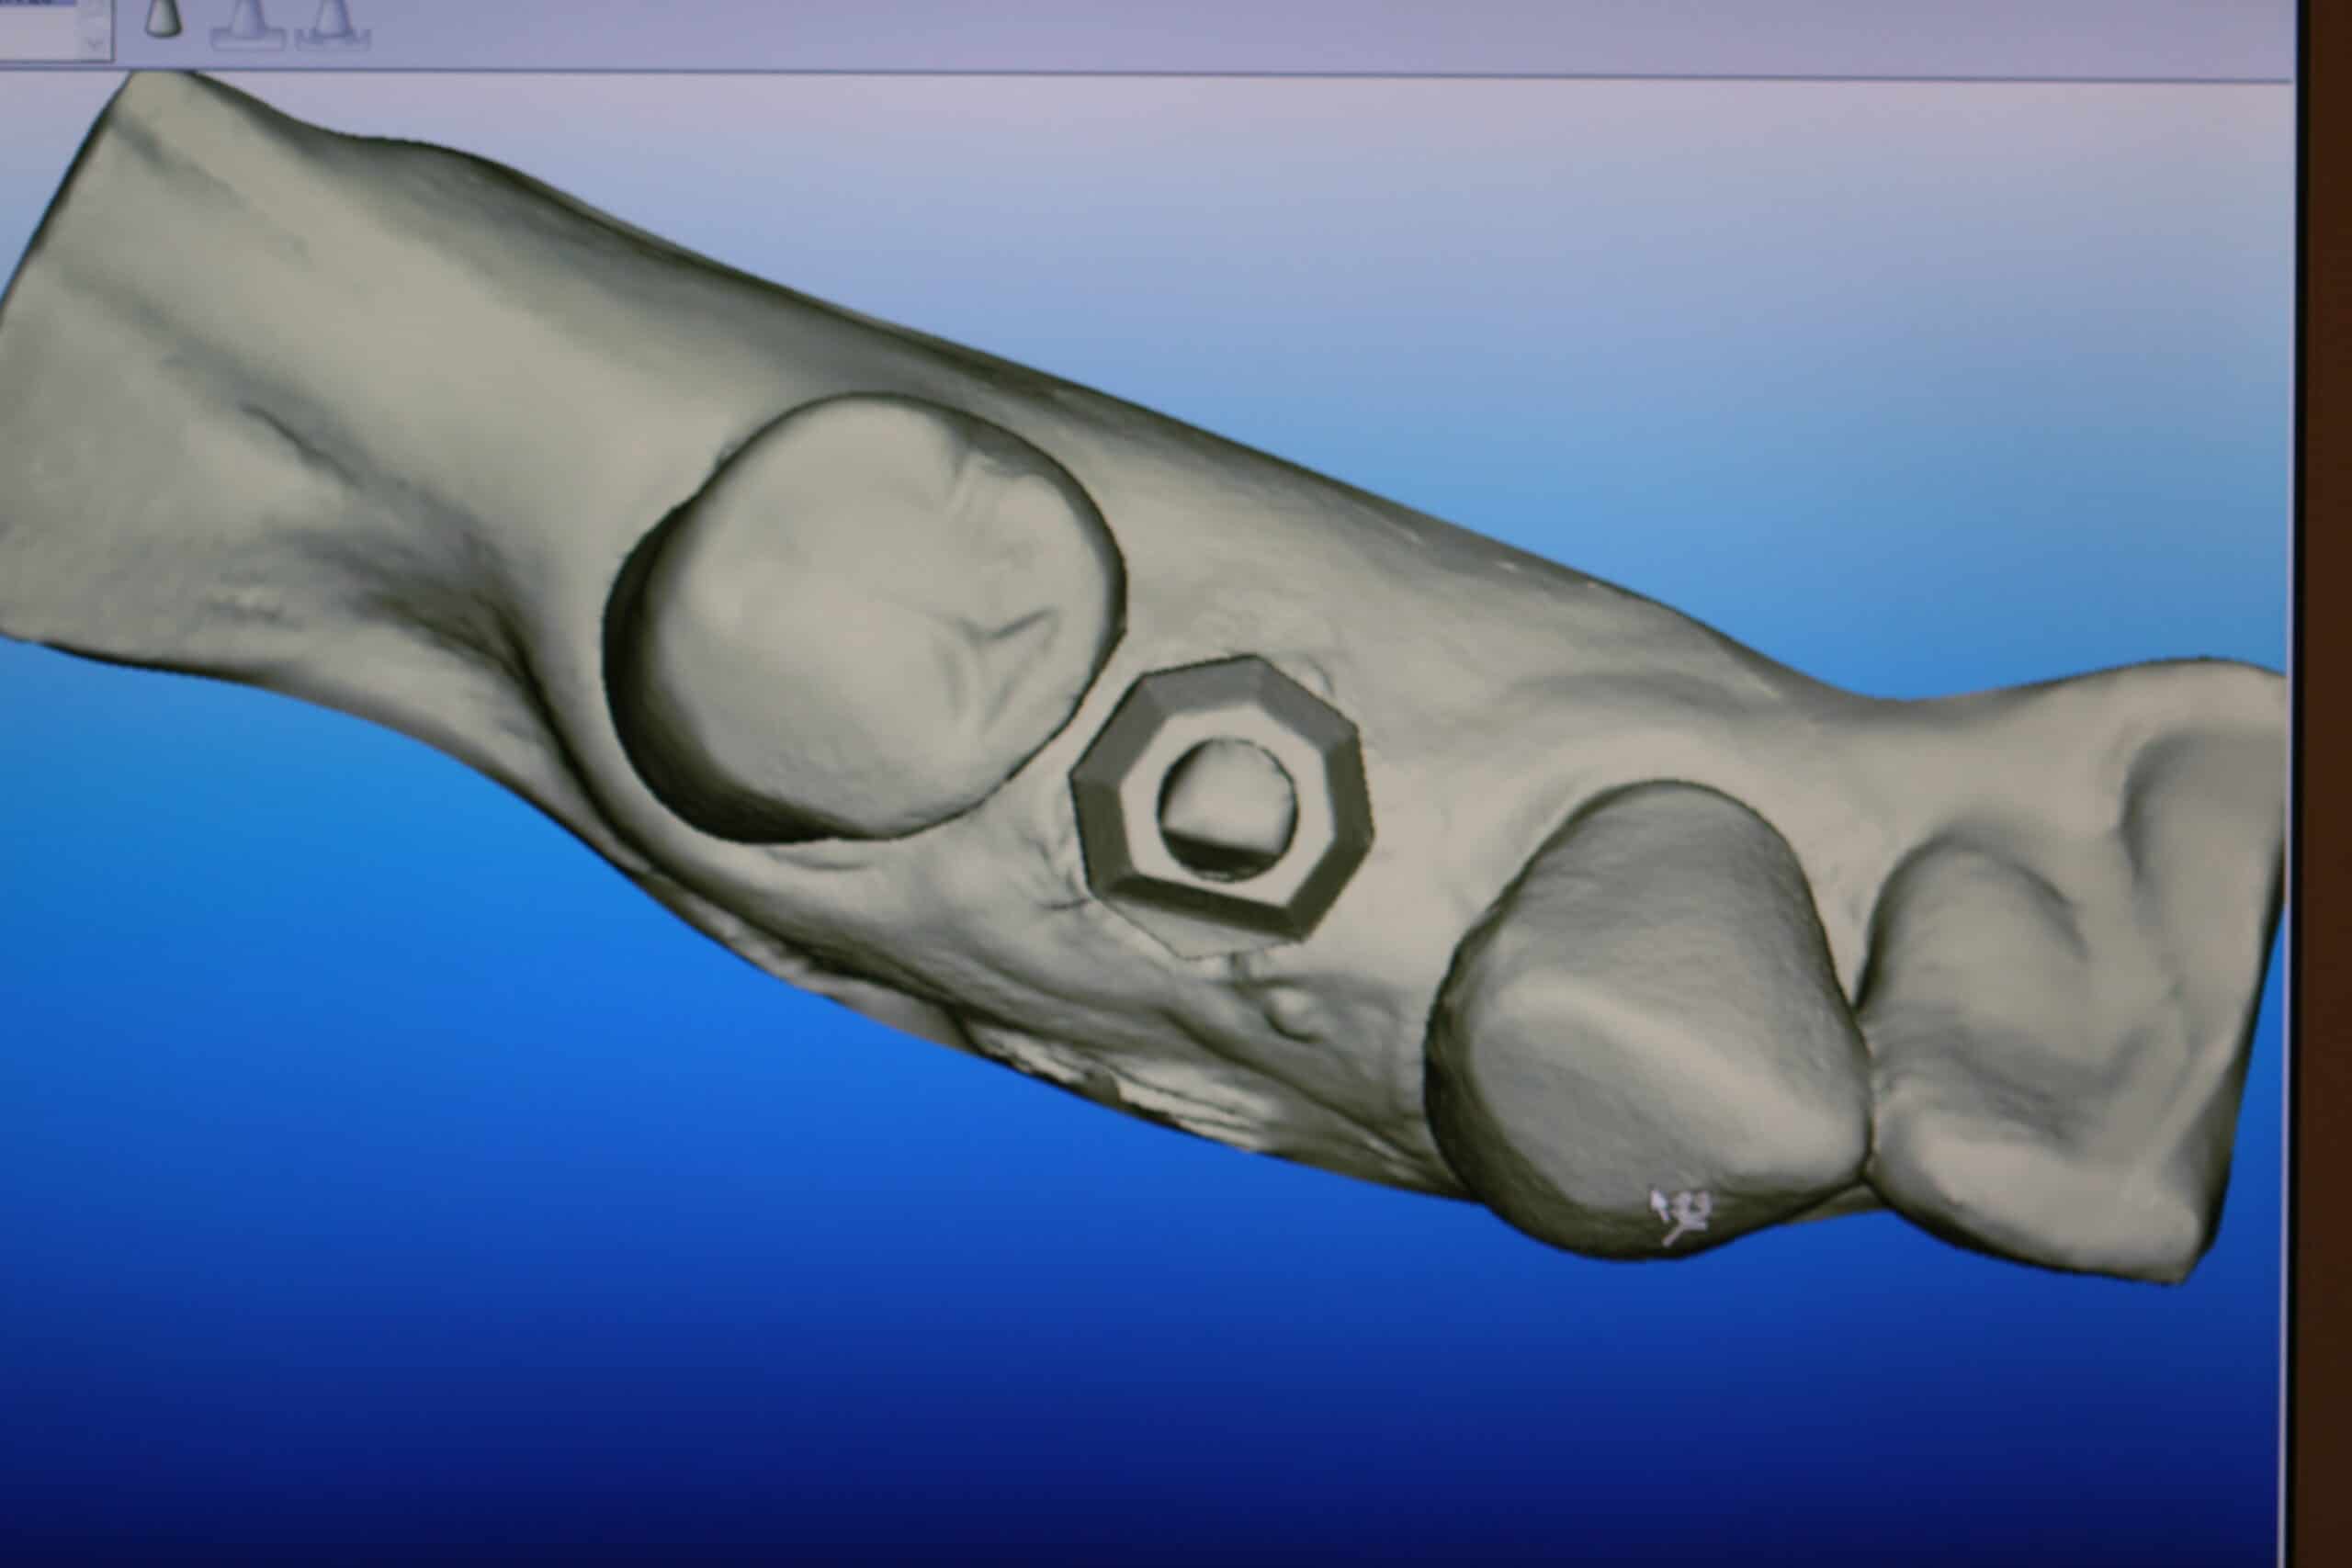
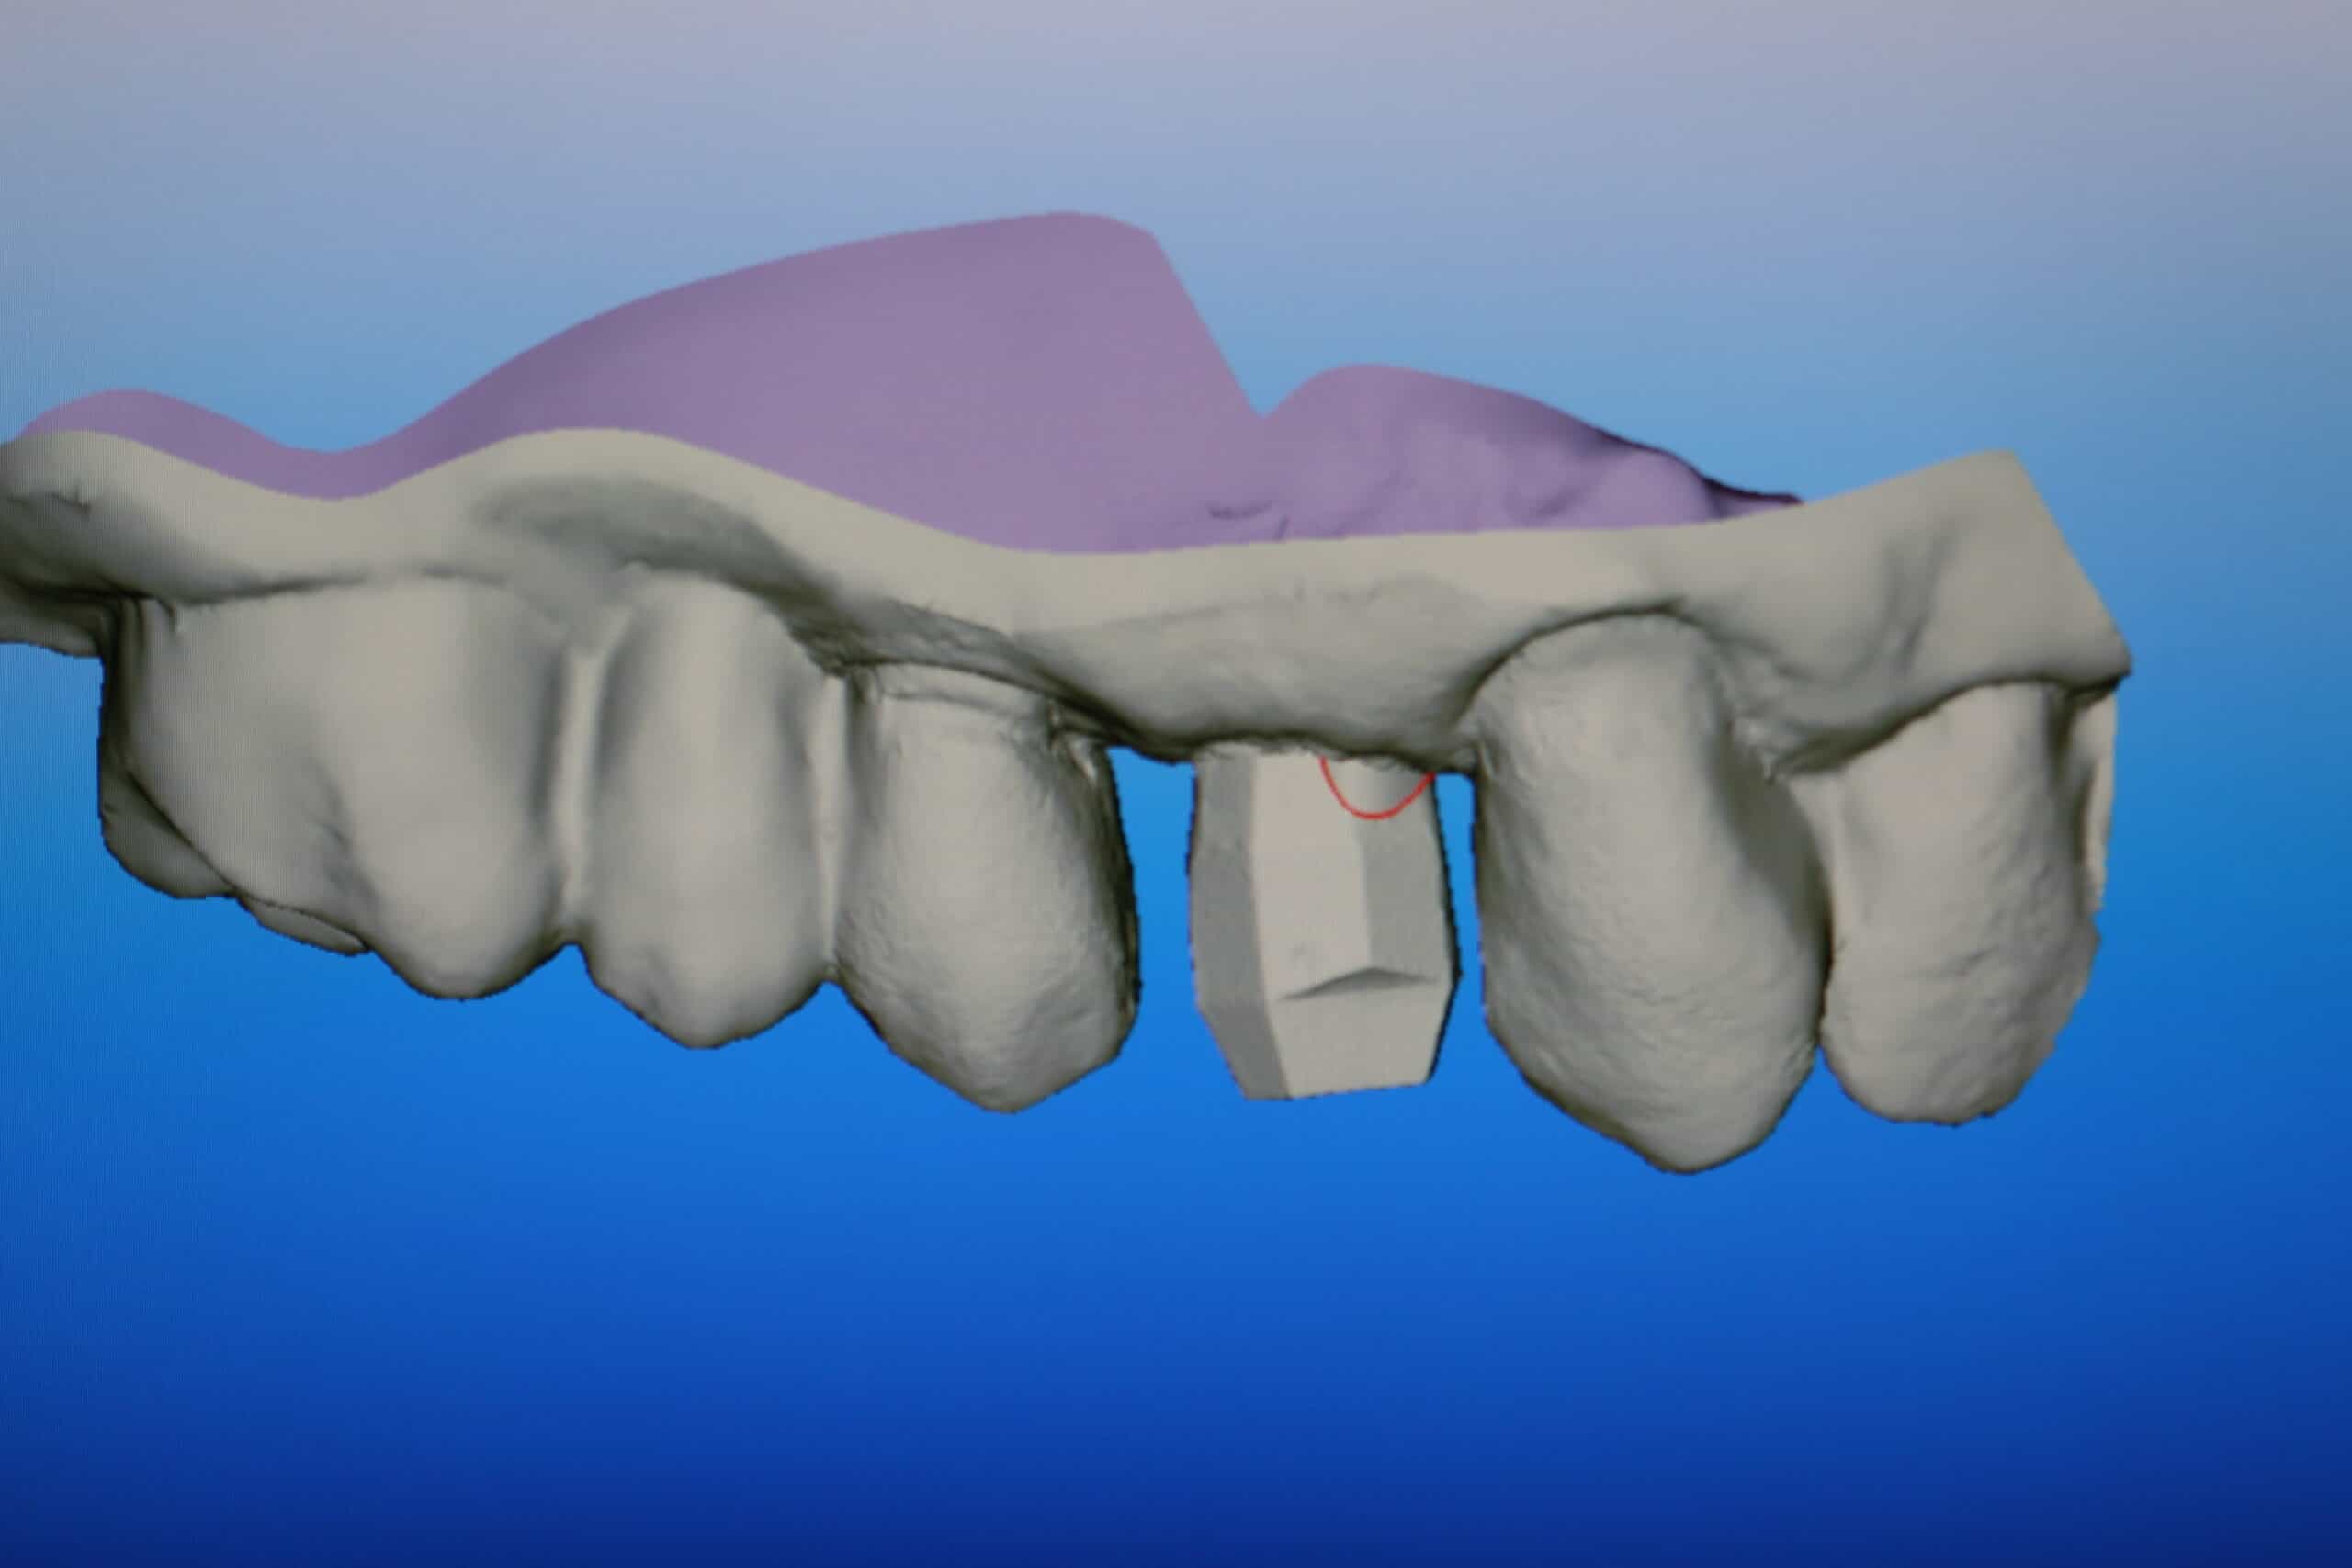
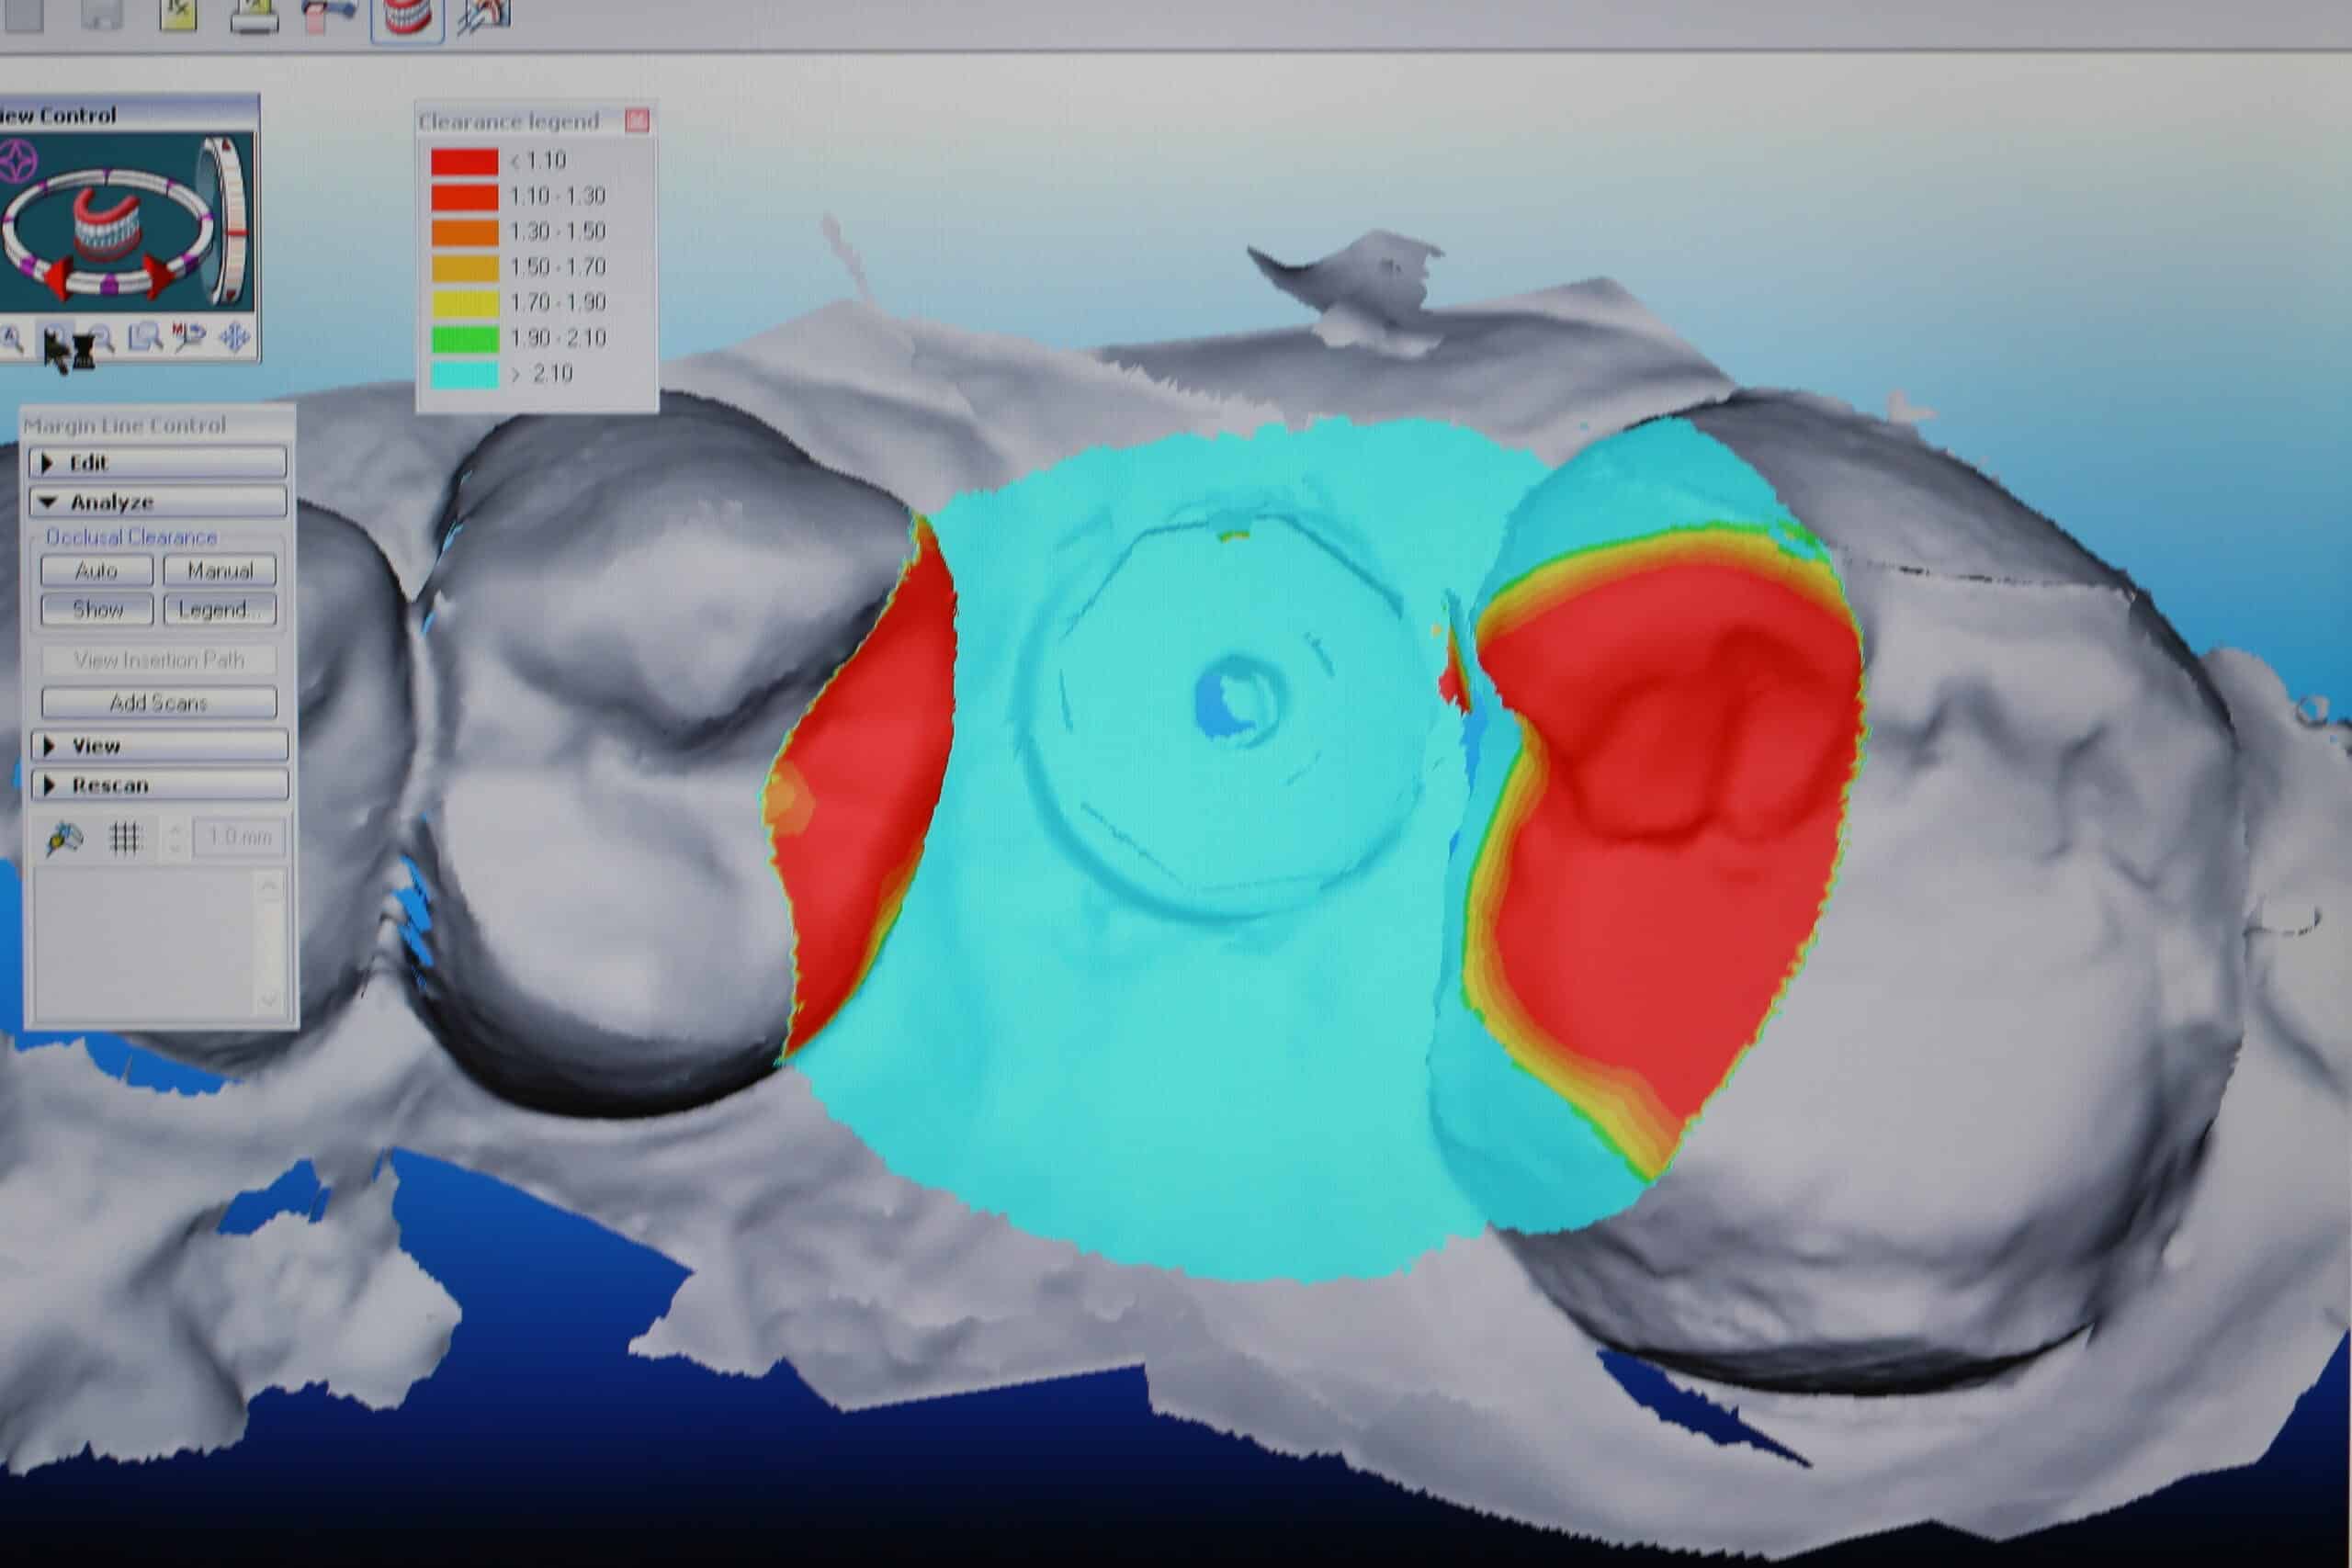
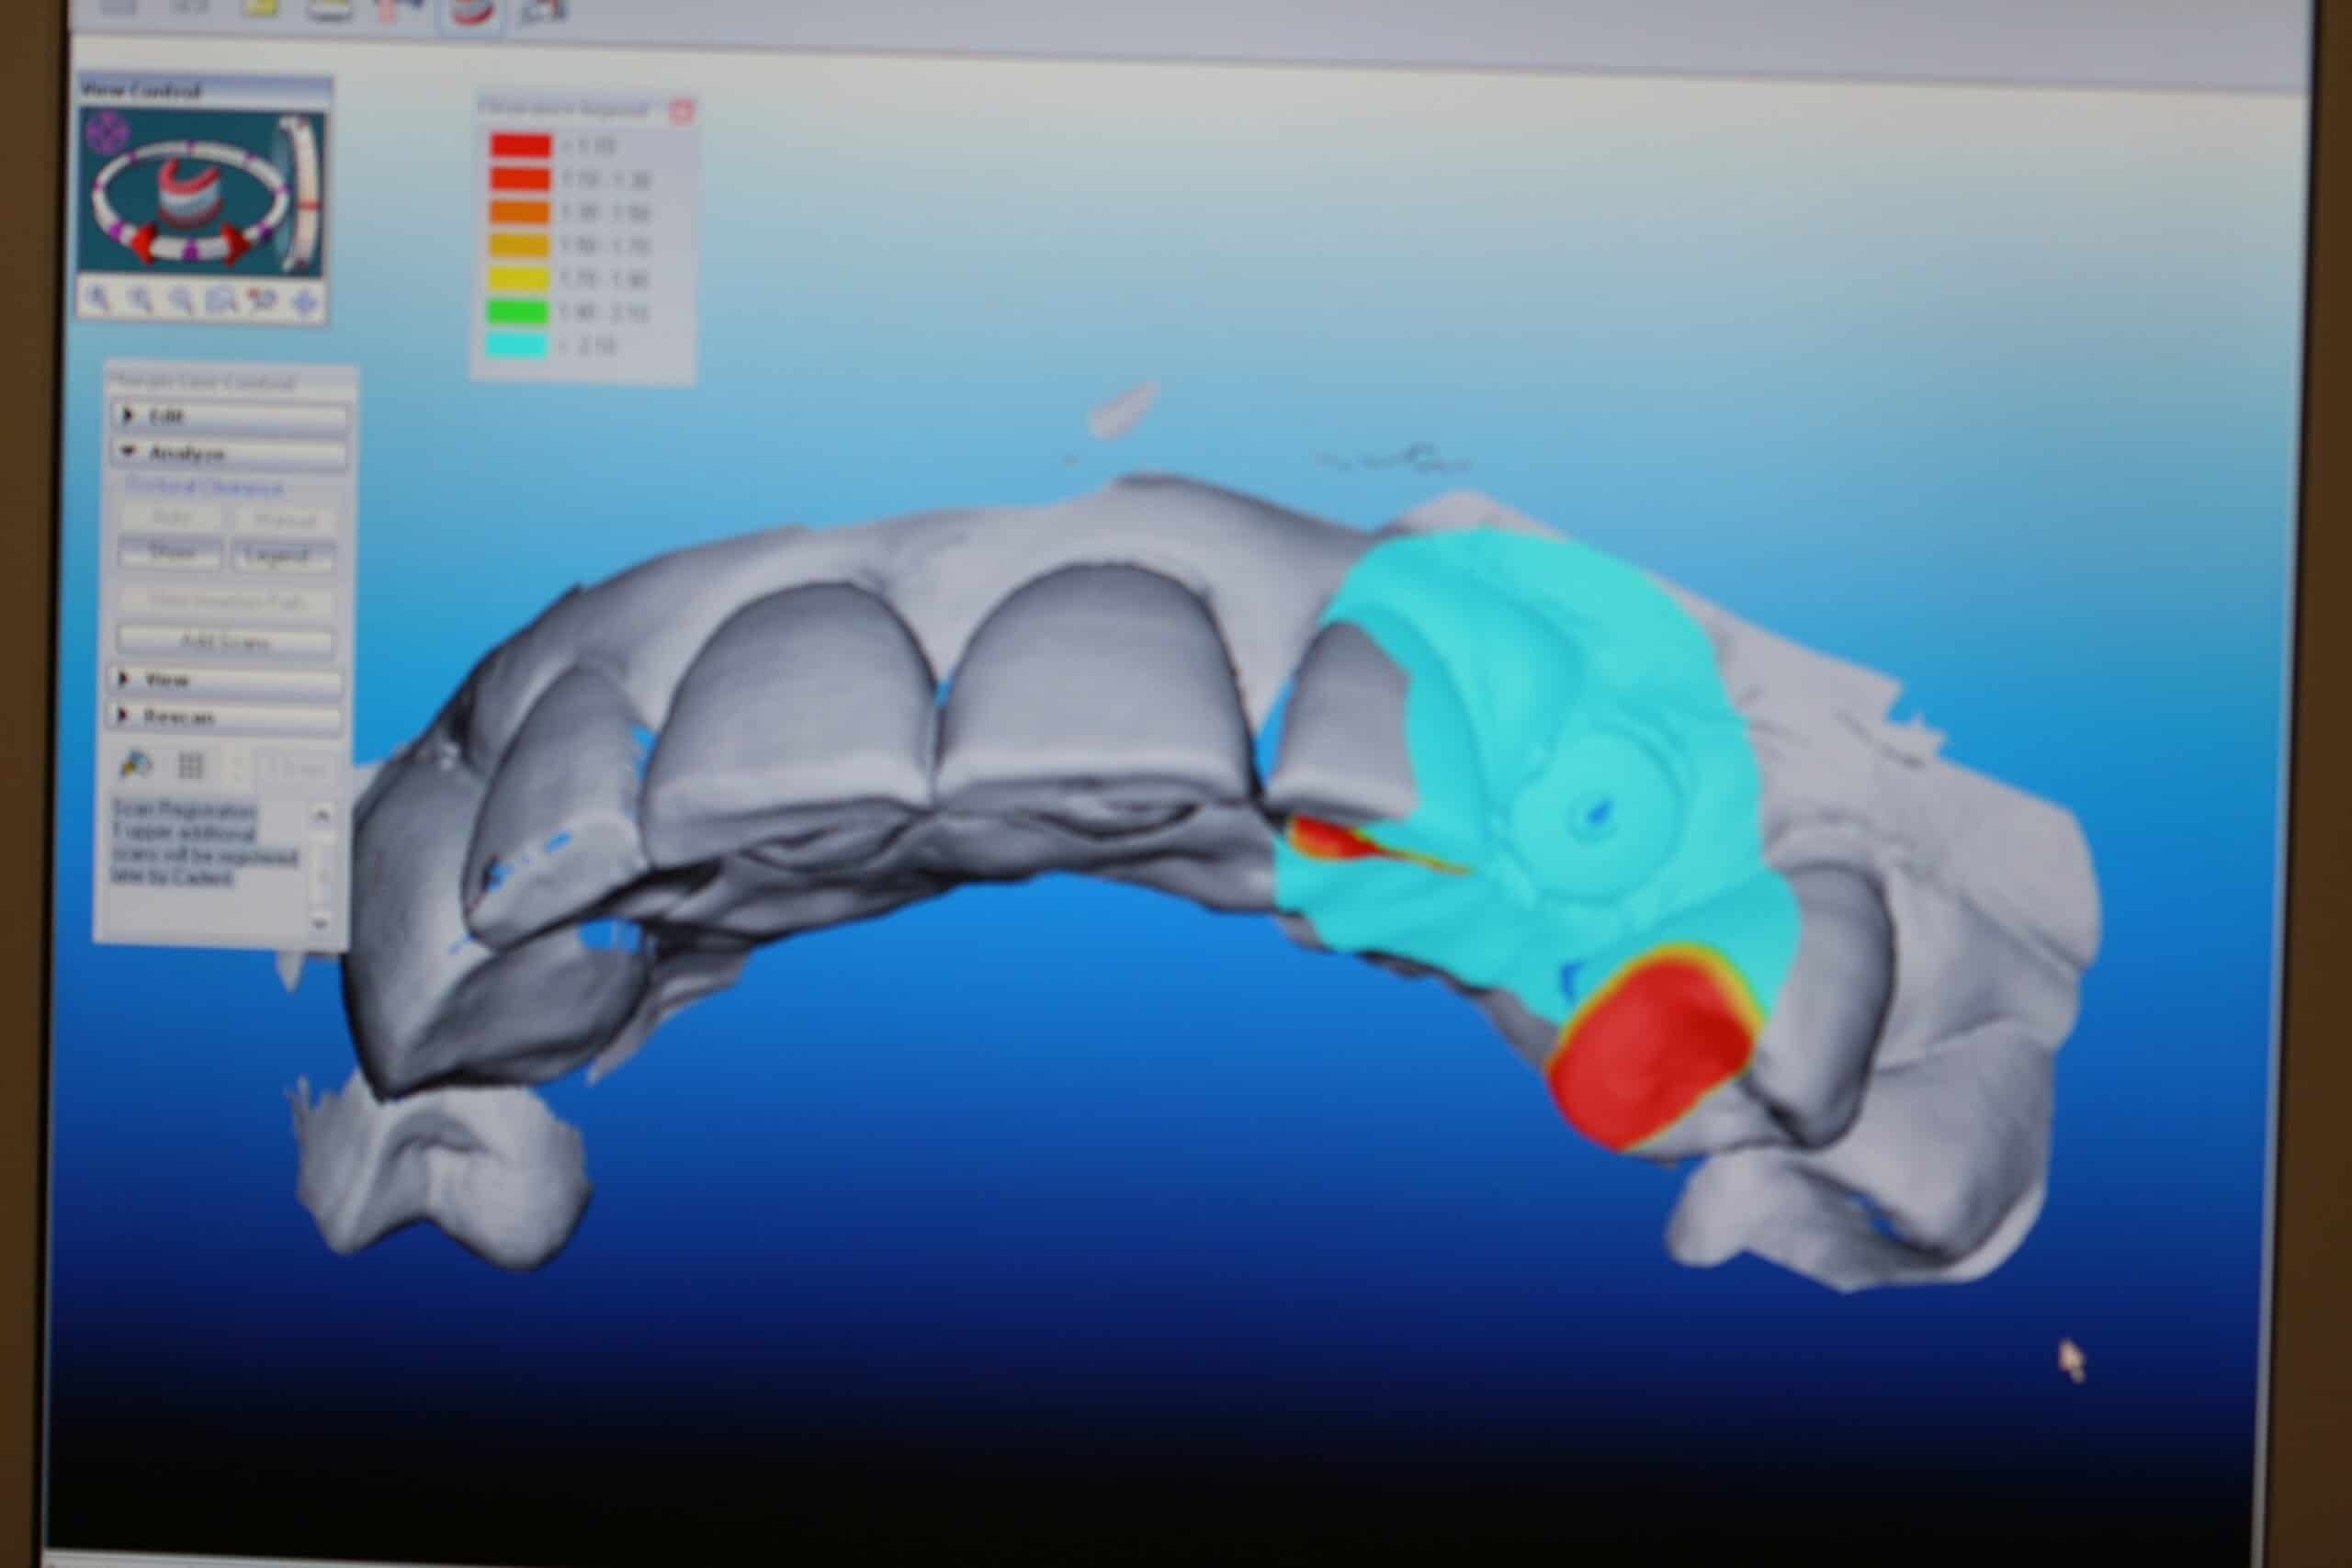
Cleaned up iTero scan of the 5 Axis scanning jig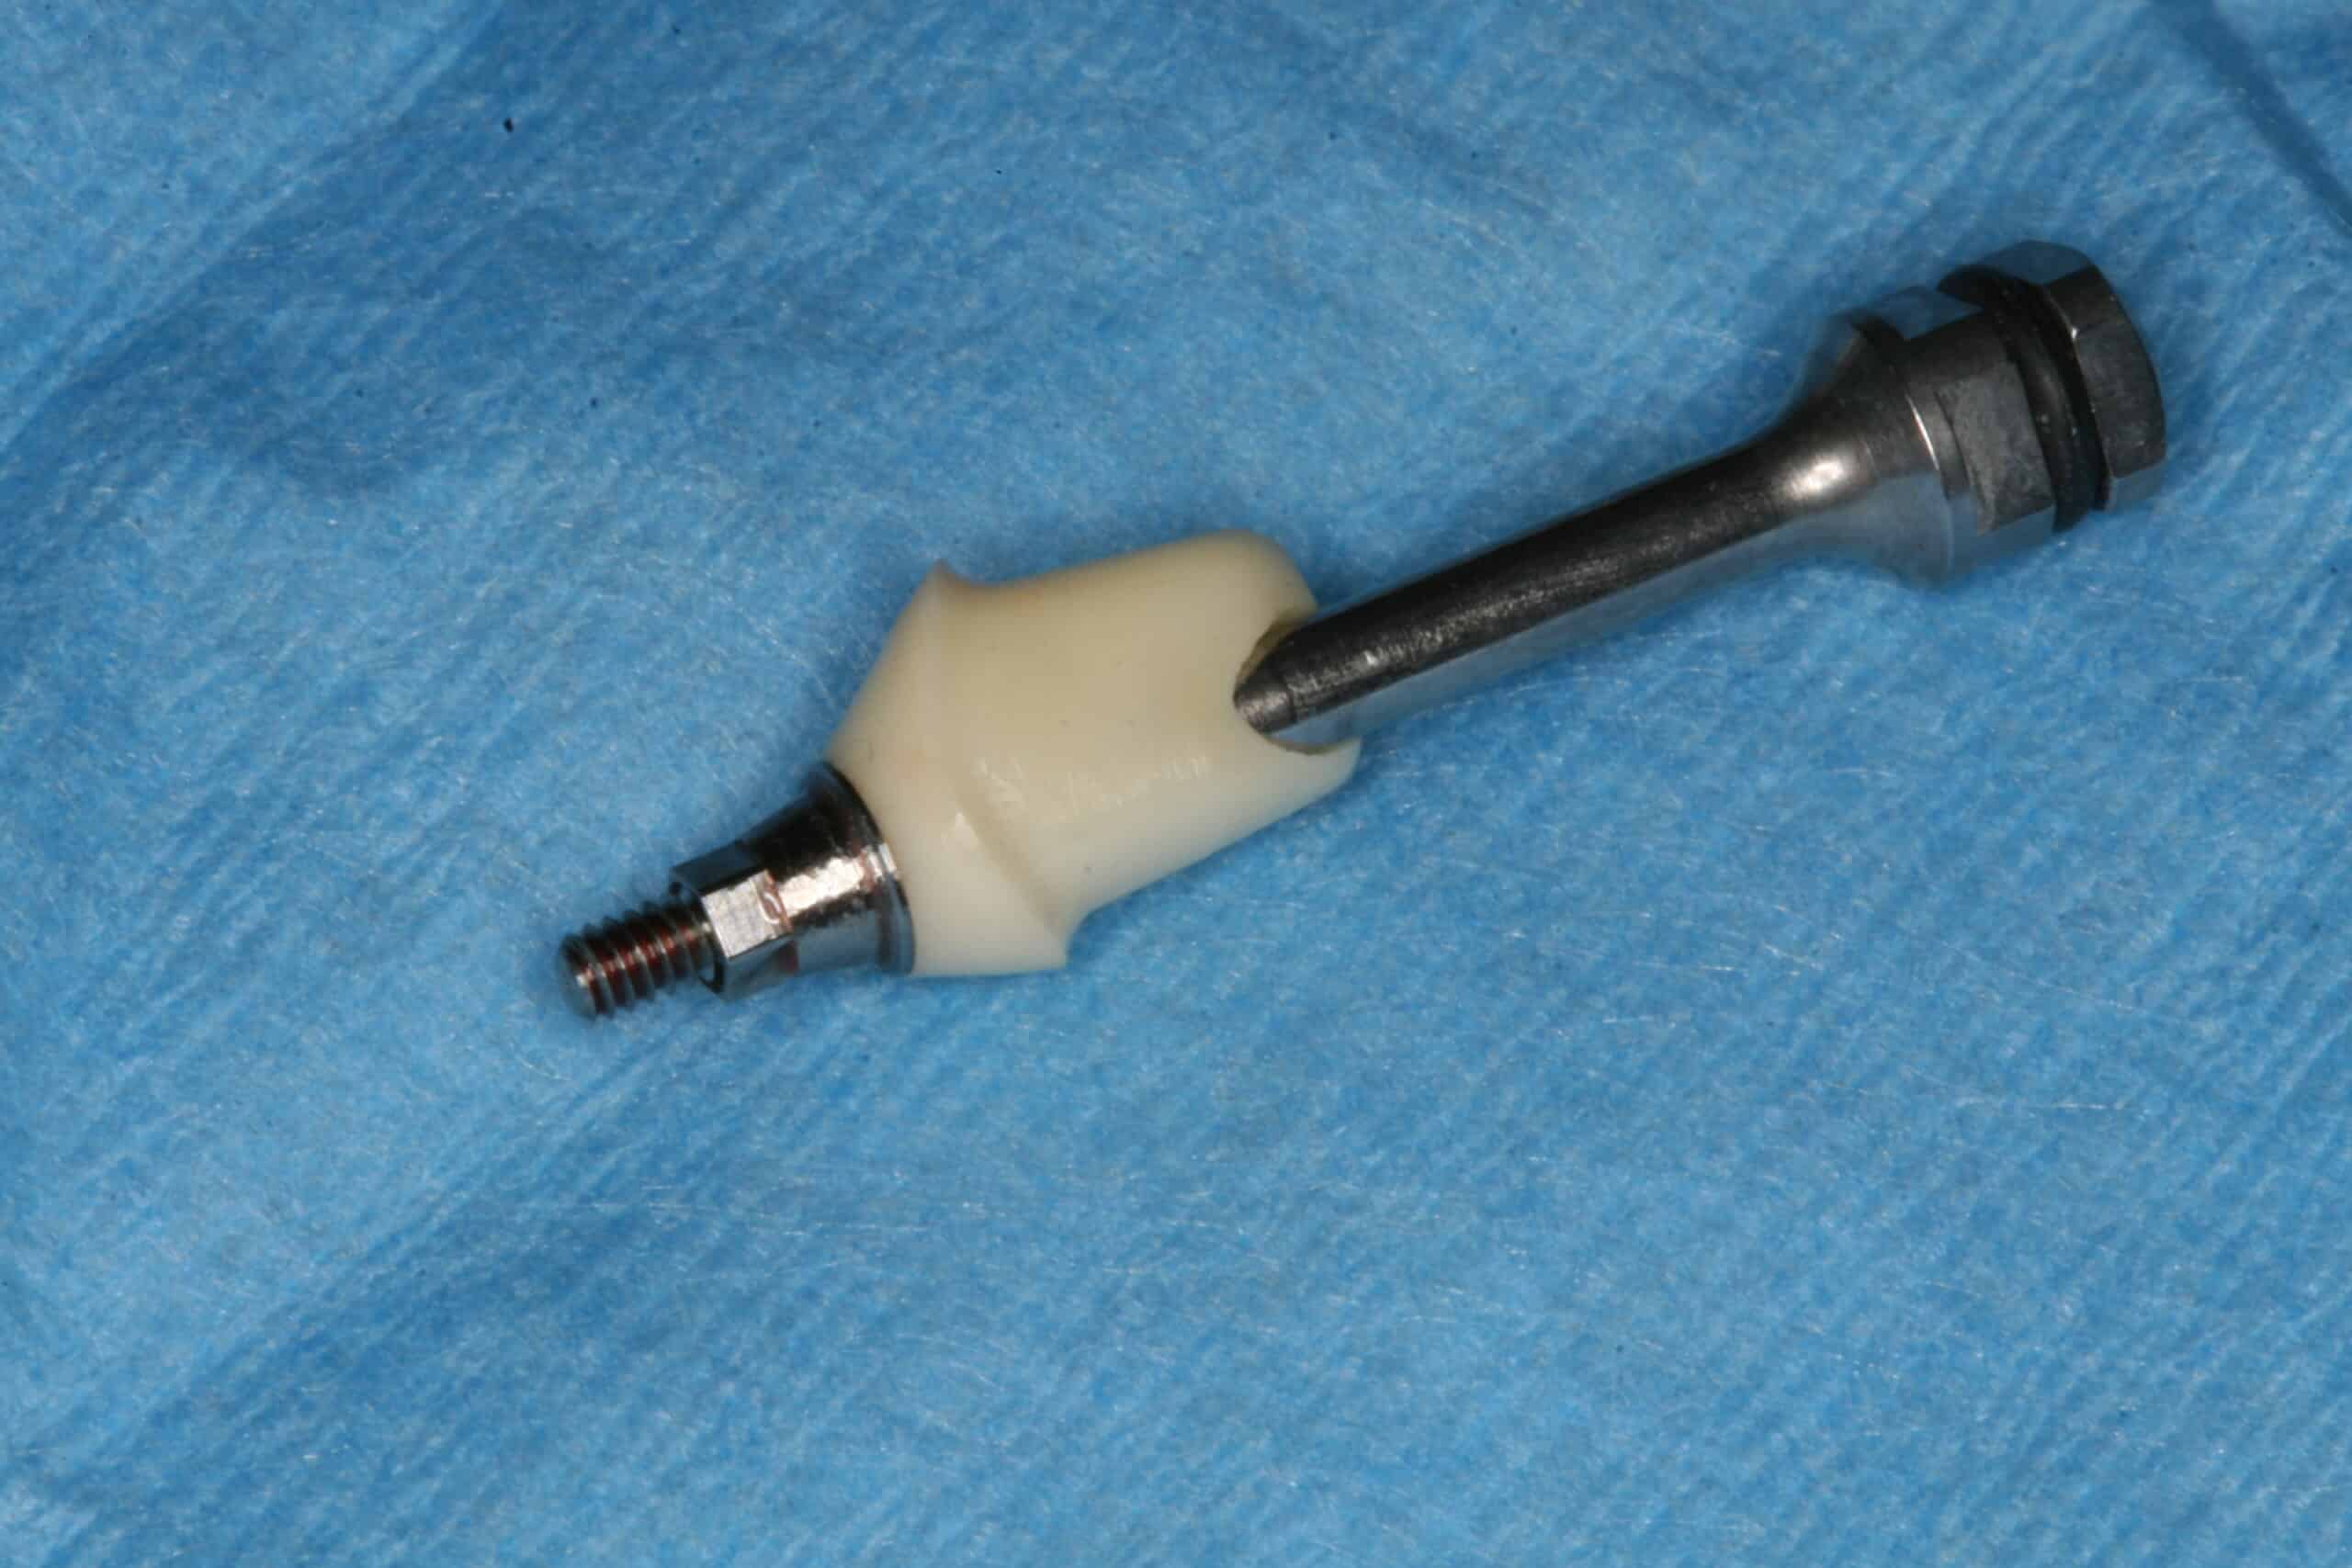
Once the scan is sent to Tel aviv where the data is manipulated so it can be read, then the data is then sent to 5 Axis Dental in Whitby, ON, Canada where the iTero models are milled out and the custom abutment is made. The neat thing is that the crown is also made at the same time, and mailed to our office all in about 2 weeks. This saves us a PVS impression, postage, a patient visit, and two weeks time for the delivery of the final restoration. The custom abutment above is a hybrid zirconium custom abutment for the Astra implant system. They can do full zirconium for some implant brands (not all), and full titanium for all the brands they support (which is pretty much all of them).
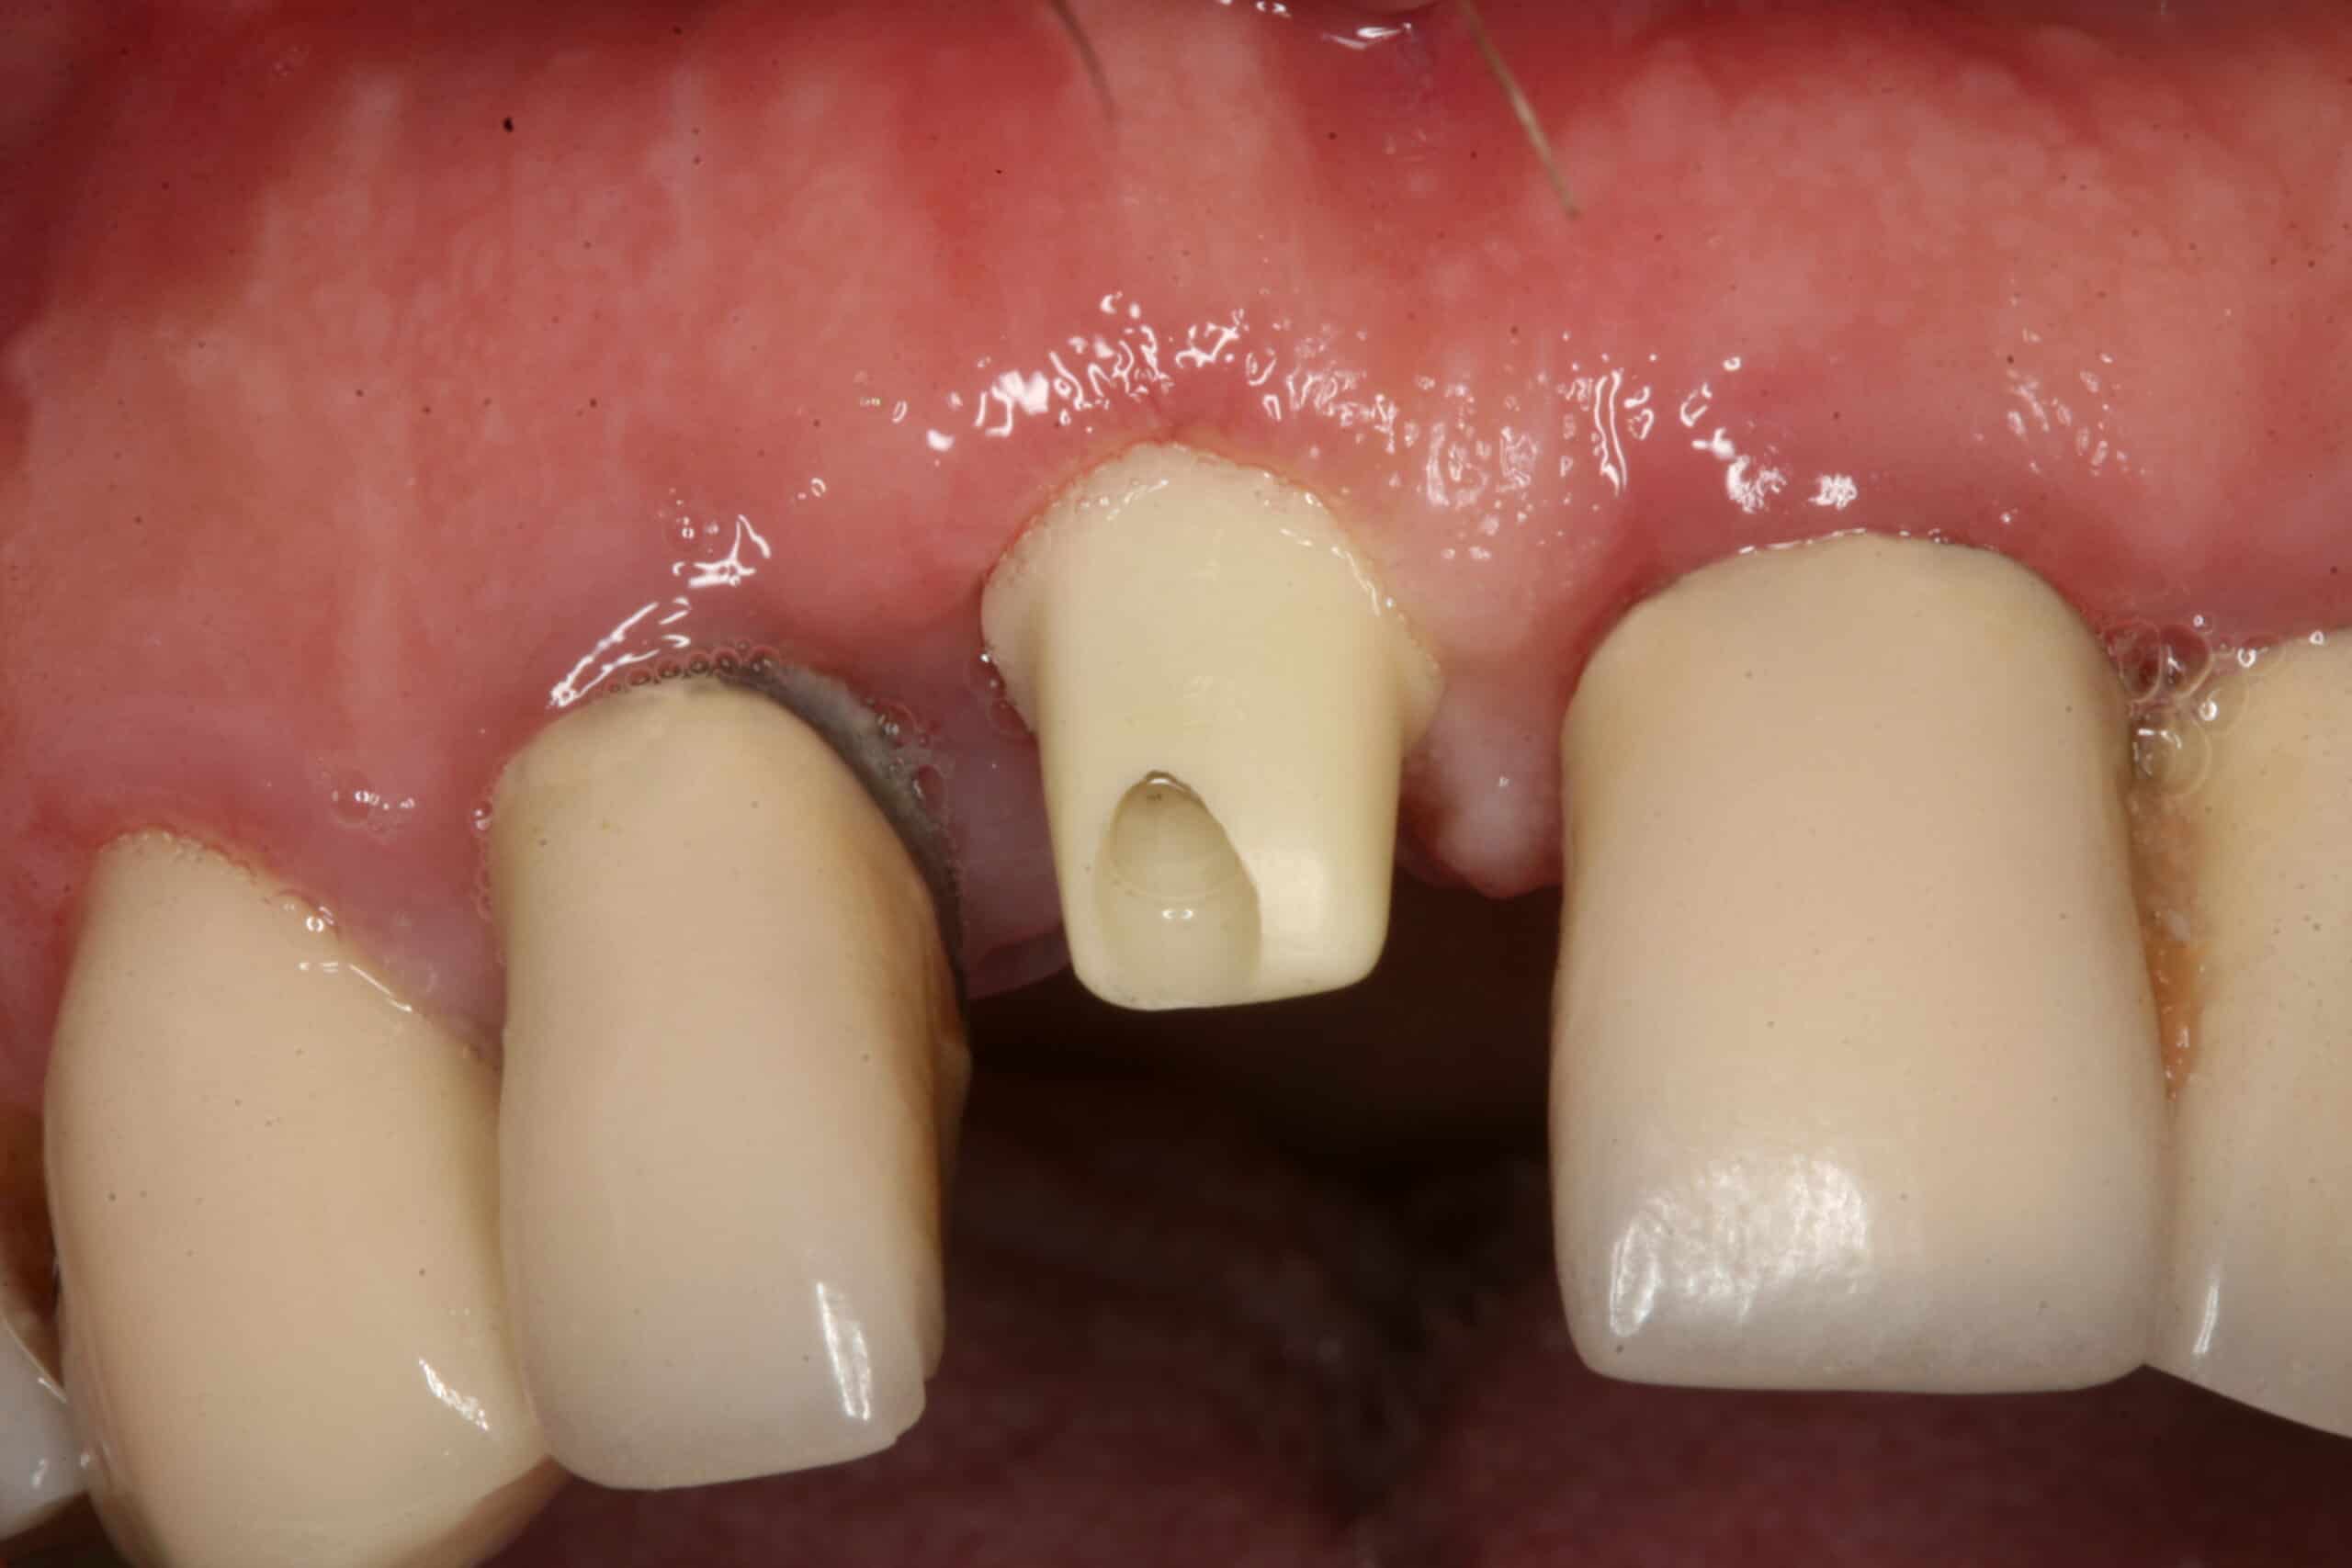


Again, this patient is blessed with a long upper lip and the poor gingival height doesn’t interfere with the esthetic value. Now if I could just teach him to floss!
Case #2
This second case is where an old FPD #27X29 broke a connector (note how thin the metal connector is on this photo) on a 63 y/o/w/f. In stead of having another FPD made the patient chose to have an implant crown.
The patient has expressed the the desire to have dental implant to replace the pontic of #27X29 that just broke at the connectors. Reviewed health history, and found no complicating factors. The patient was placed in ASA 1 and accepted as a candidate for implants. Bone evaluation: Good width/height. Risks, benefits and alternative discussed including new FPD. The patient was instructed to call the office if they are to having any questions. Next Visit: Implant Placement
Informed Consent, Reviewed health history, Sterile Field Established, Skin/Mouth Prep-betadine & peridex, Elevated full thickness flap, sterile saline, Astra OsseoSpeed 4.0S 13mm in #28 area, Type 3 bone, bone level implant cover screw, 5.0 black silk suture, Mid-surgery PA, Post-op PA, Oral Hygiene Instructions, Topical anesthetic 20% lido/4% Tetra/2% phenylephrine with 1 carpule (36mg/1.7ml) of 2% Mepivacaine/1:20,000 NeoCobefrin infiltration, Pt informed not to eat food, bite or chew on lips or tongue while anesthetic is still working. Next Visit: Suture removal in 1 week
Now that I reflect back on this case I should have removed some crestal bone so the emergence profile would come from deeper in the bone.
Reviewed health history, Topical anesthetic 20% lido/4% Tetra/2% phenylephrine with 1 carpule (68mg/1.7ml) of 4% Articaine w/1:100000 epi infiltration, exposed implant with diode laser with eye protection, removed healing cap, placed scanning pin, implant sounded good, x-ray verification, Cadent Itero digital impression, Virtual bite, 5Axis Dental Designs, healing collar Astra 3.5/4.0 4.5-4mm, Oral Hygiene Instructions, Pt informed not to eat food, bite or chew on lips or tongue while anesthetic is still working. Next Visit: place CAD/CAM, cement crown

Diode laser to expose implant

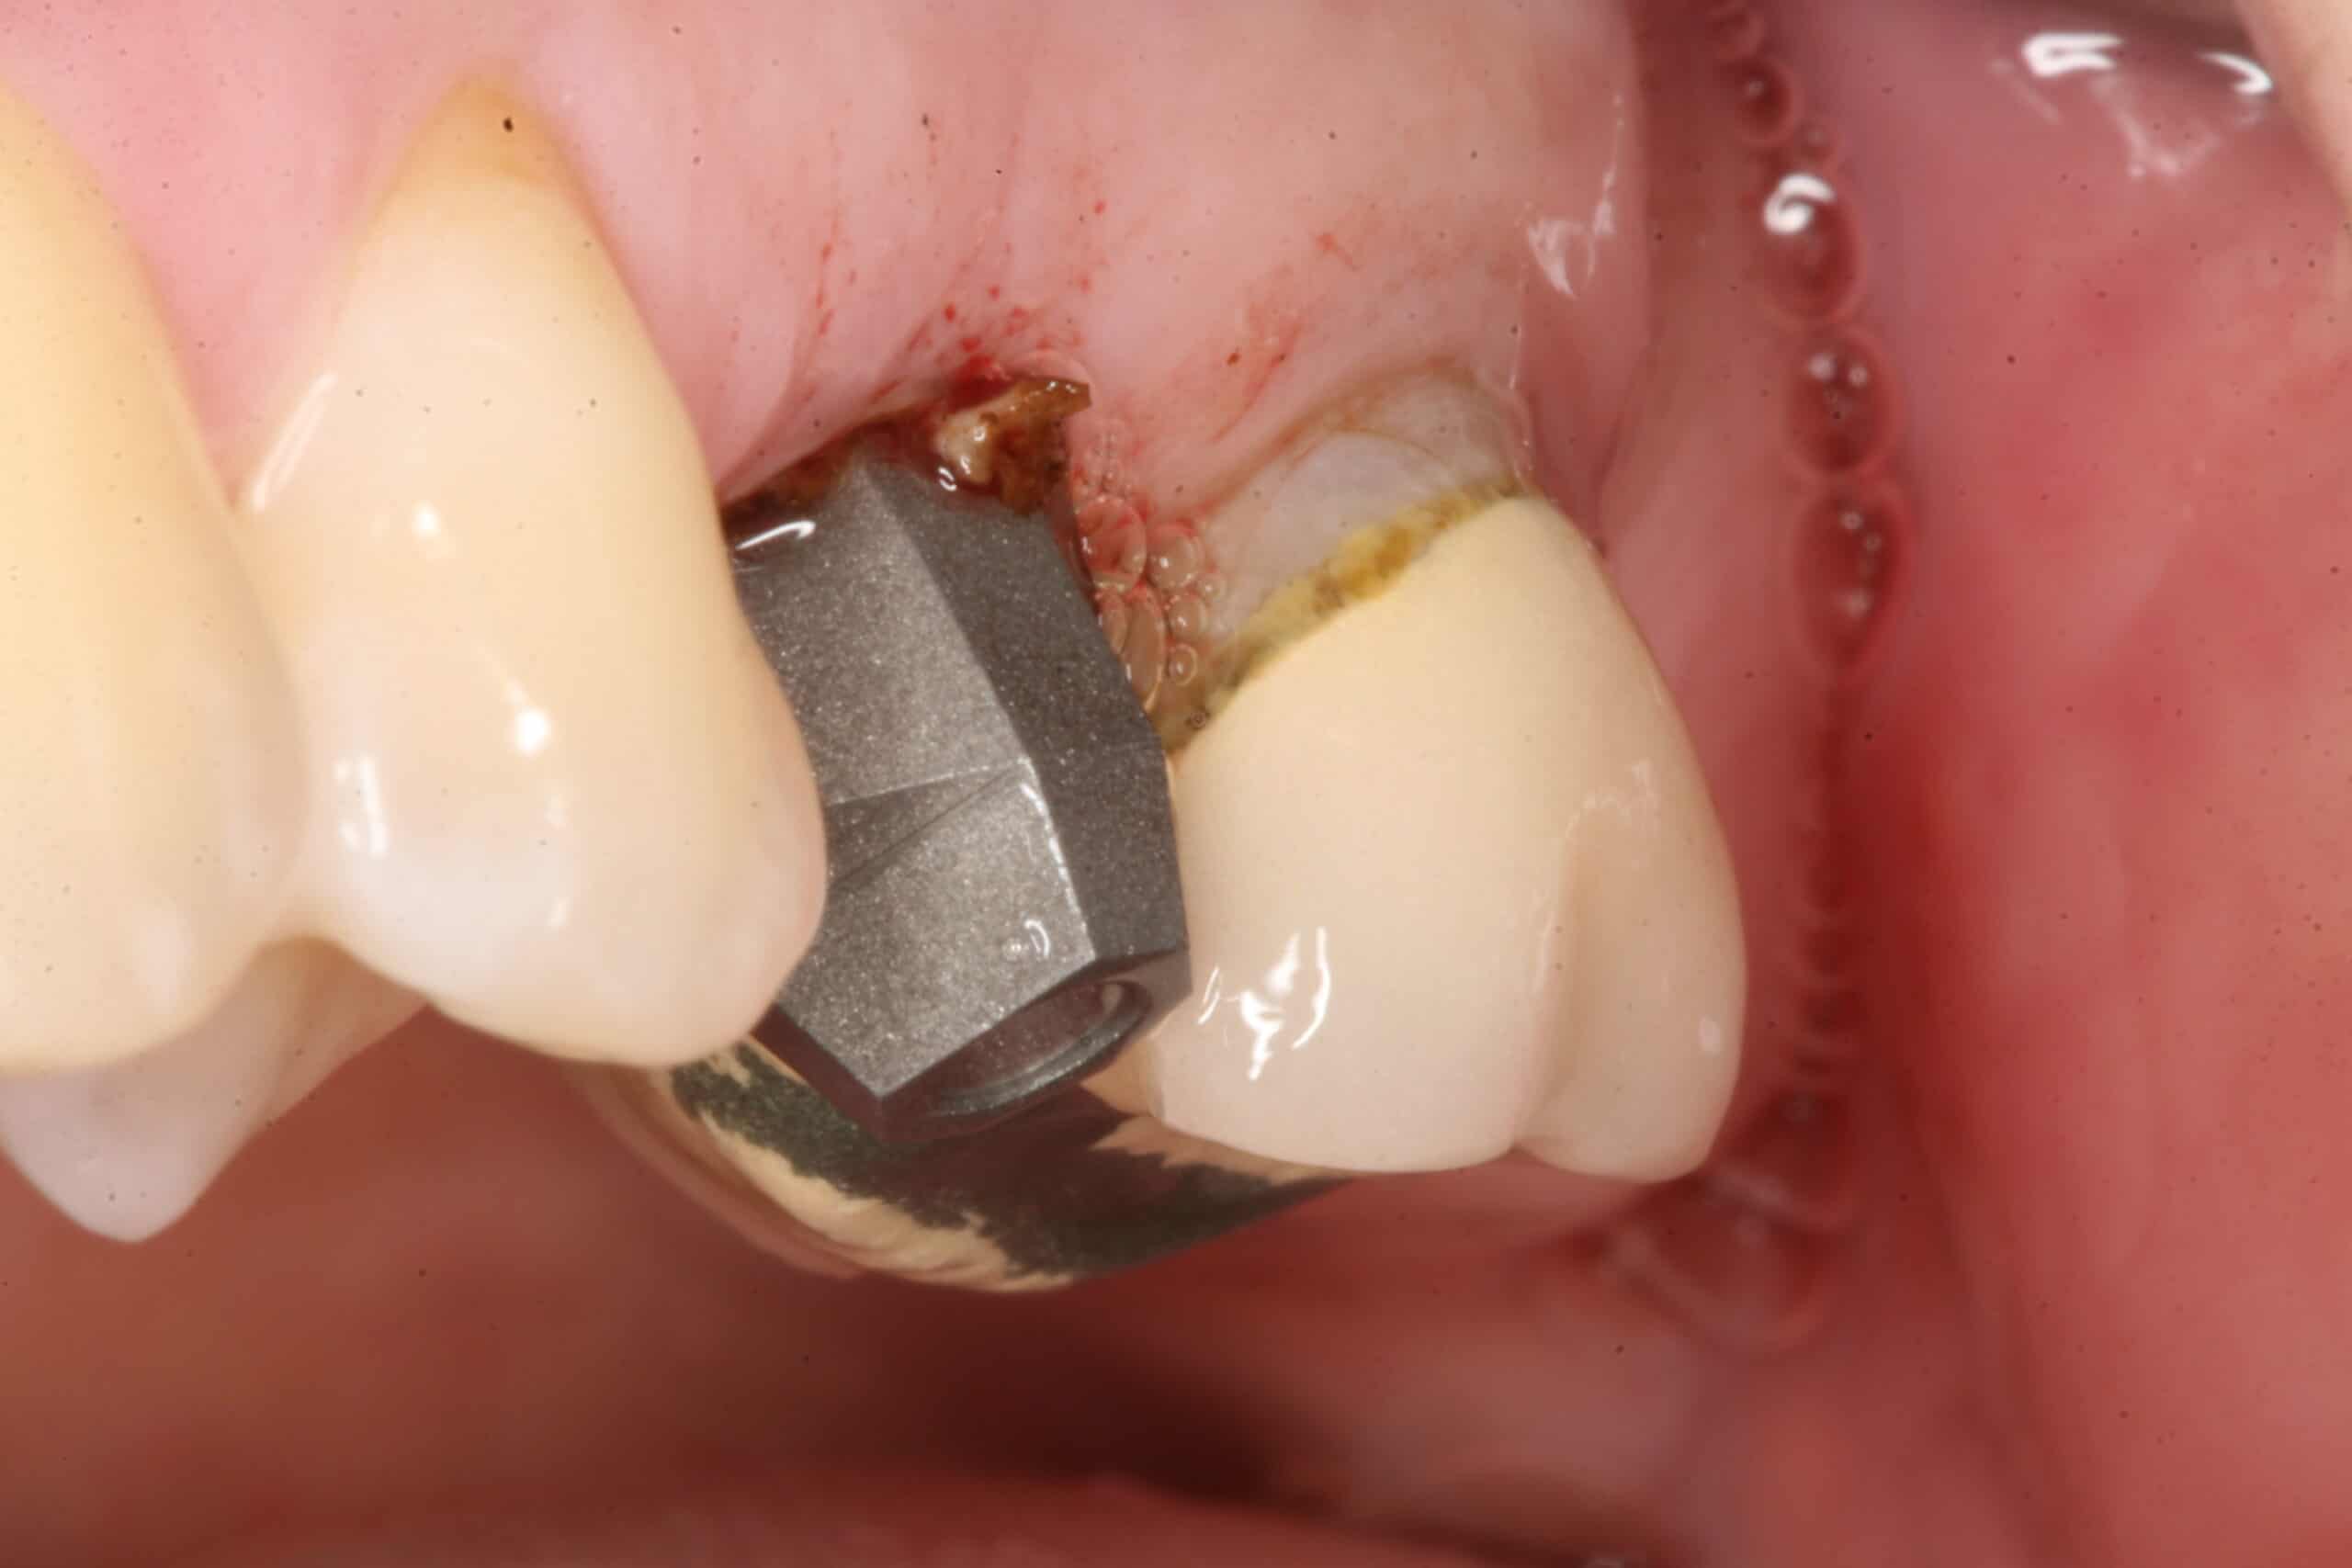
5 Axis Dental scanning jig for Astra in place
X-ray verification
Healing collar

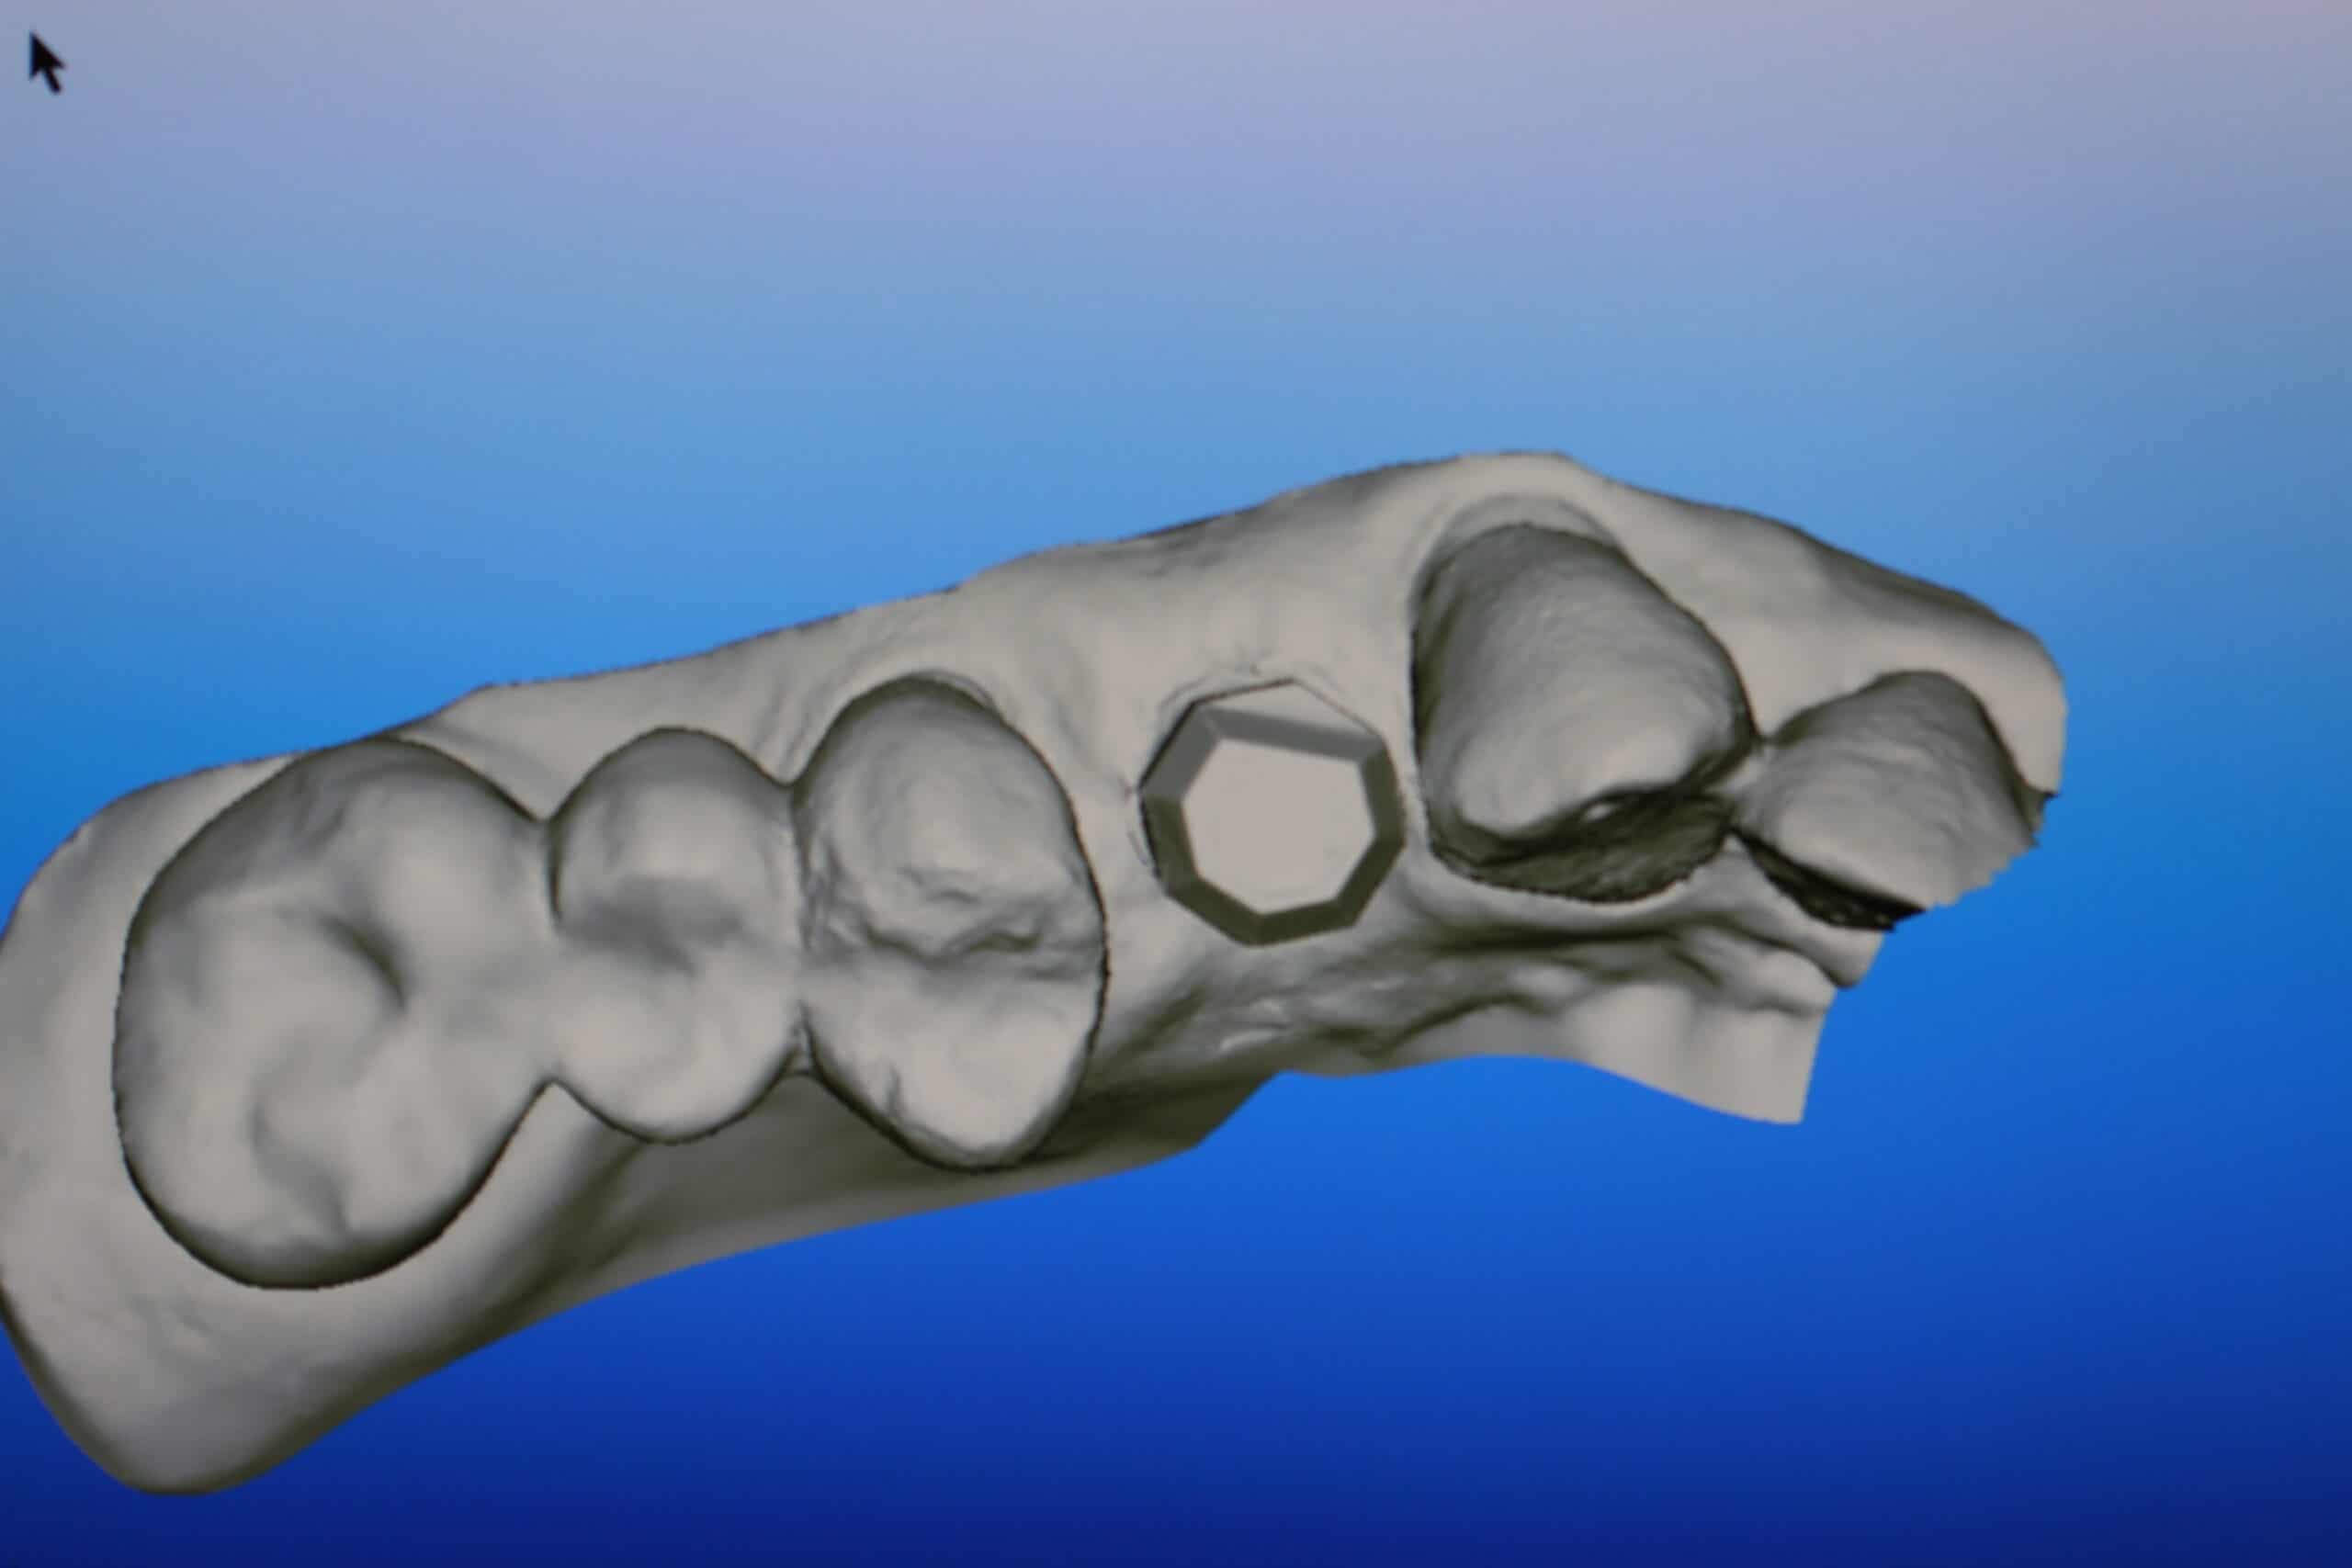
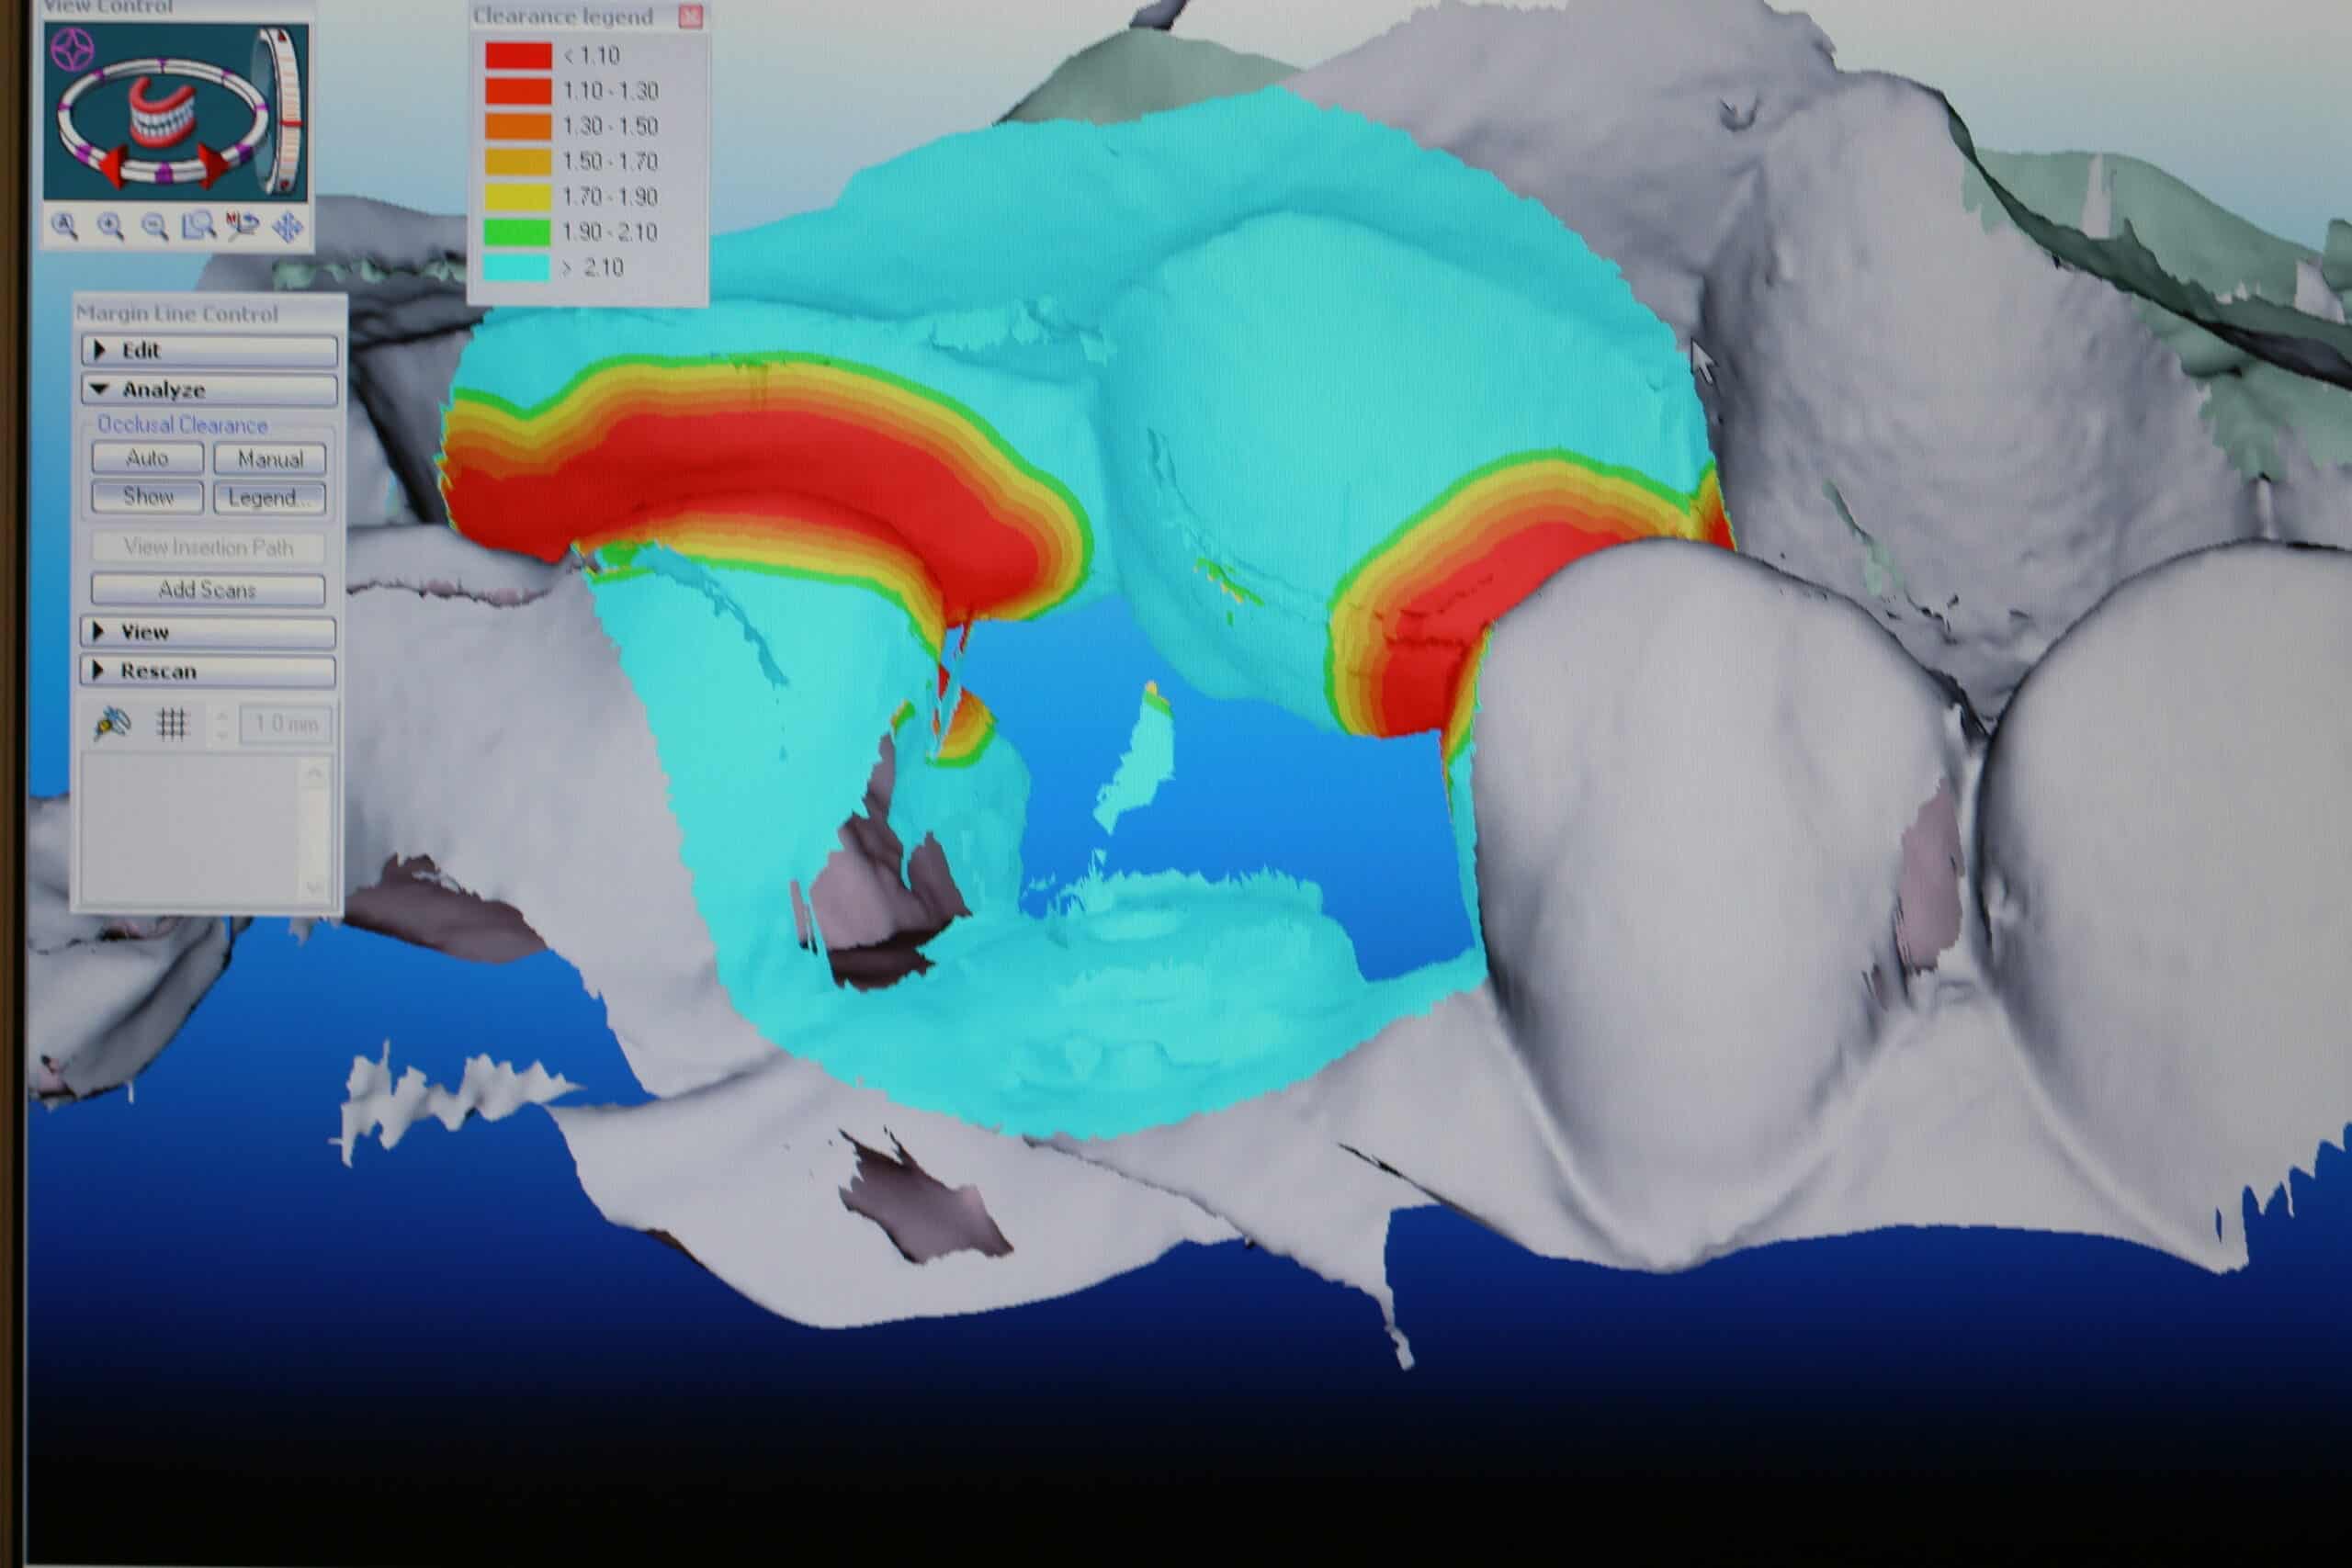
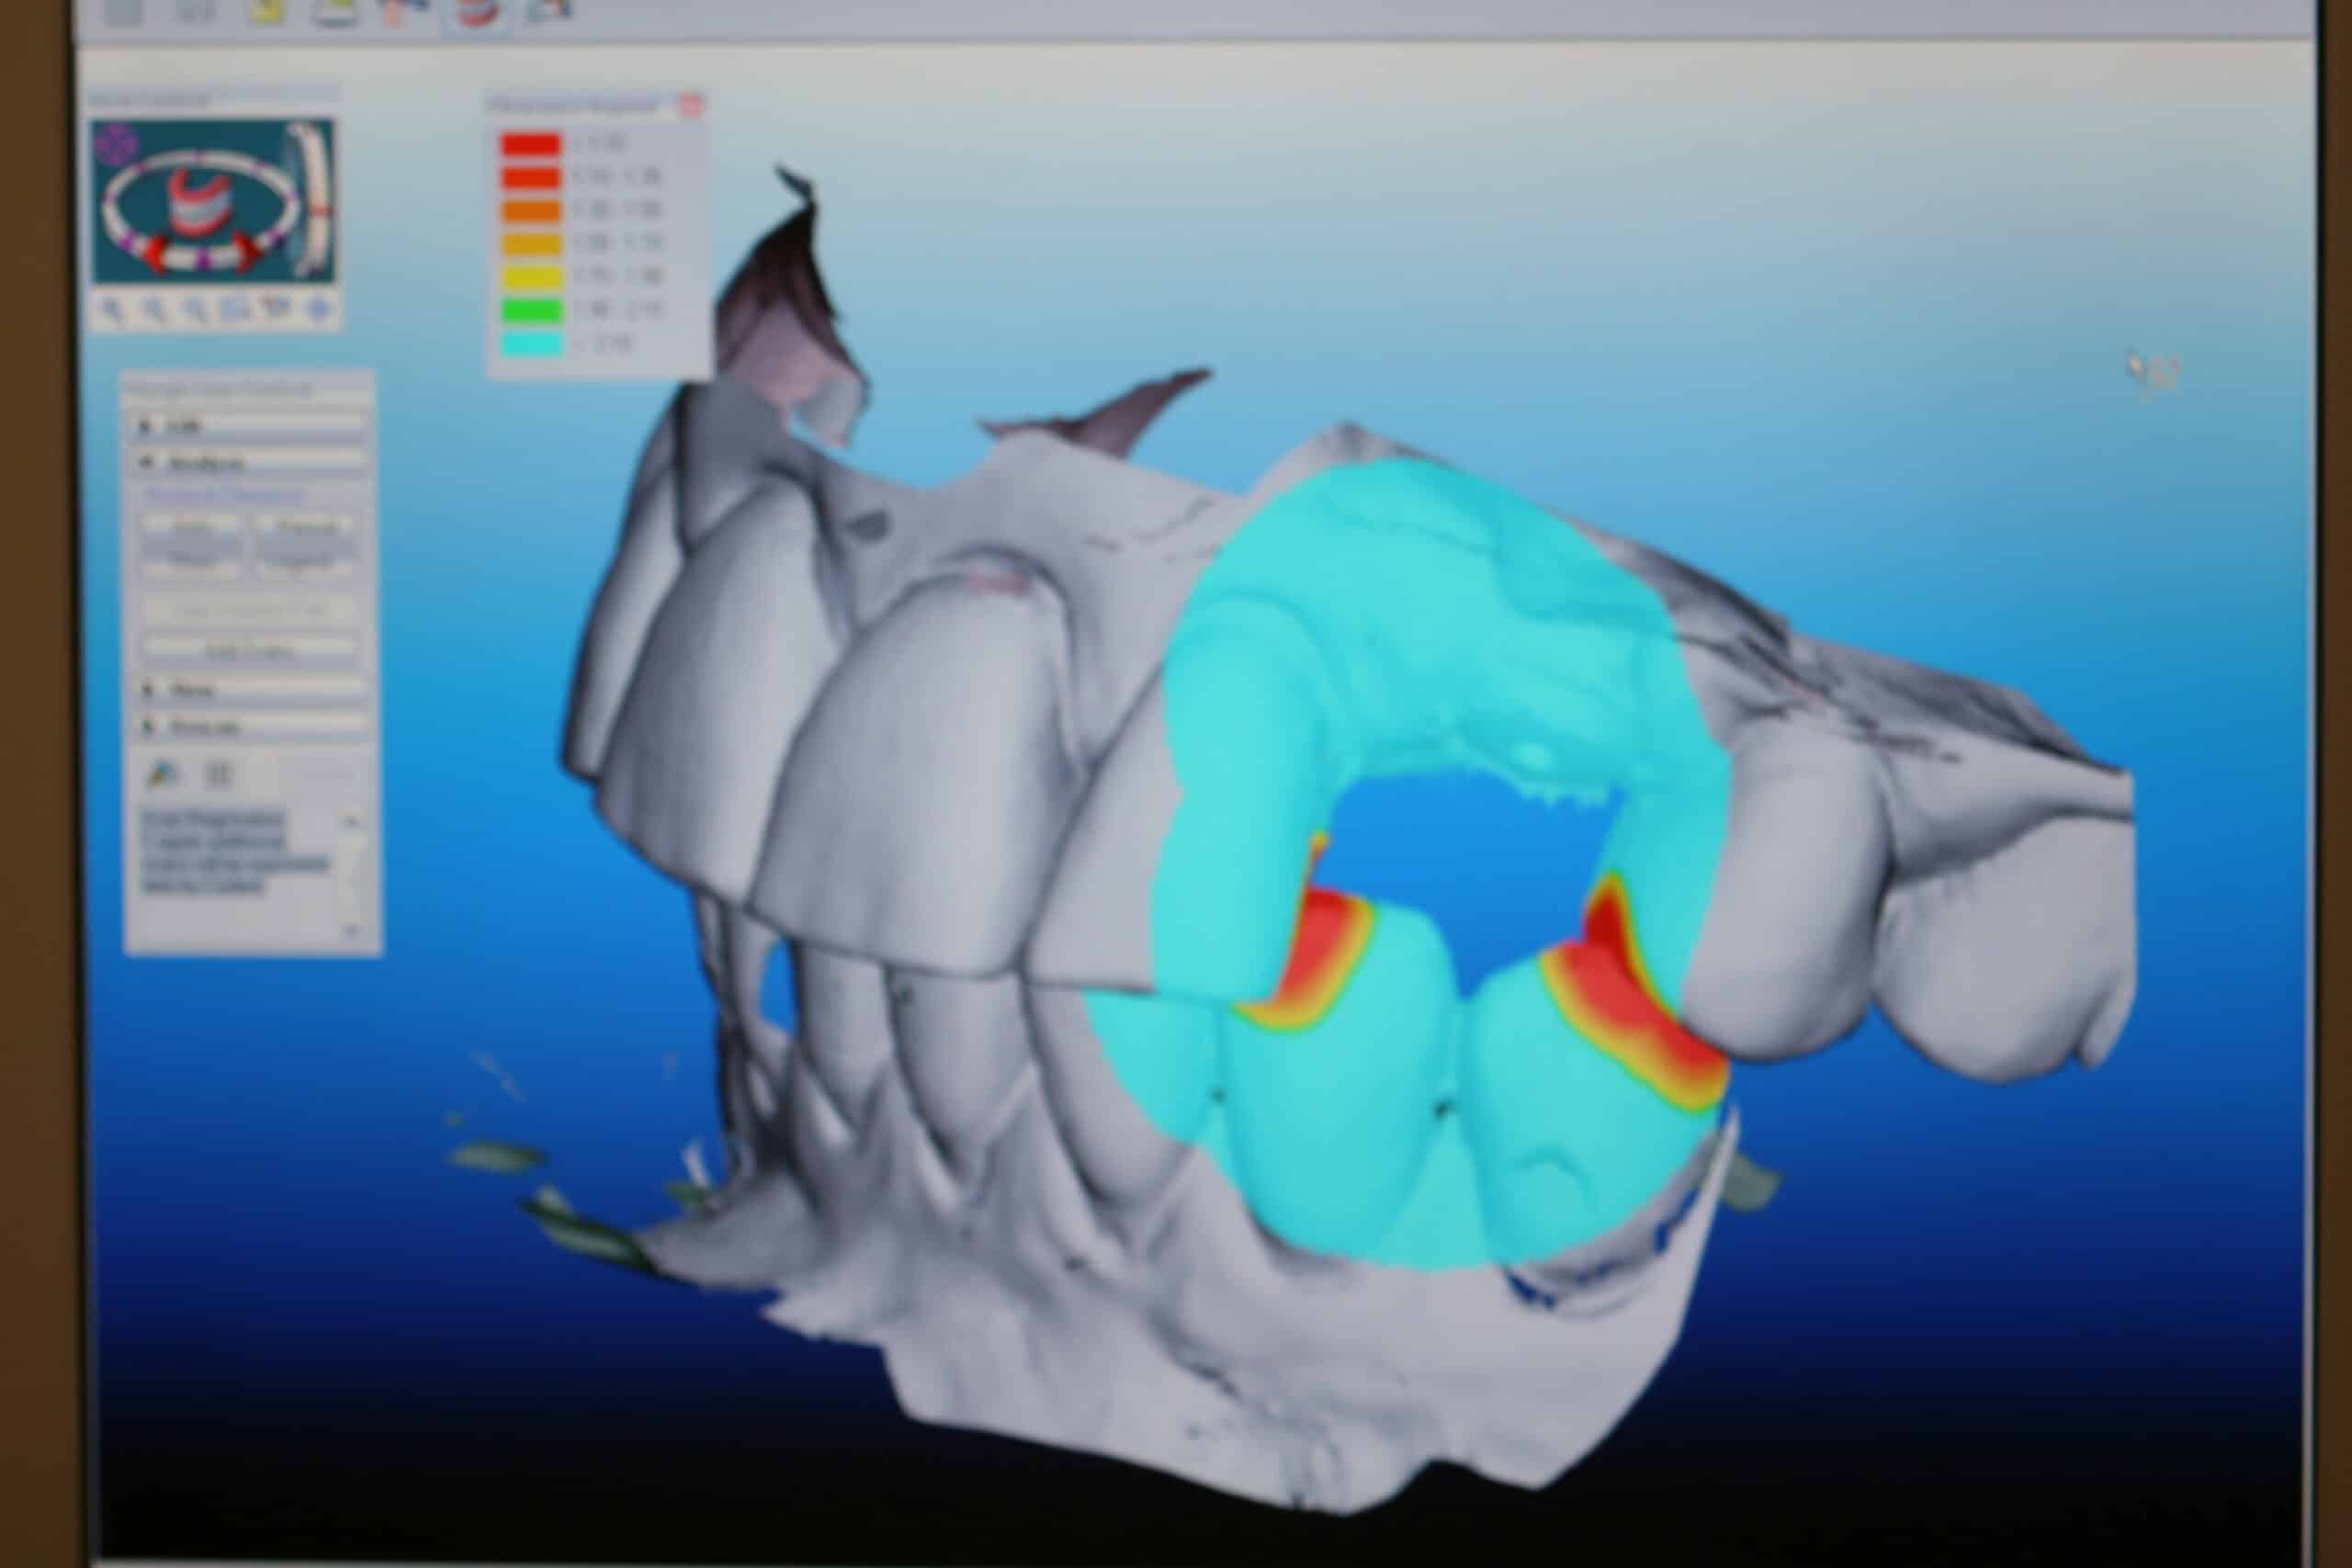
The above iTero scan is the raw data with the scanning jig in place. However, since the jig is so large, it would be very difficult to scan the interproximals of the adjacent teeth and to get a virtual bite with the jig in place, so after the jig was scanned it was removed and a healing abutment was placed for the rest of the scans. Notice that in the above iTero scan you see the healing abutment and something that looks like artifact above it where the arrow cursor is seen. When the raw scans are cleaned up in Tel aviv, the scanning jig will be in placed and the case will be registered as completed as far as iTero is concerned (because it releases all of the data to 5 Axis Dental).

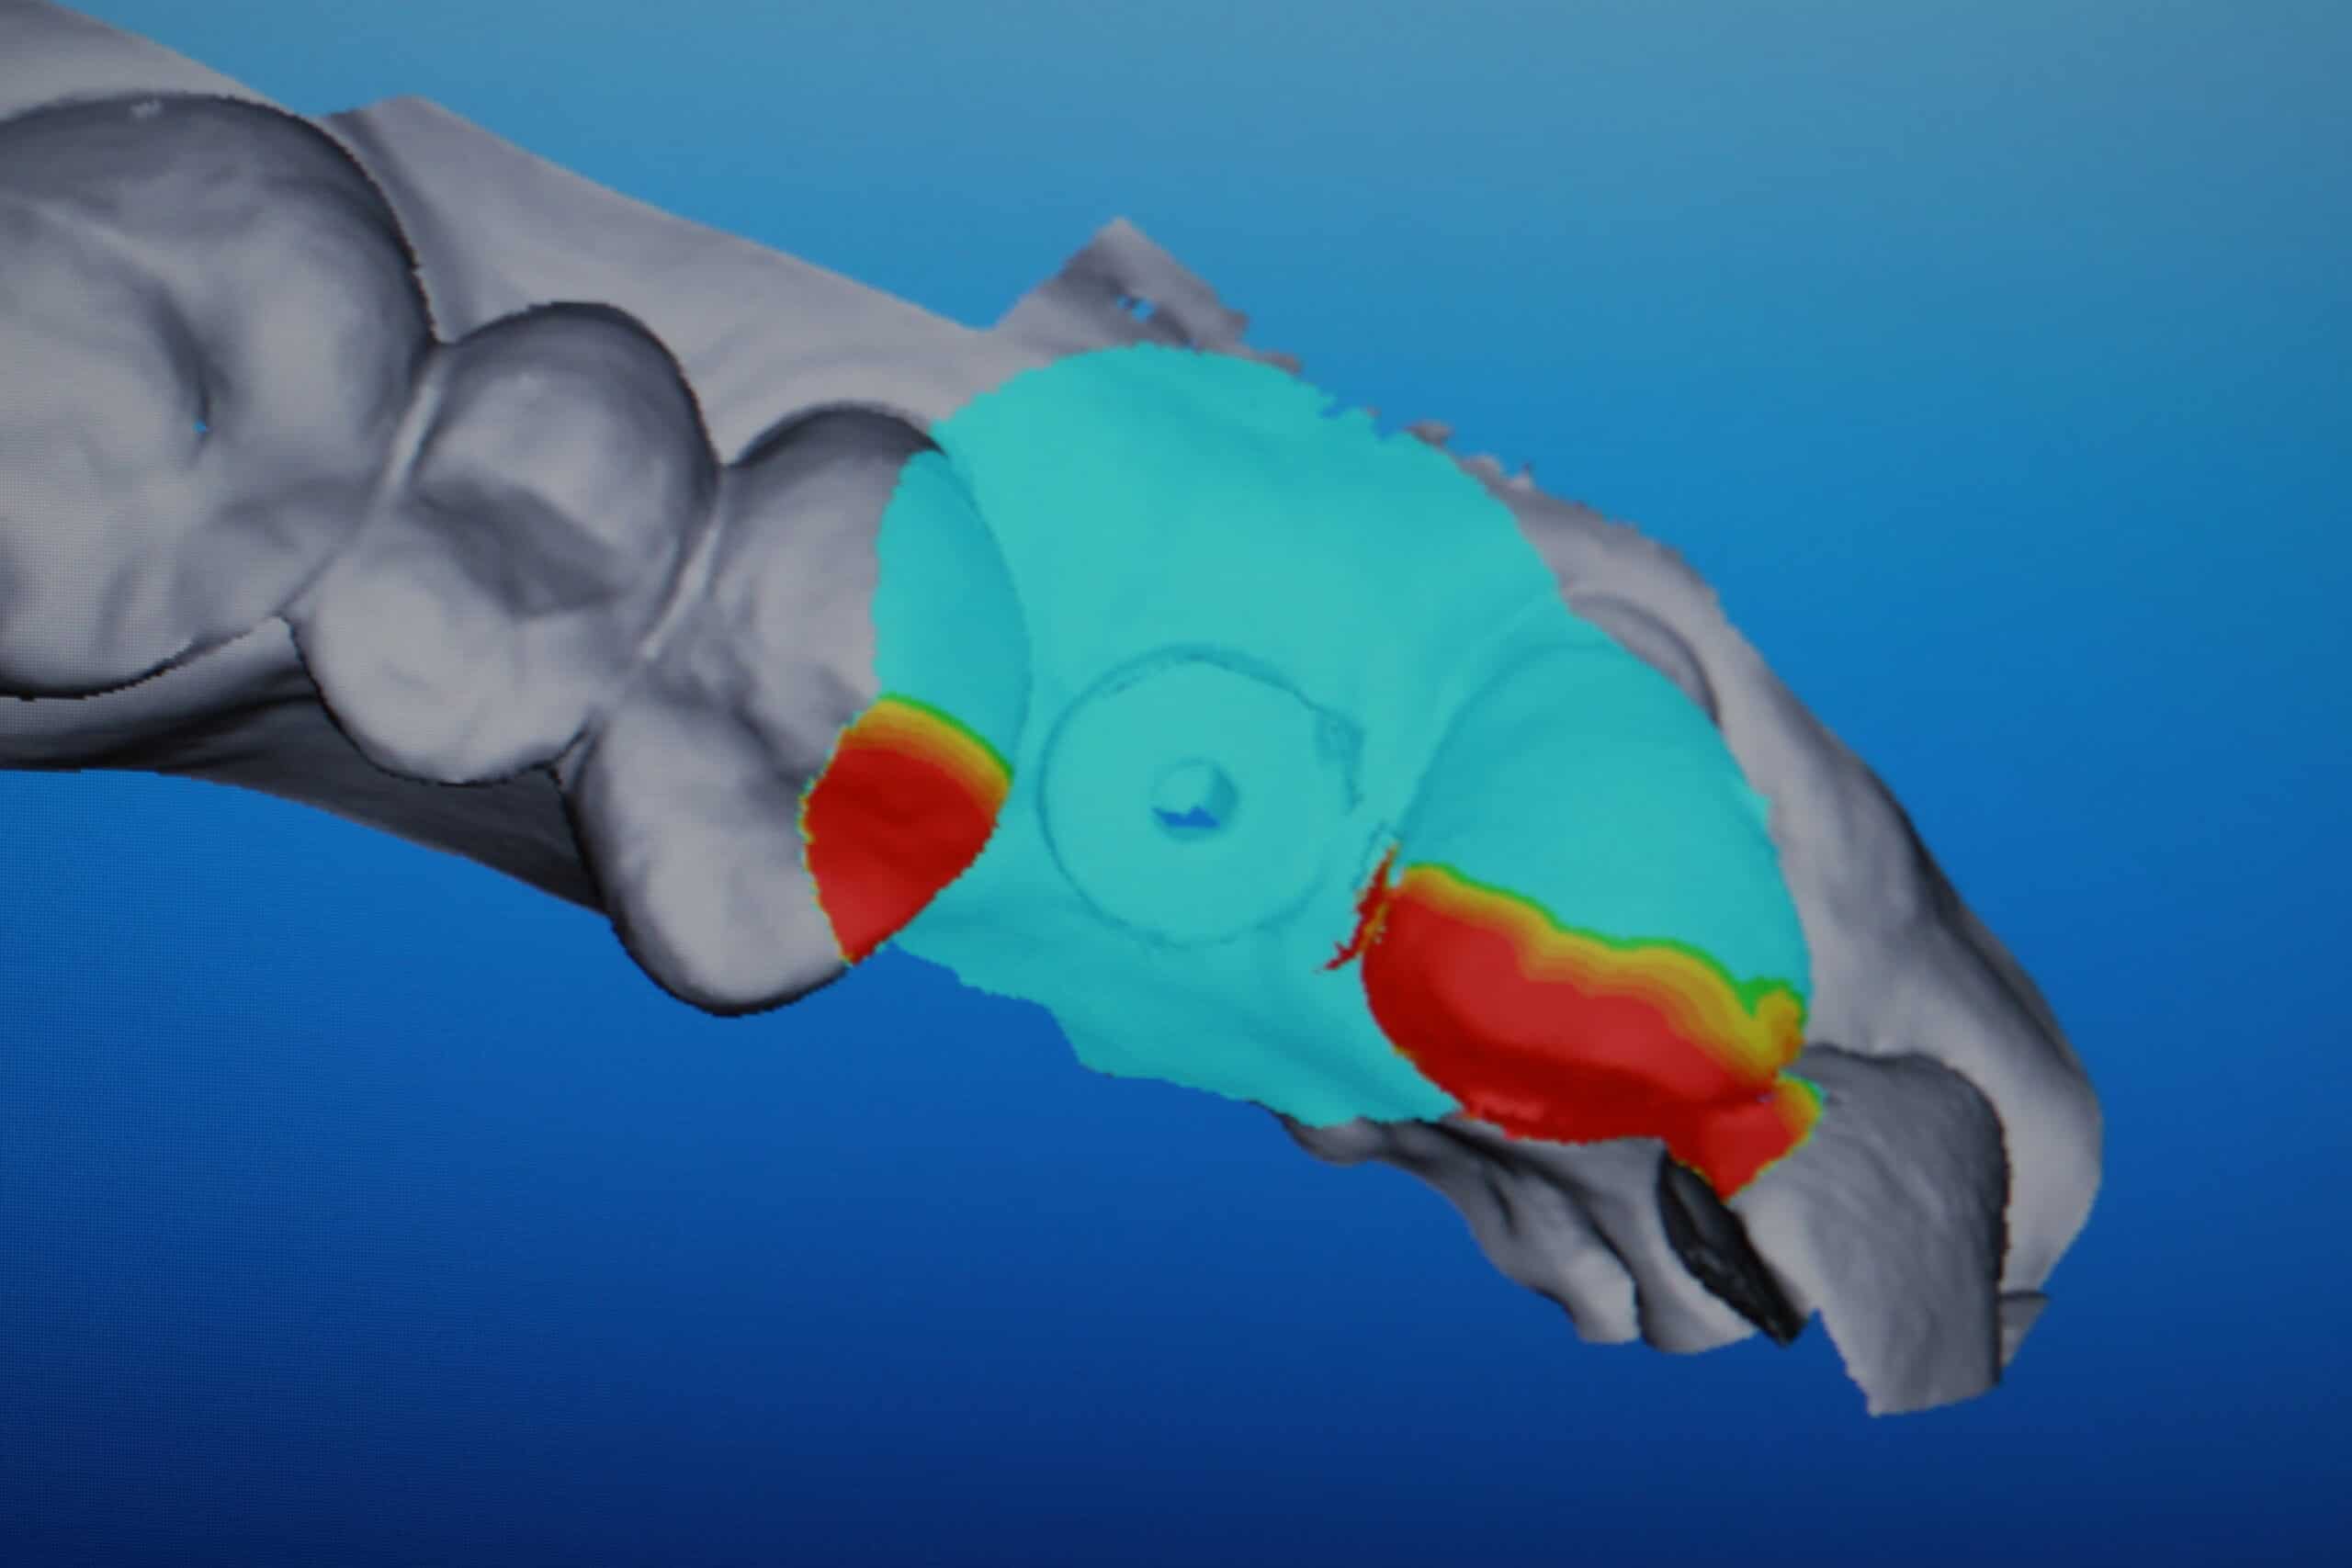
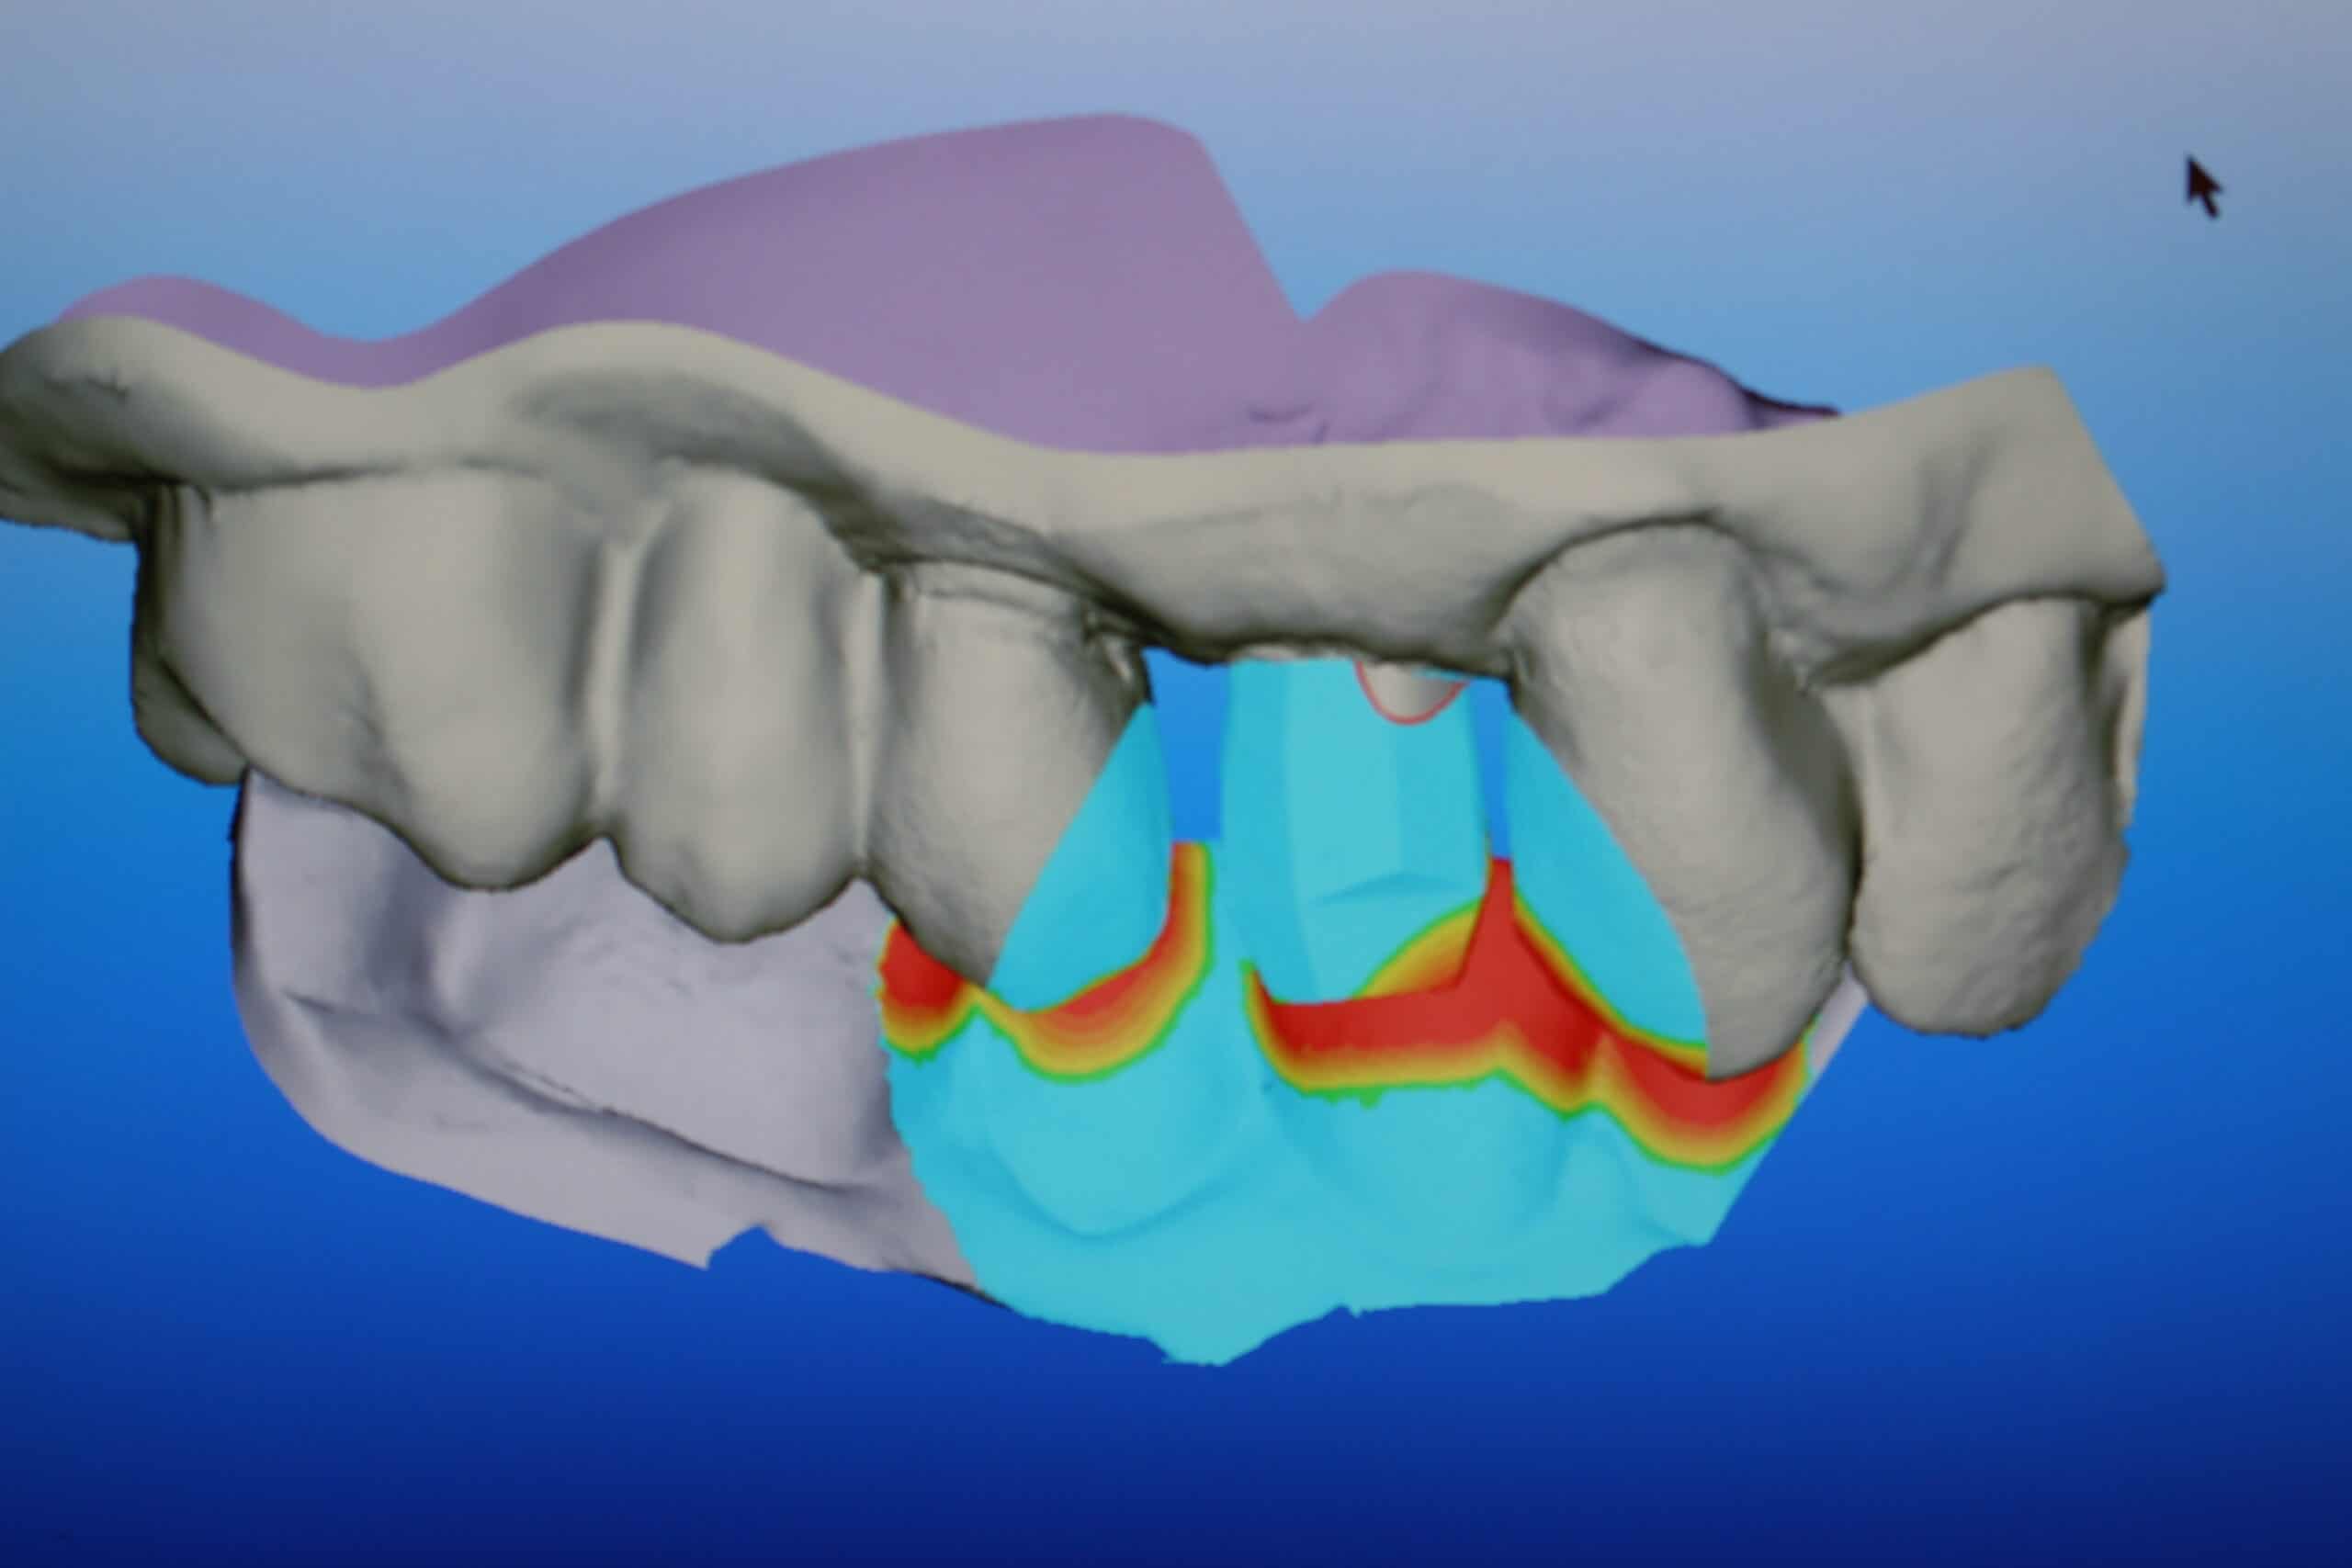
Notice that the occlusion absorbs the scanning jig as if it wasn’t there. Pretty cool!
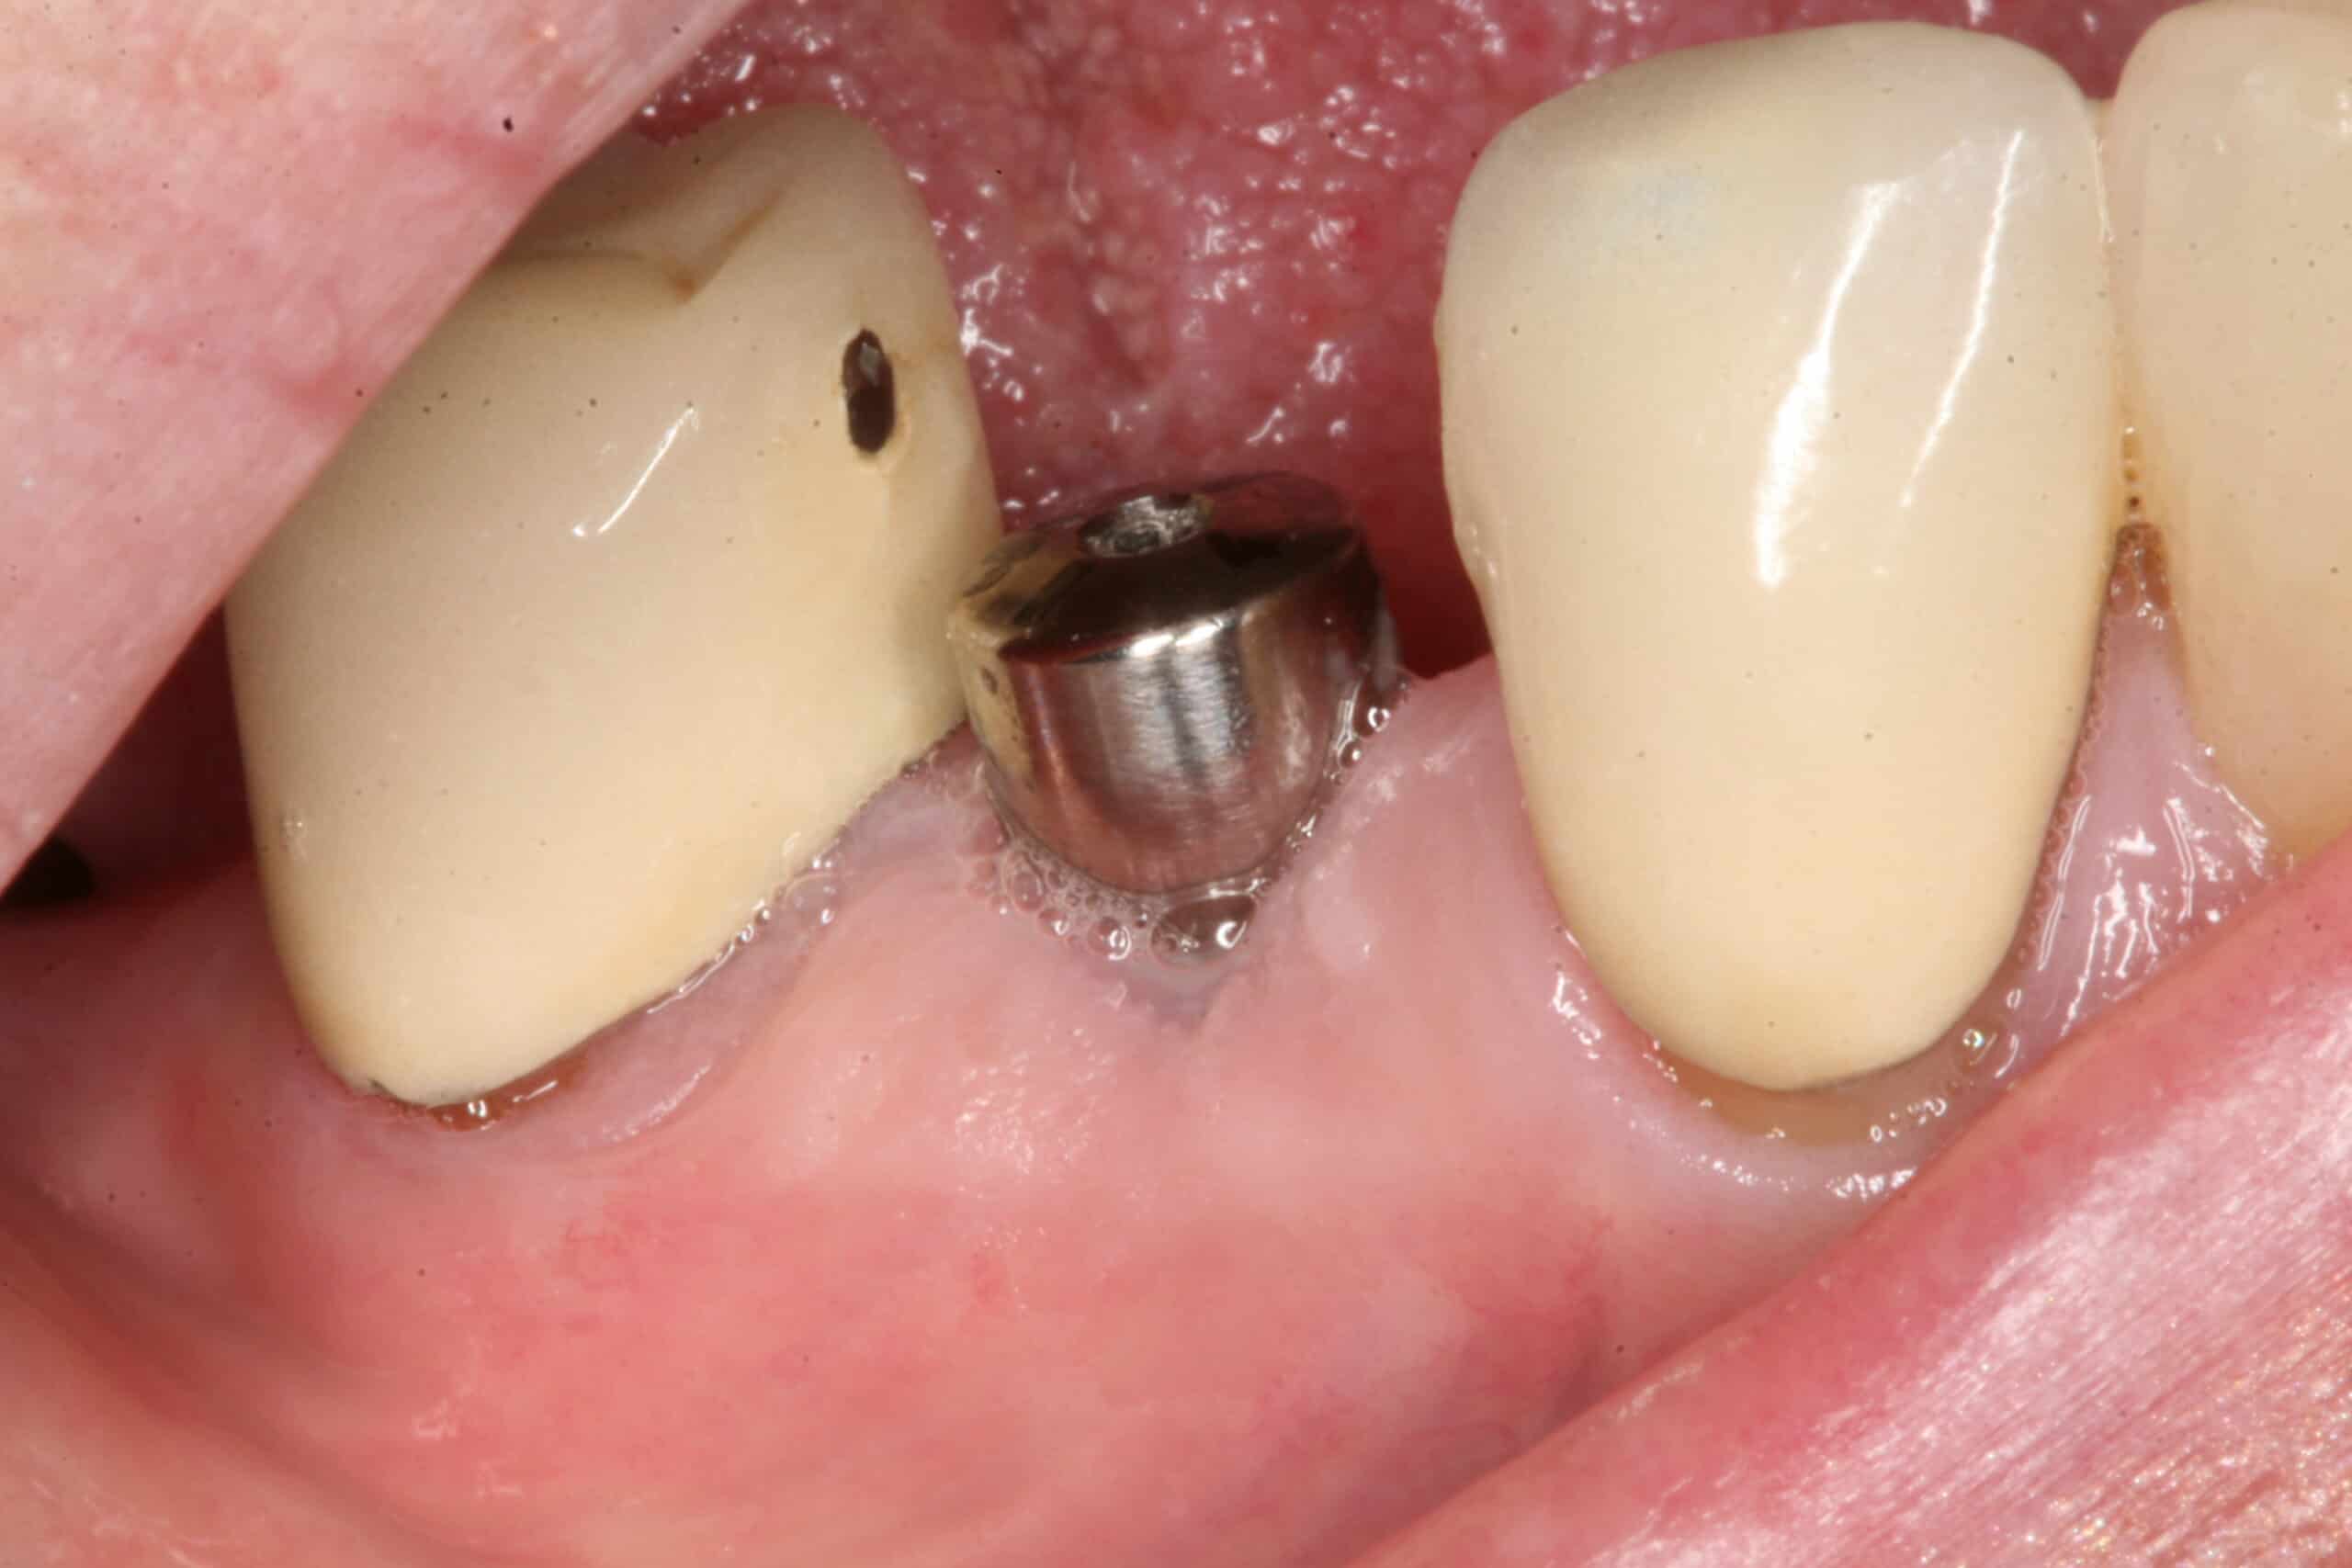
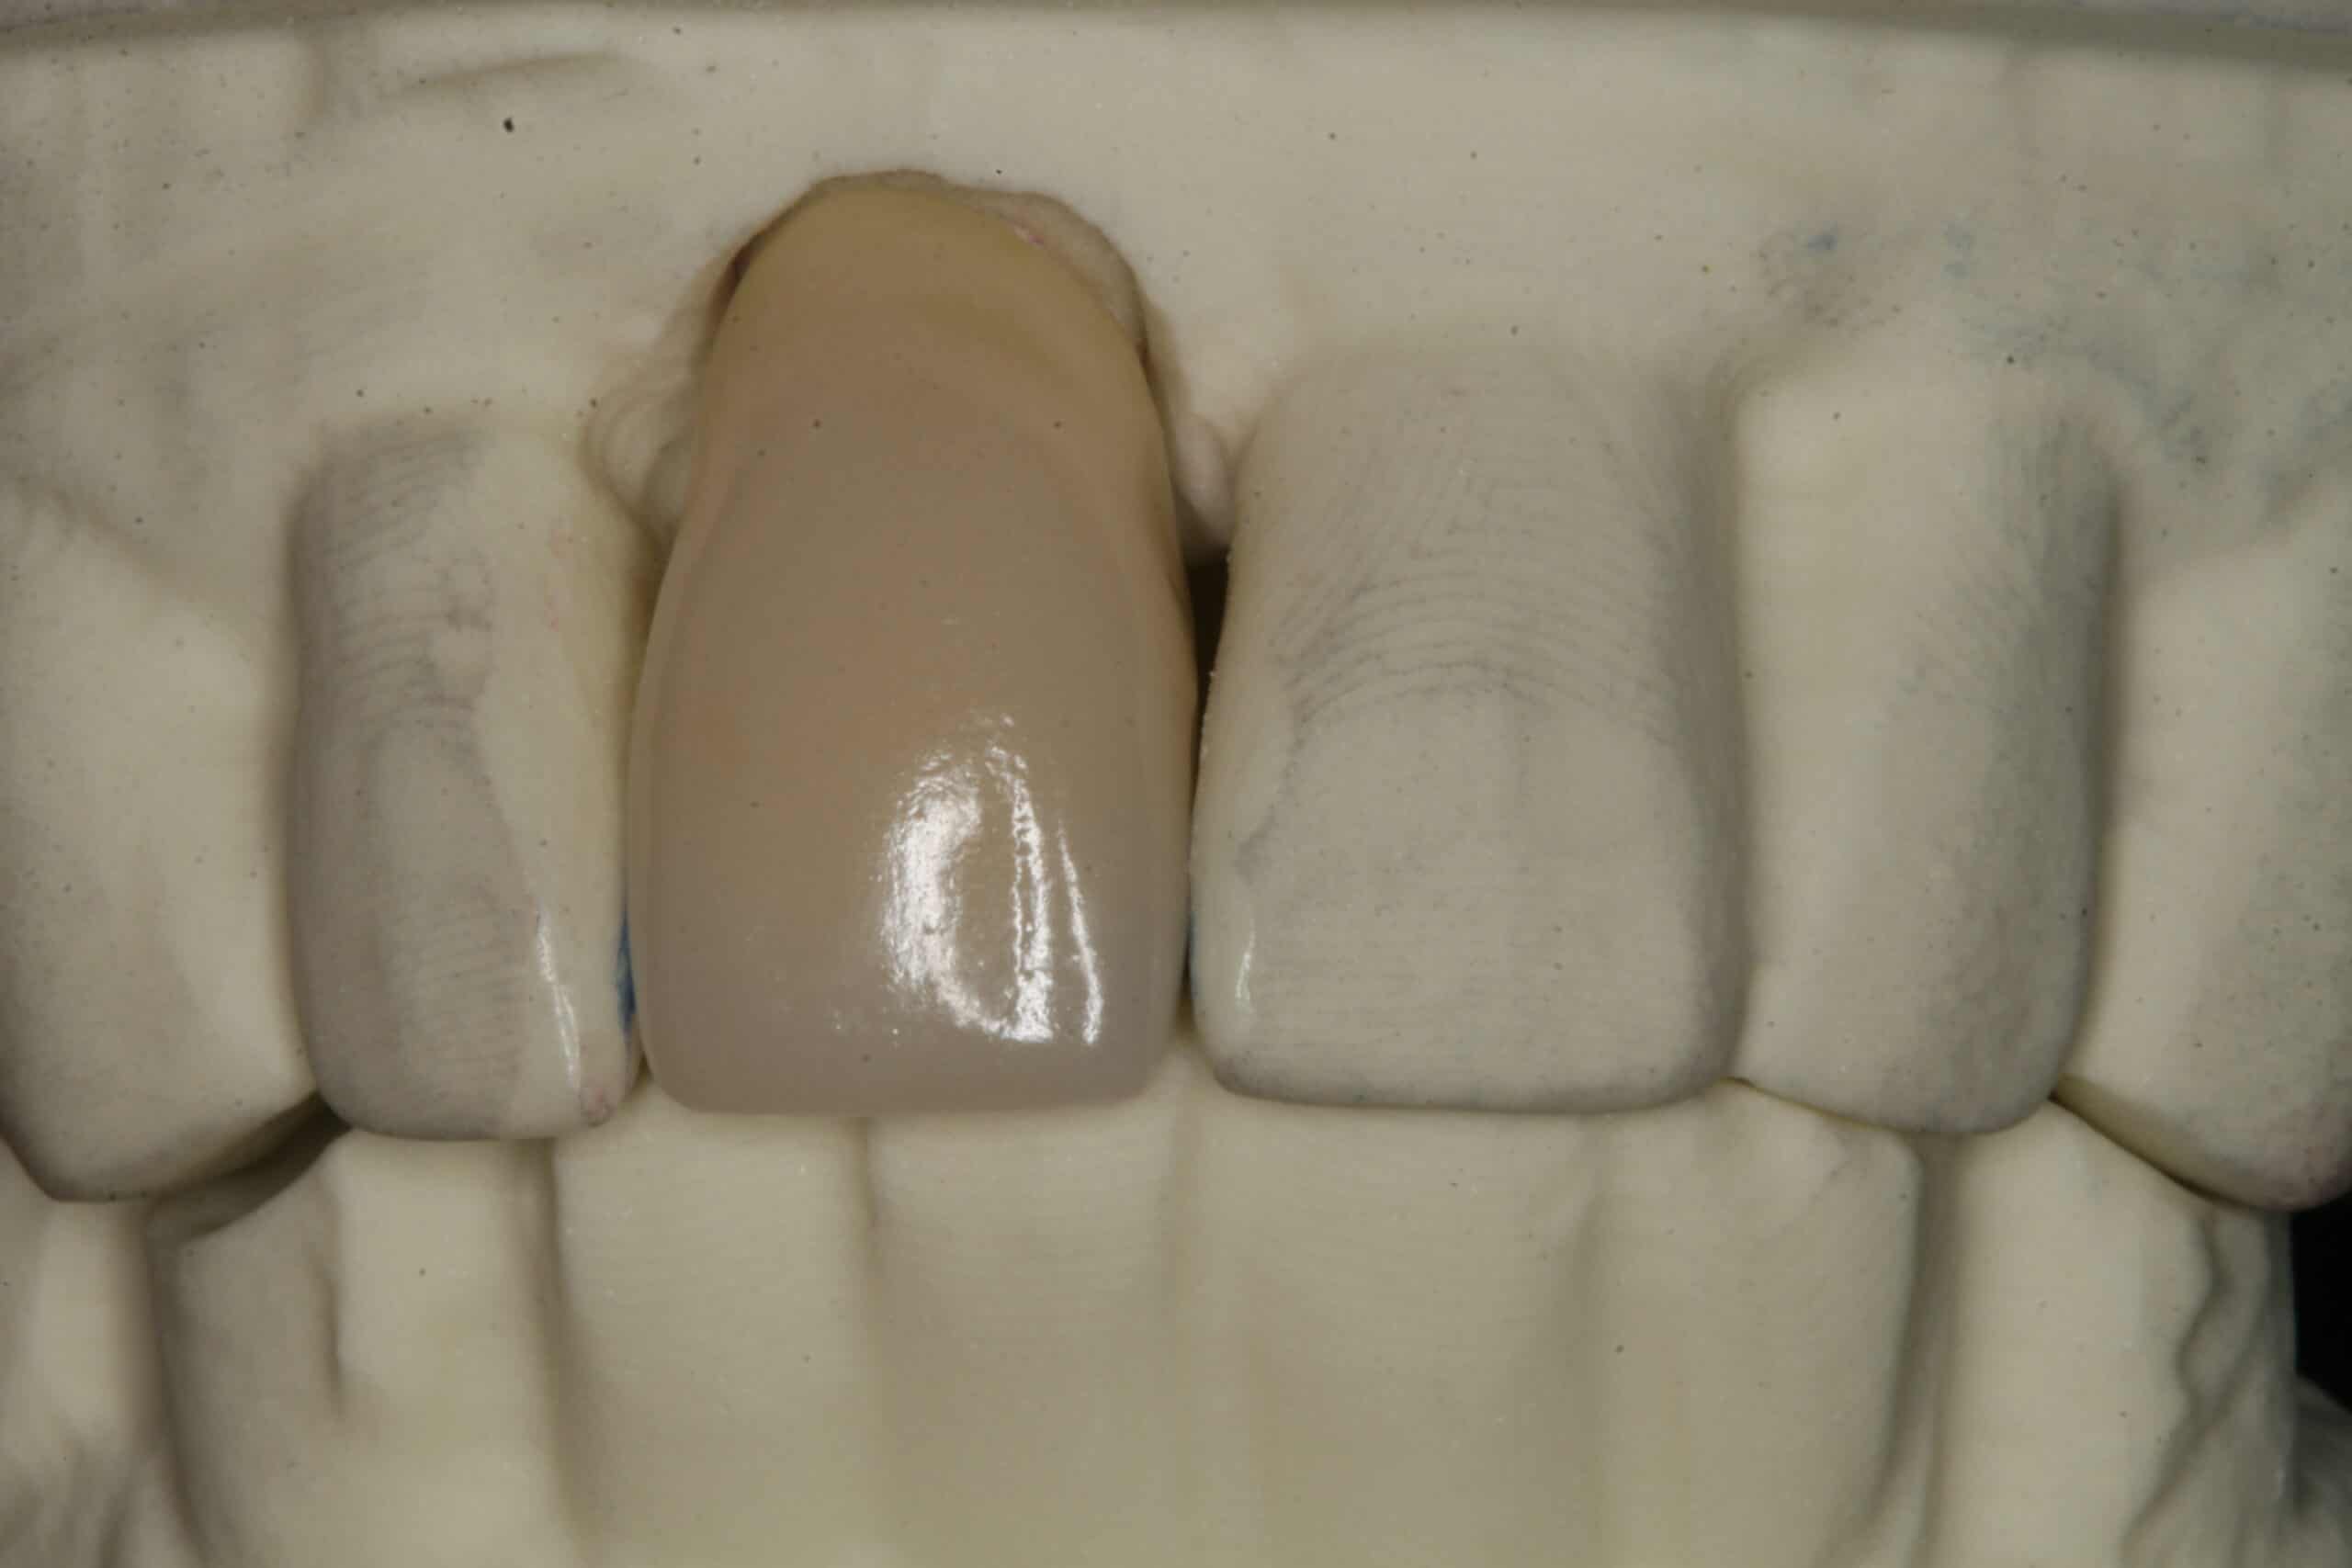
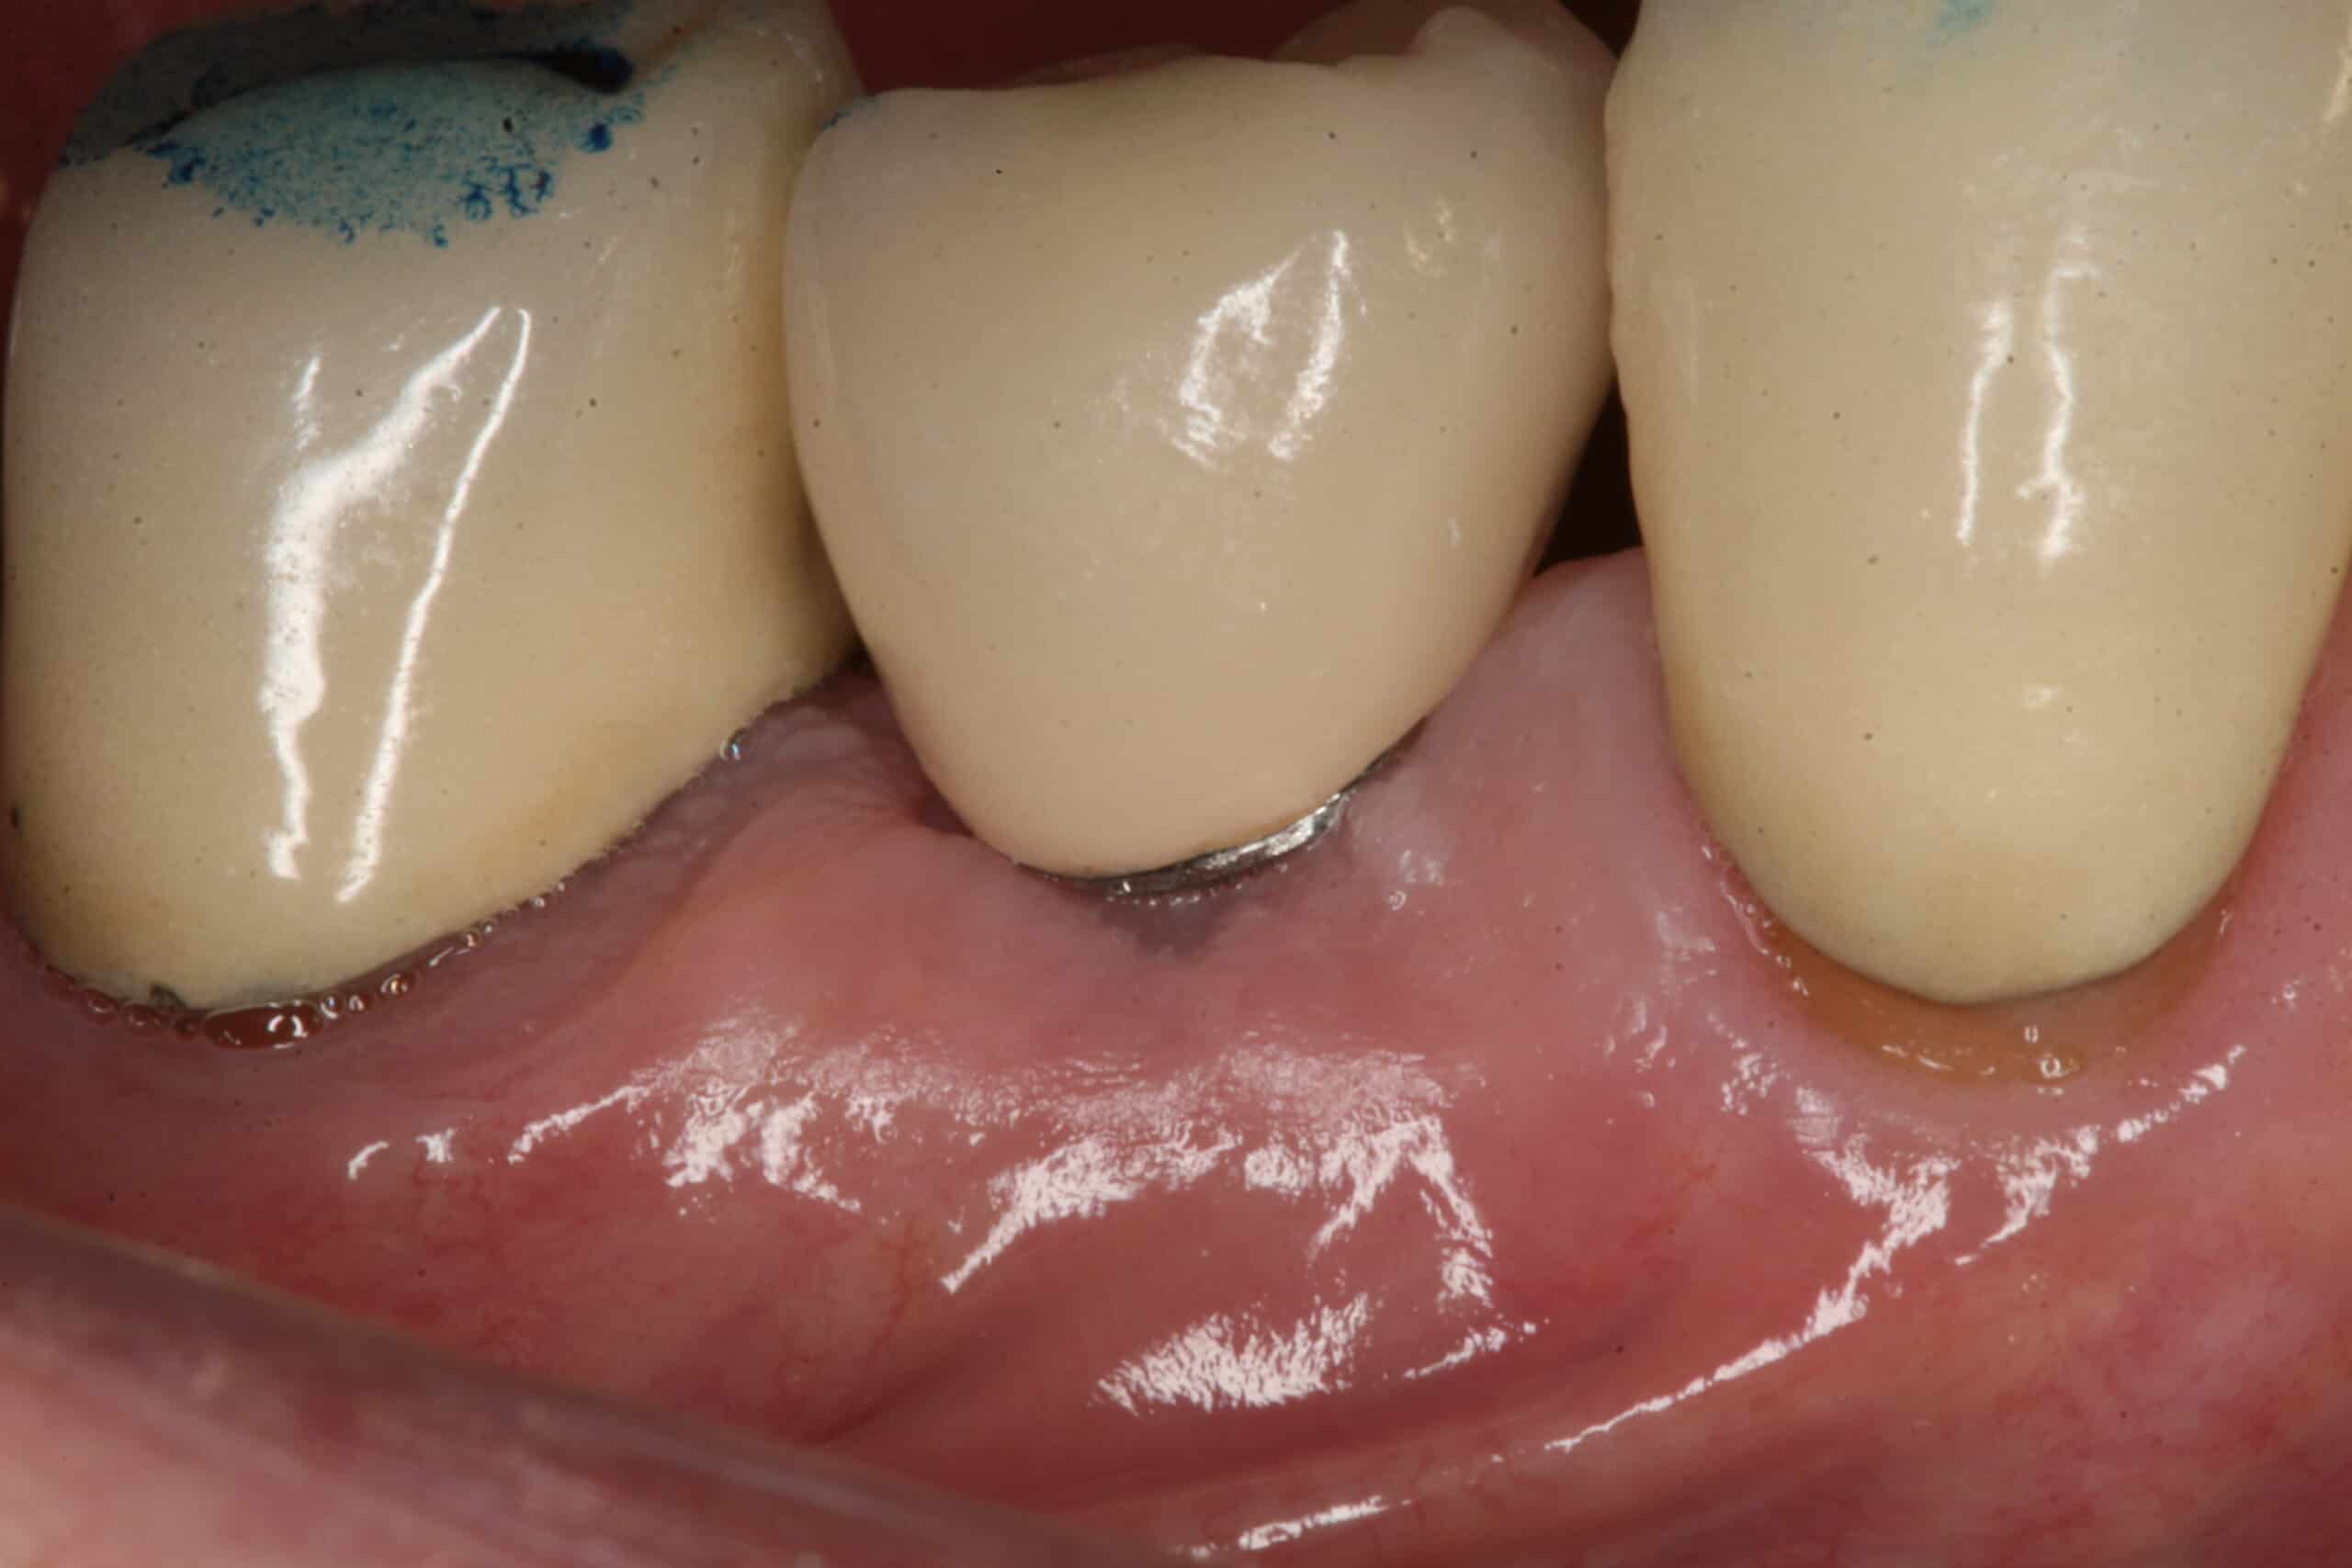
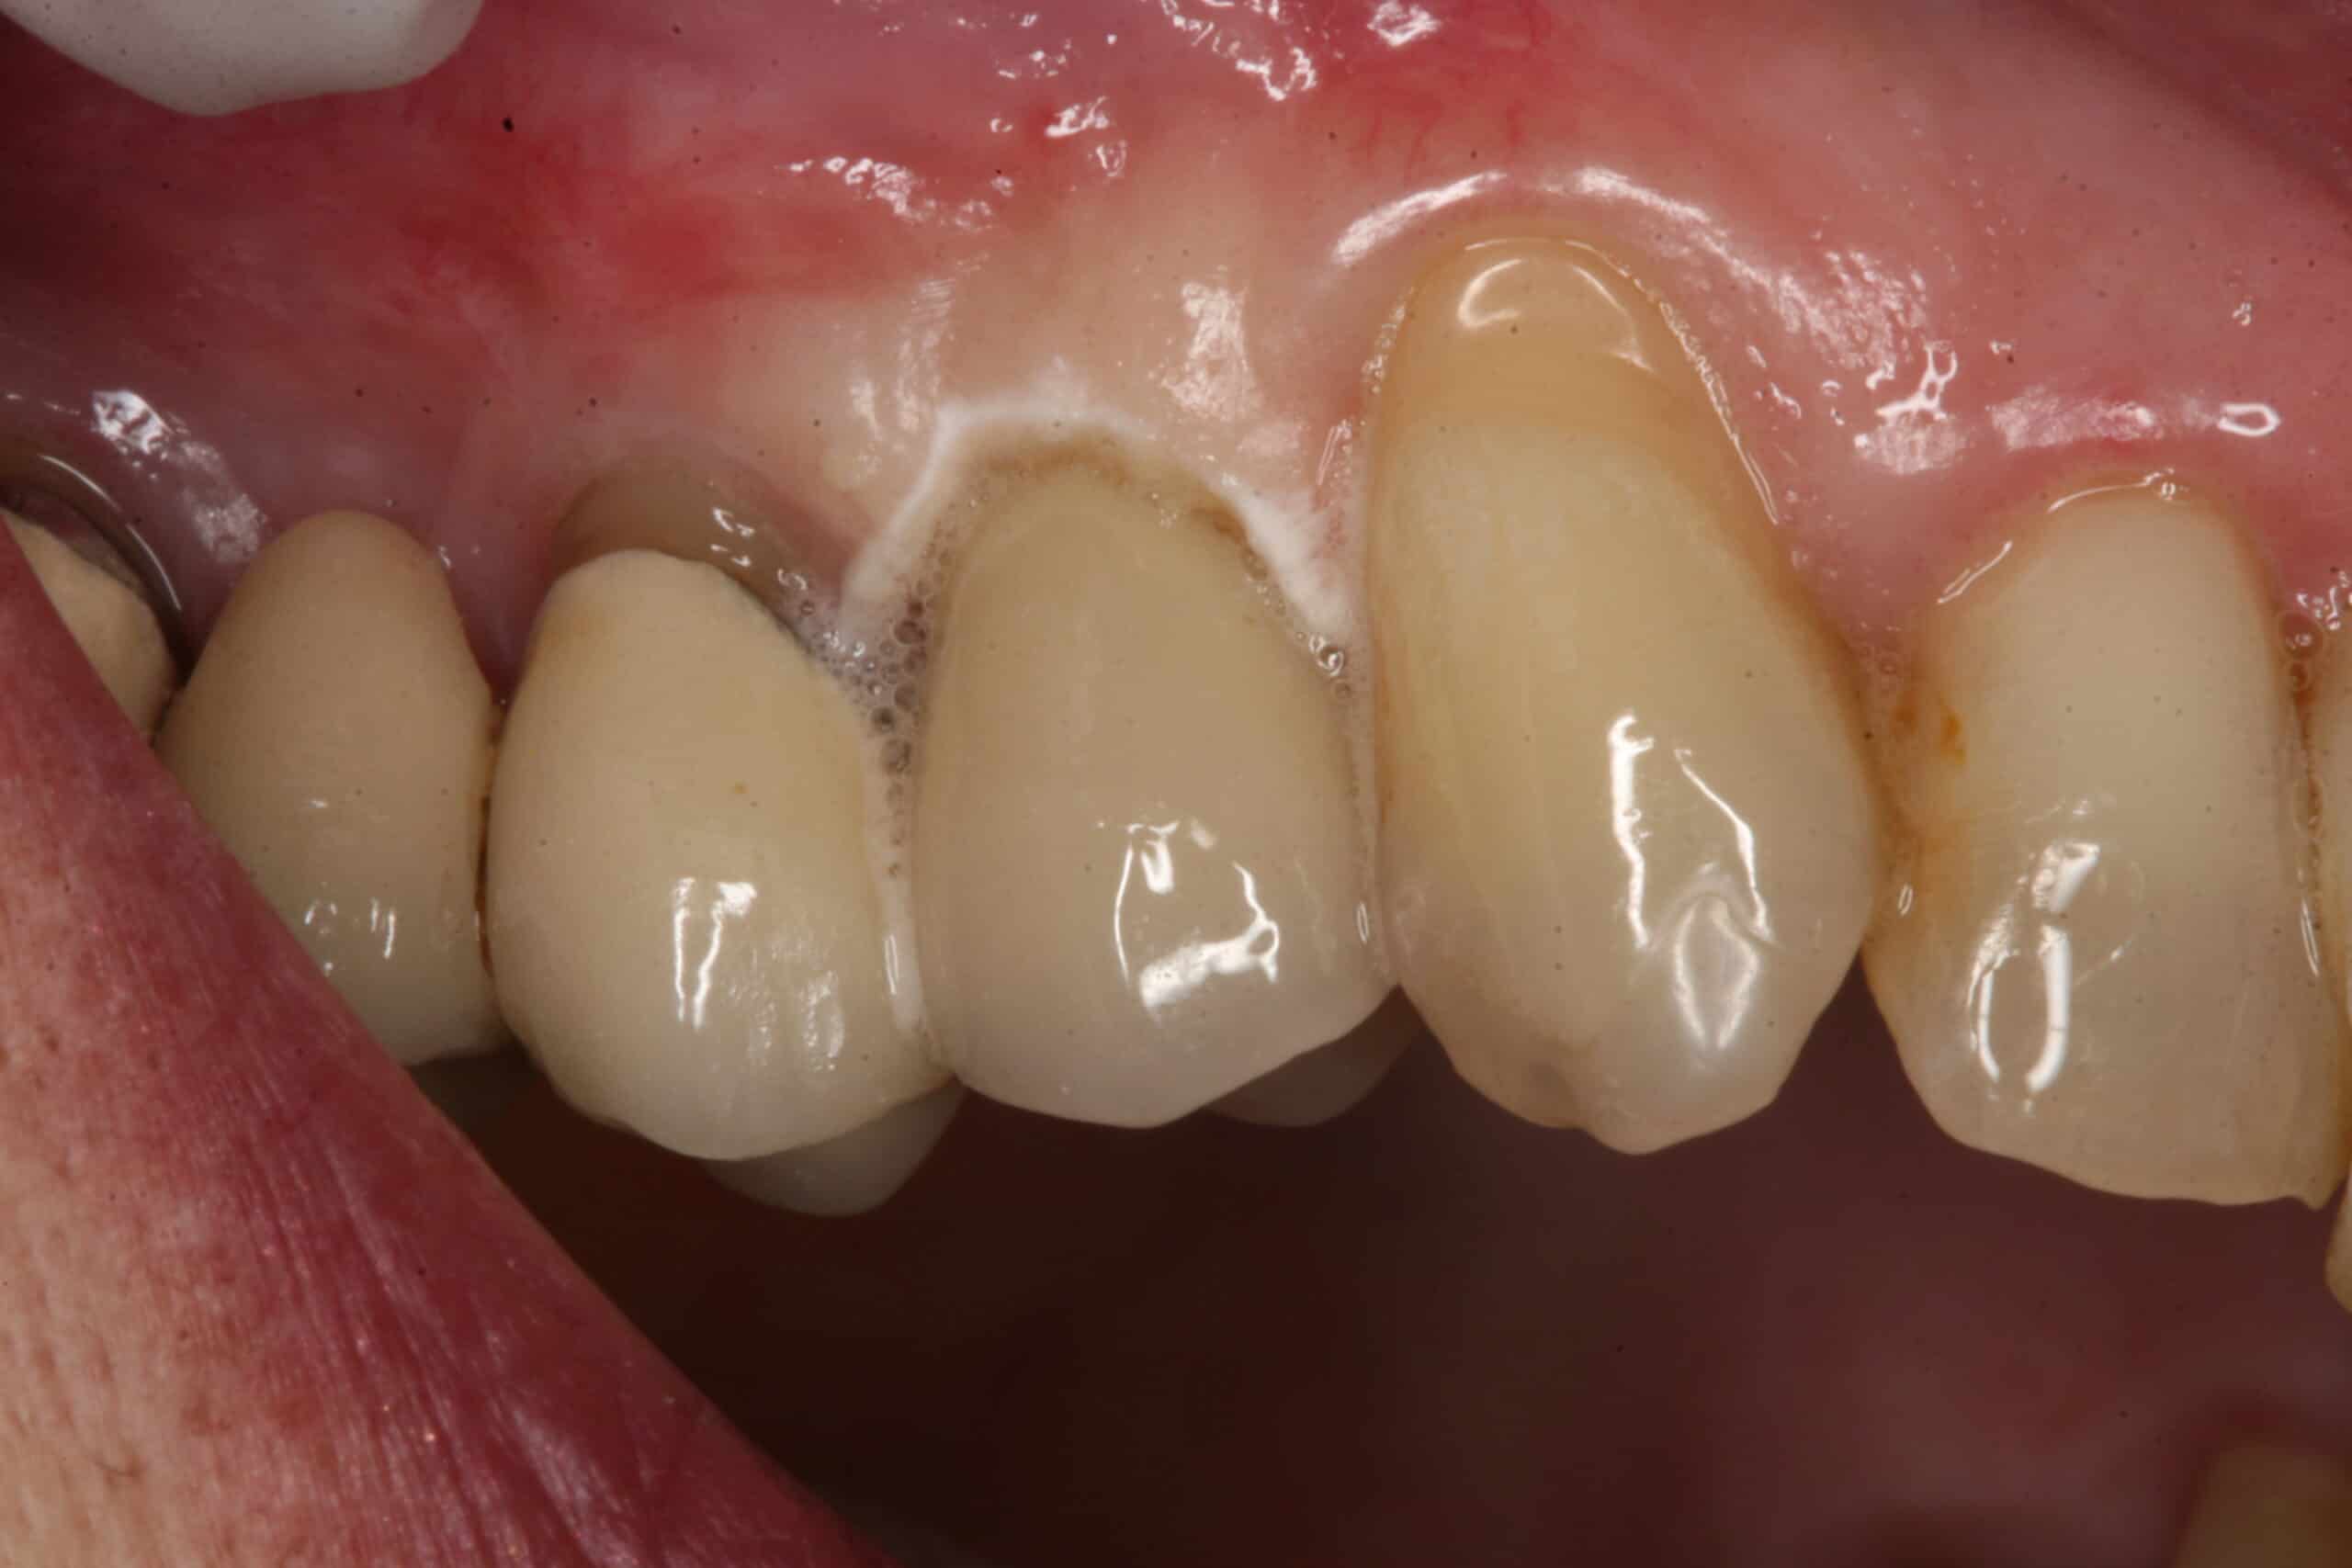
The case is back and ready to deliver.
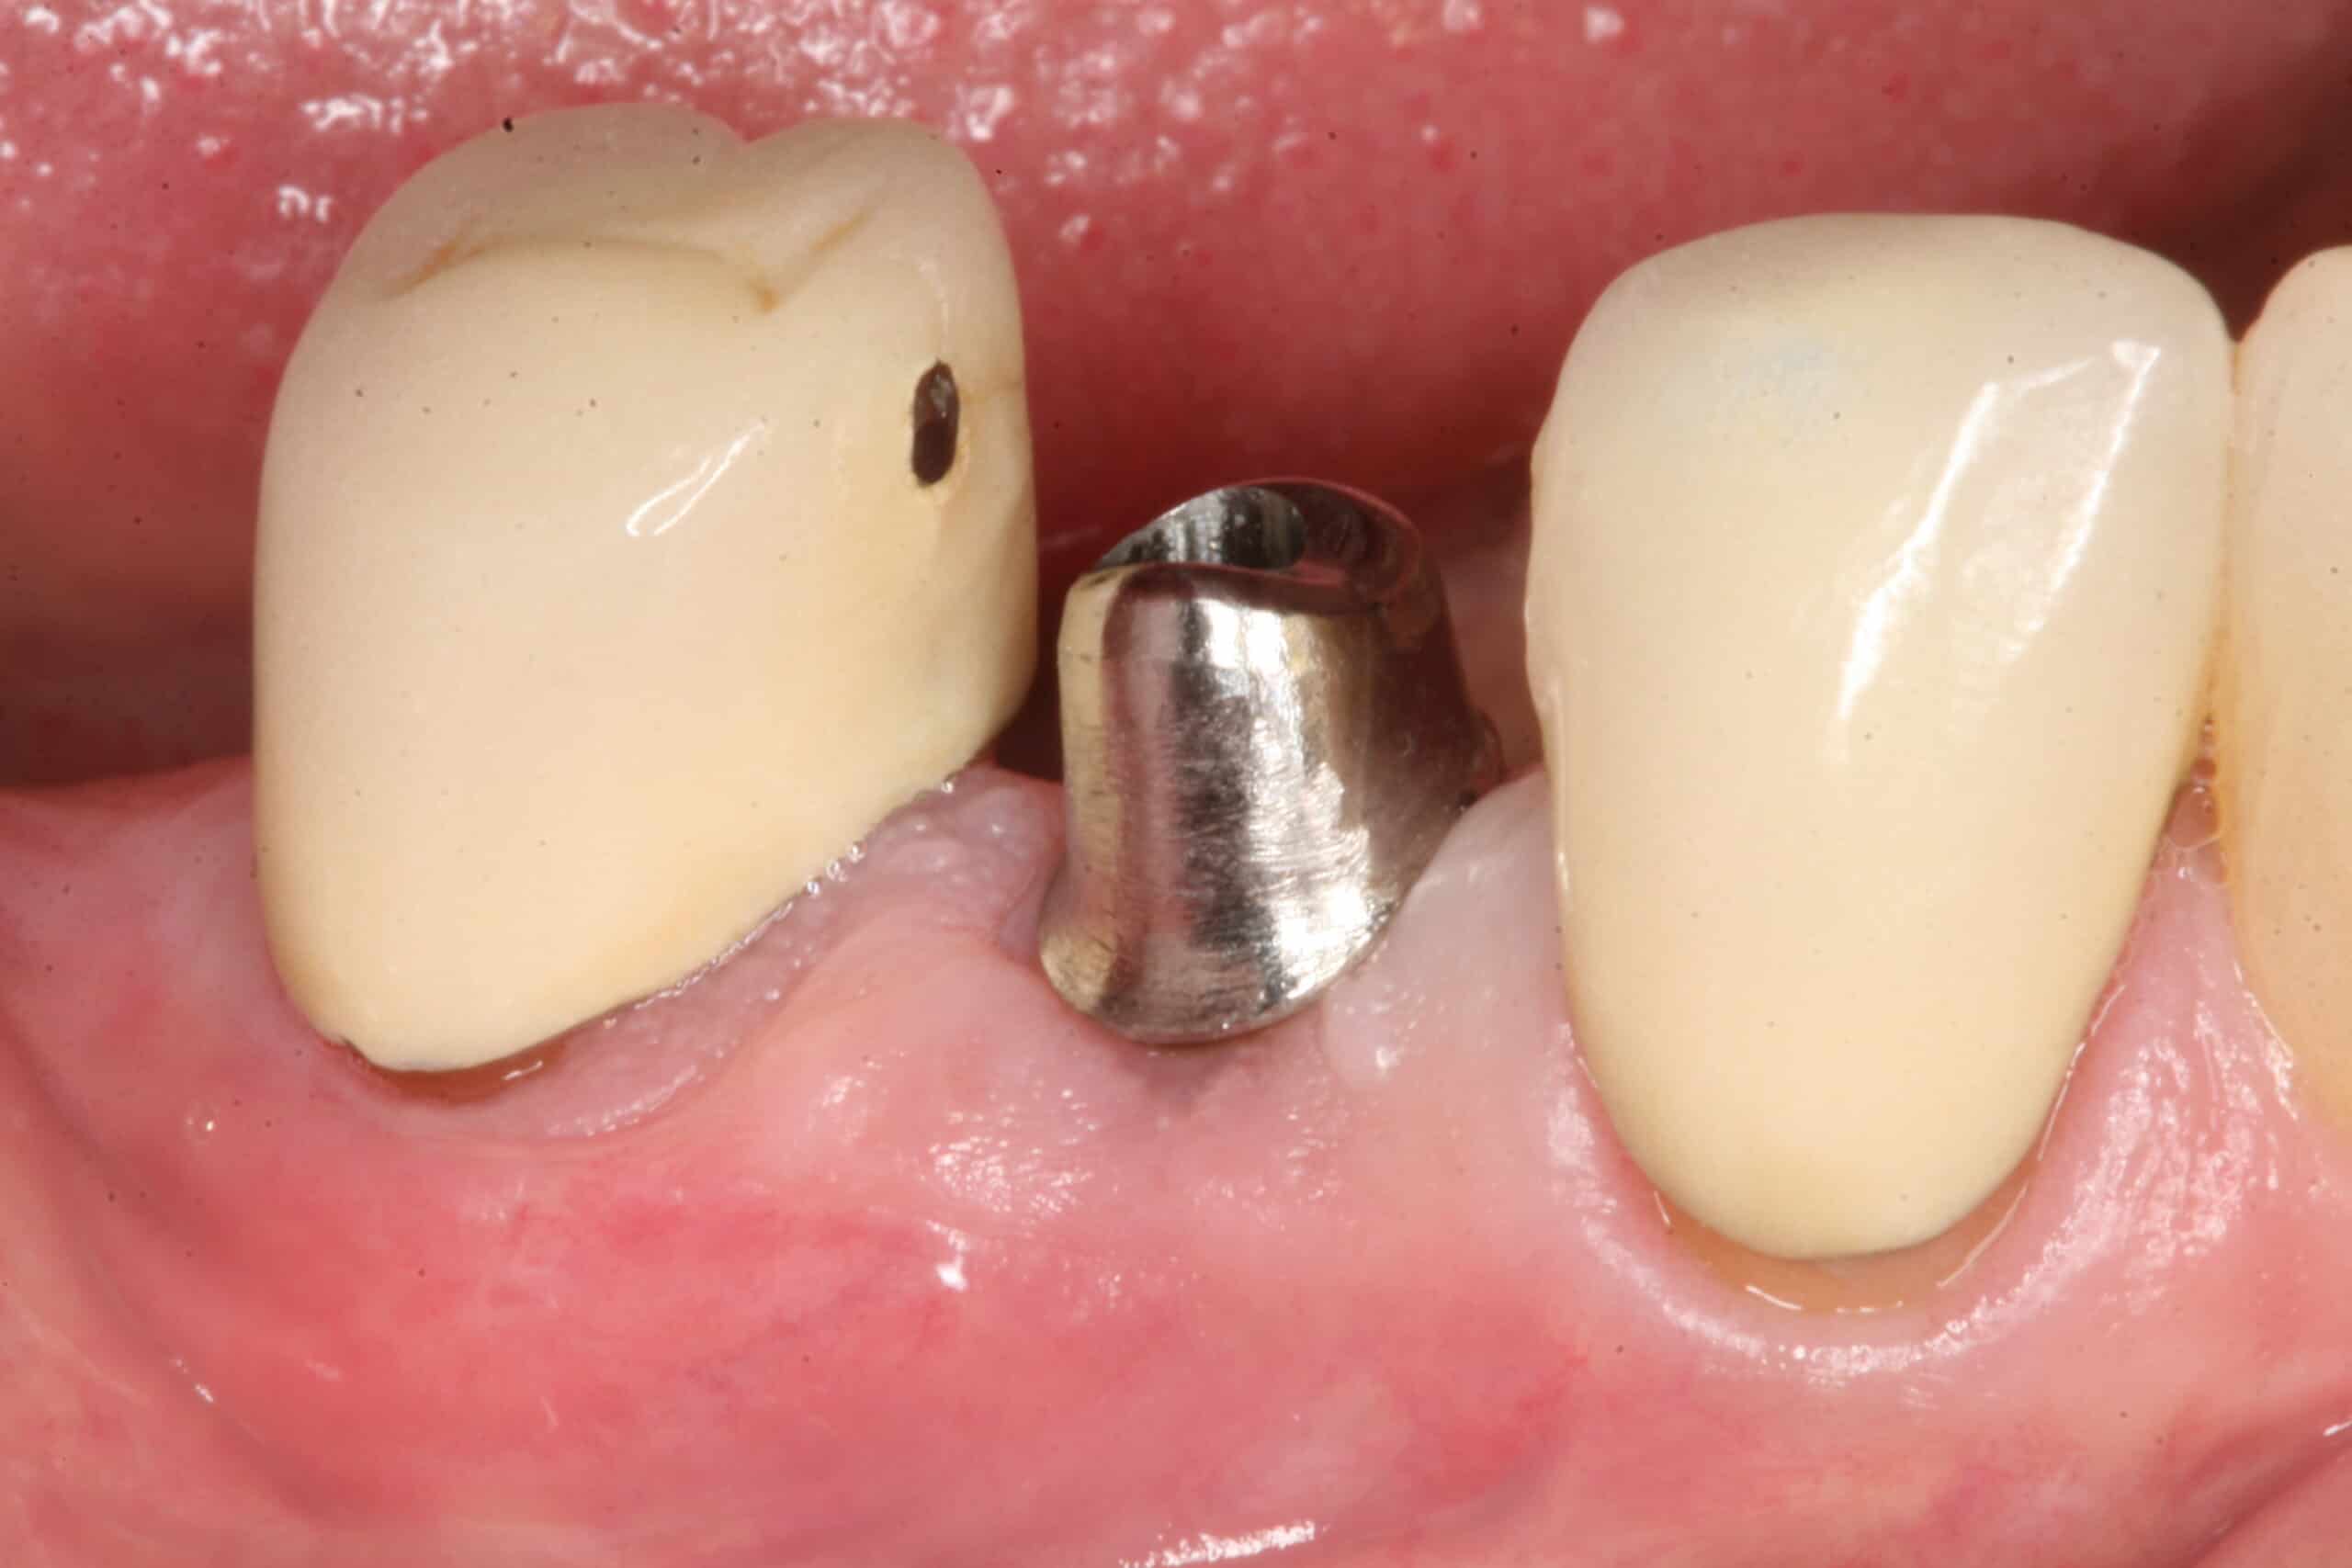
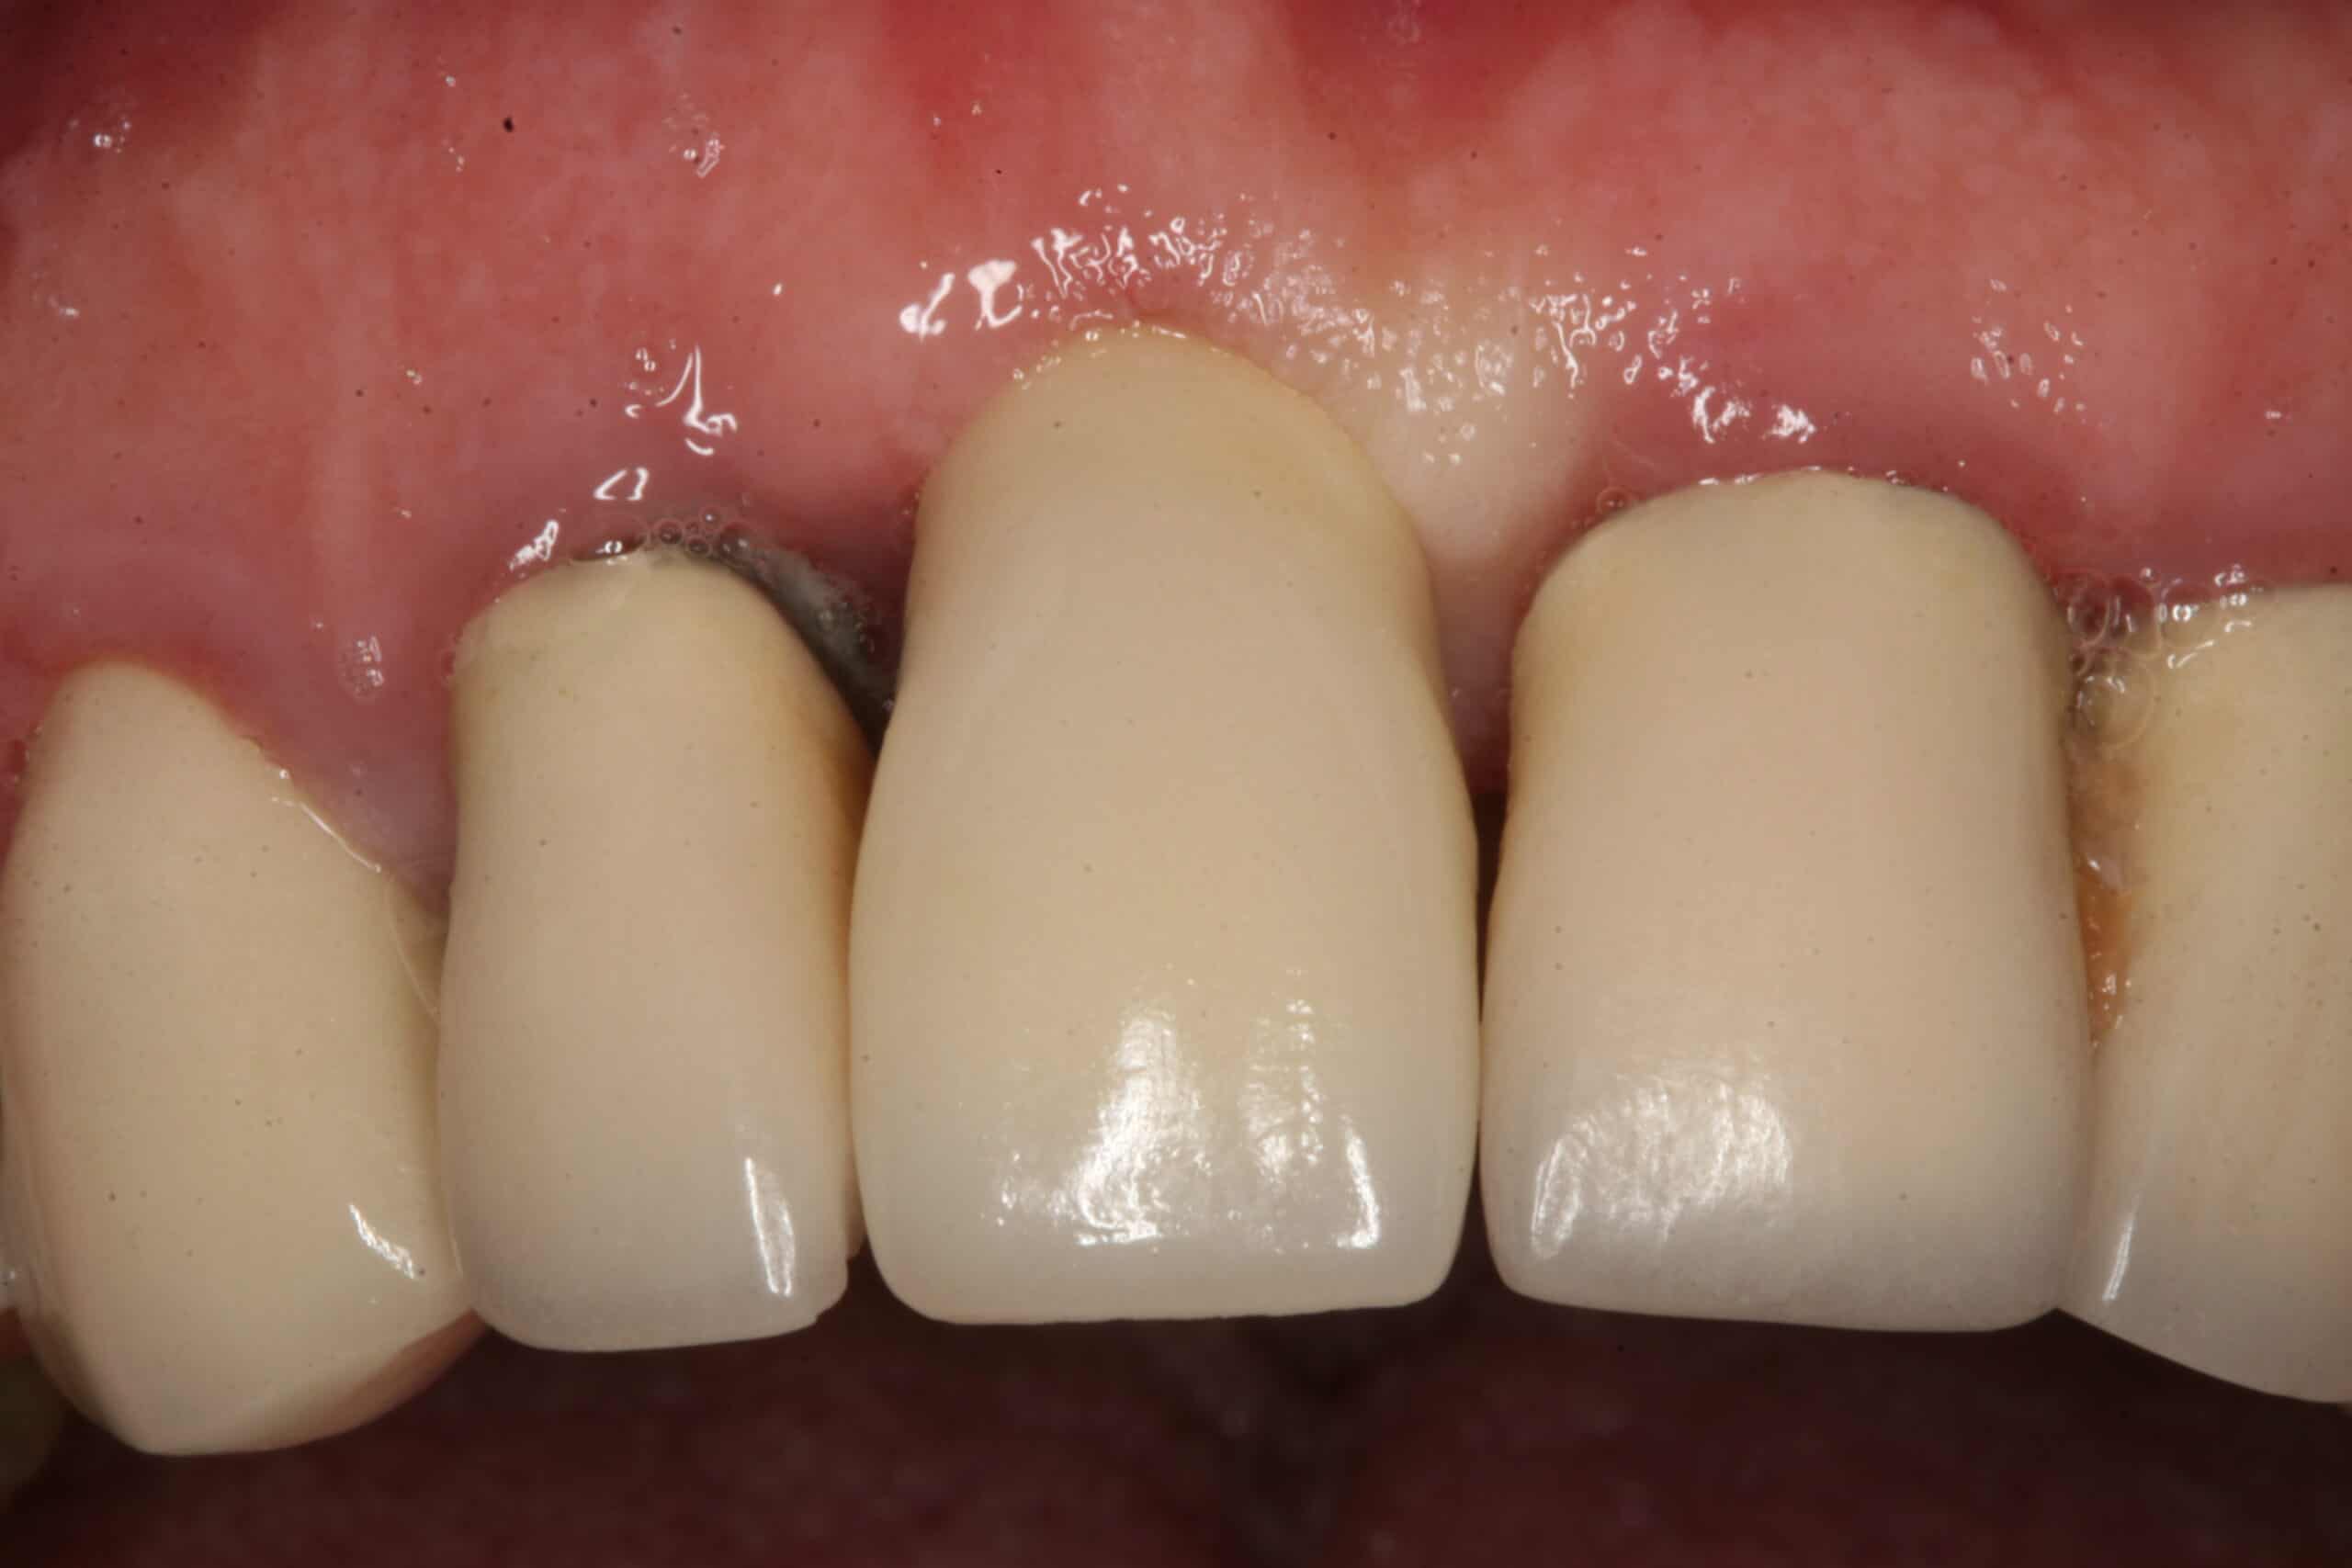
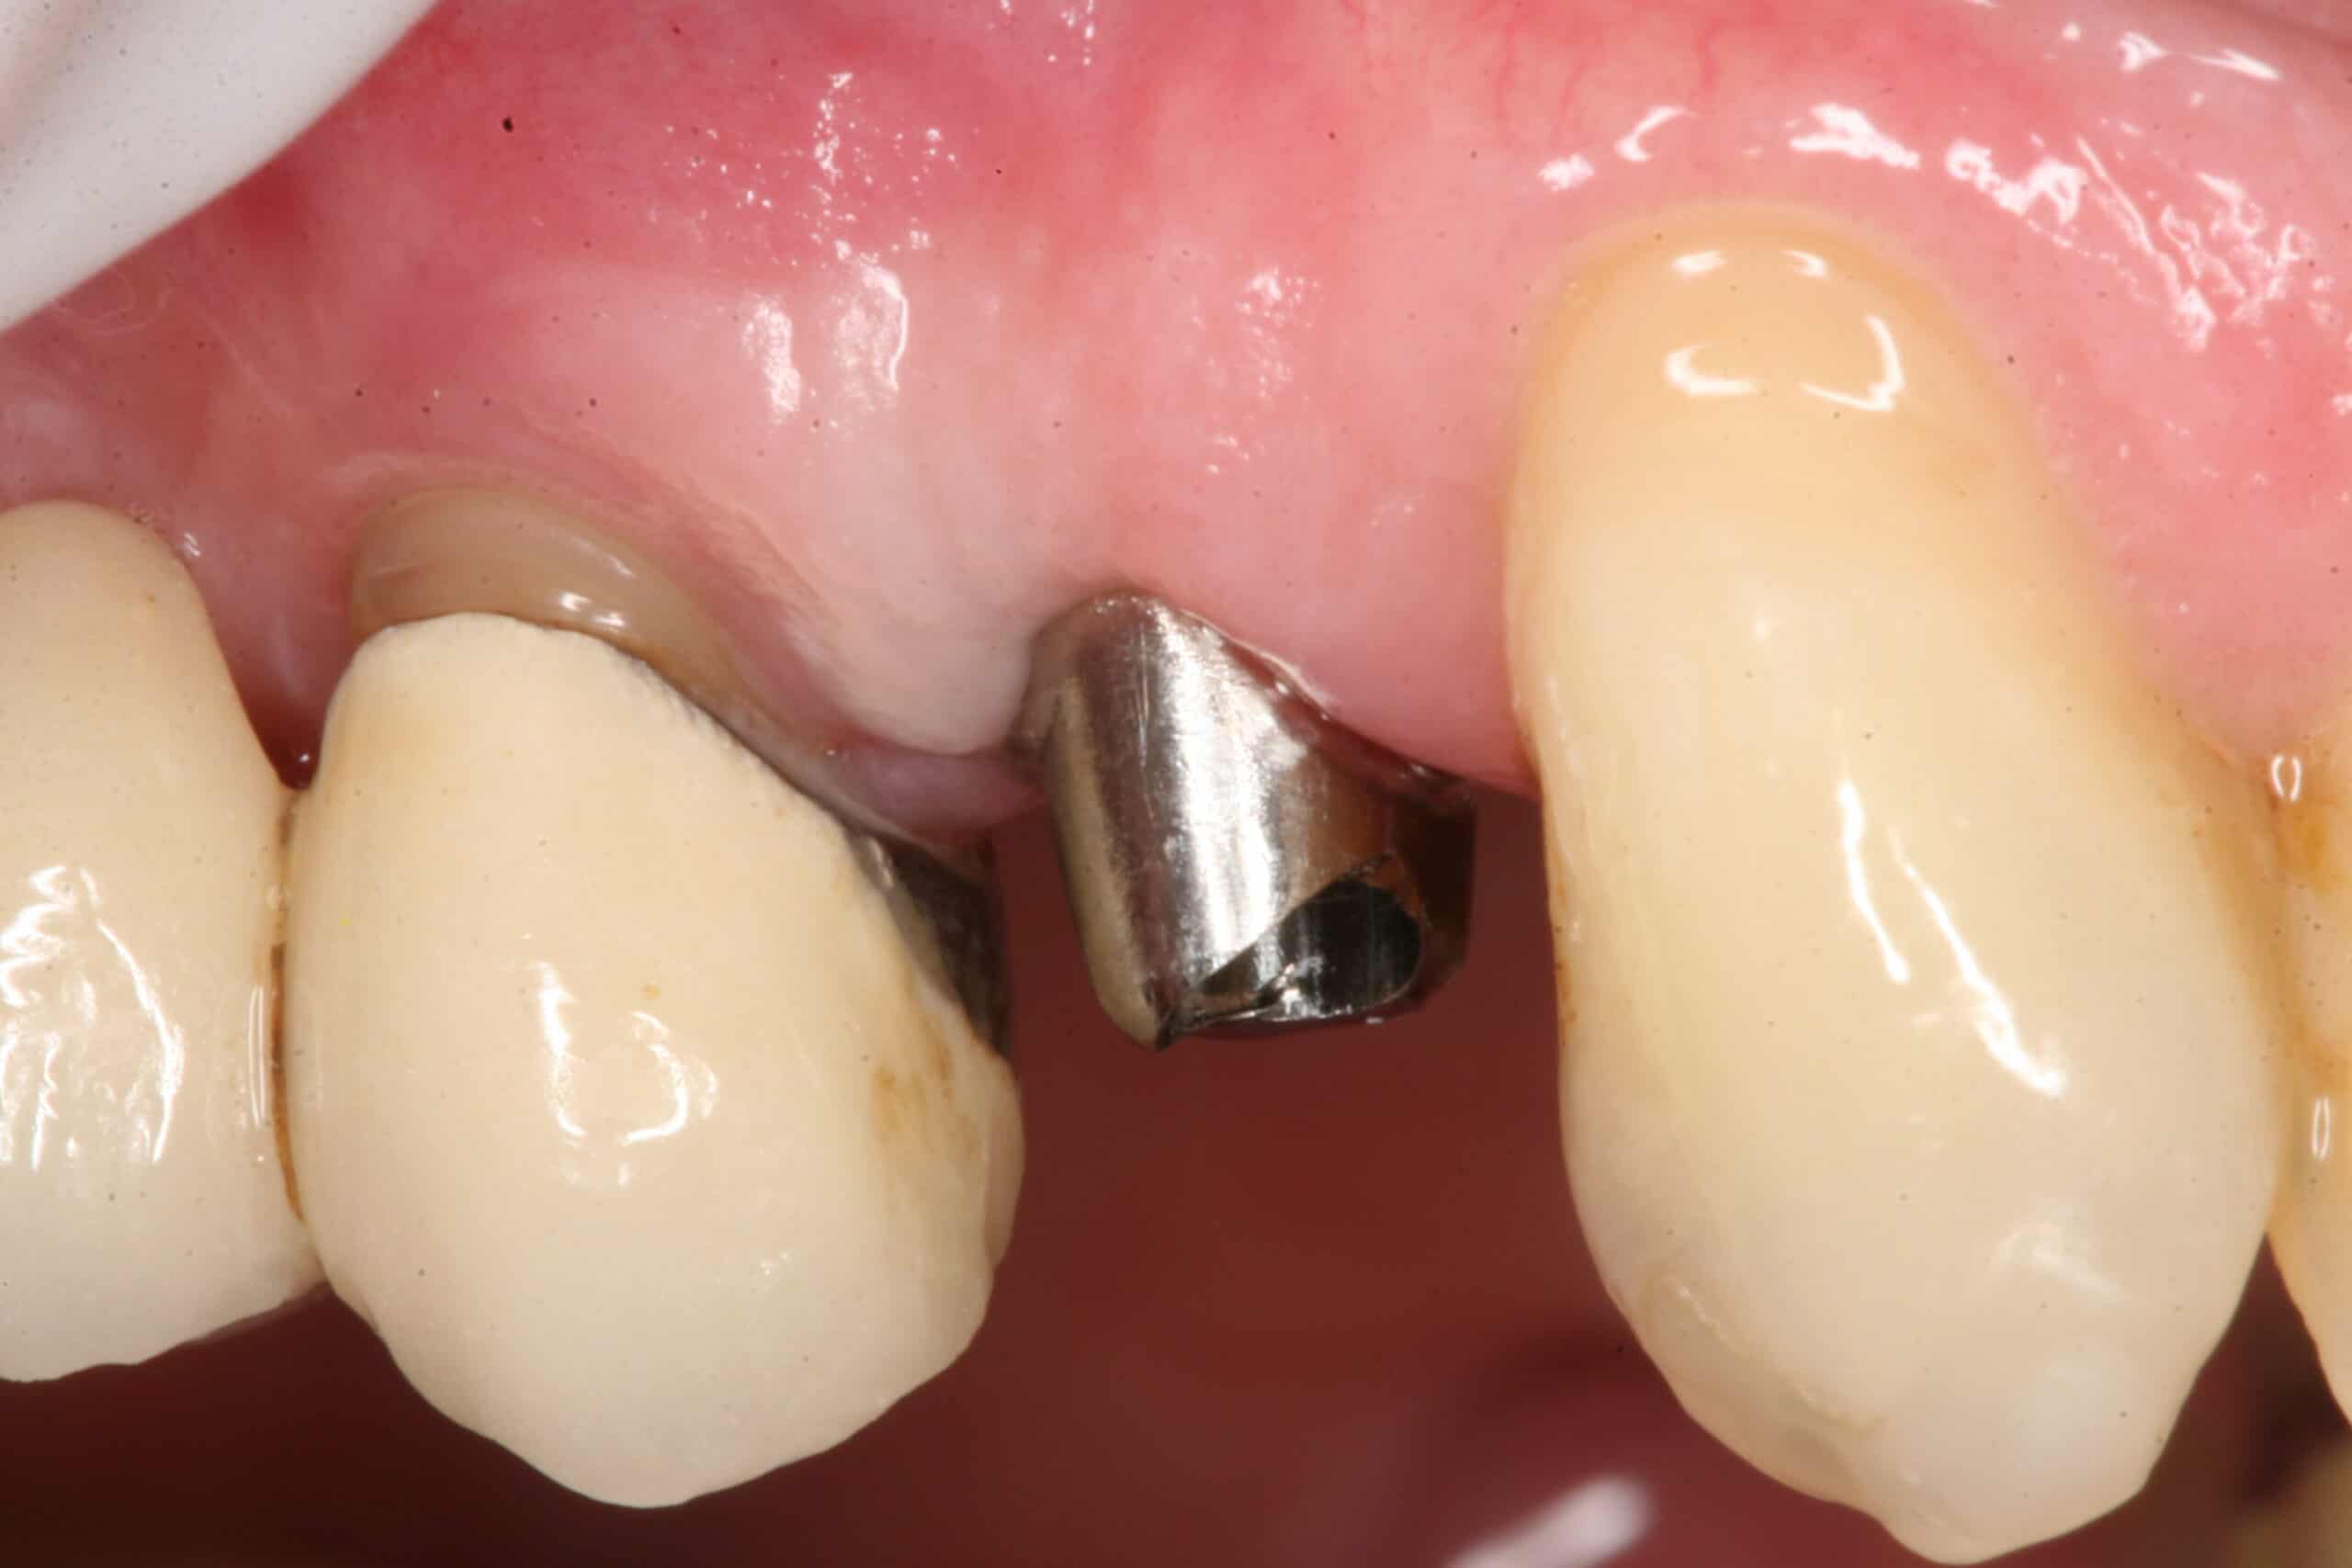
The patient did not mind that small metal collar because it never showed when she smiled. If it did bother her, a hybrid zirconium abutment with the margin a little lower would help cover it up. Still I wish I would have placed the implant deeper.

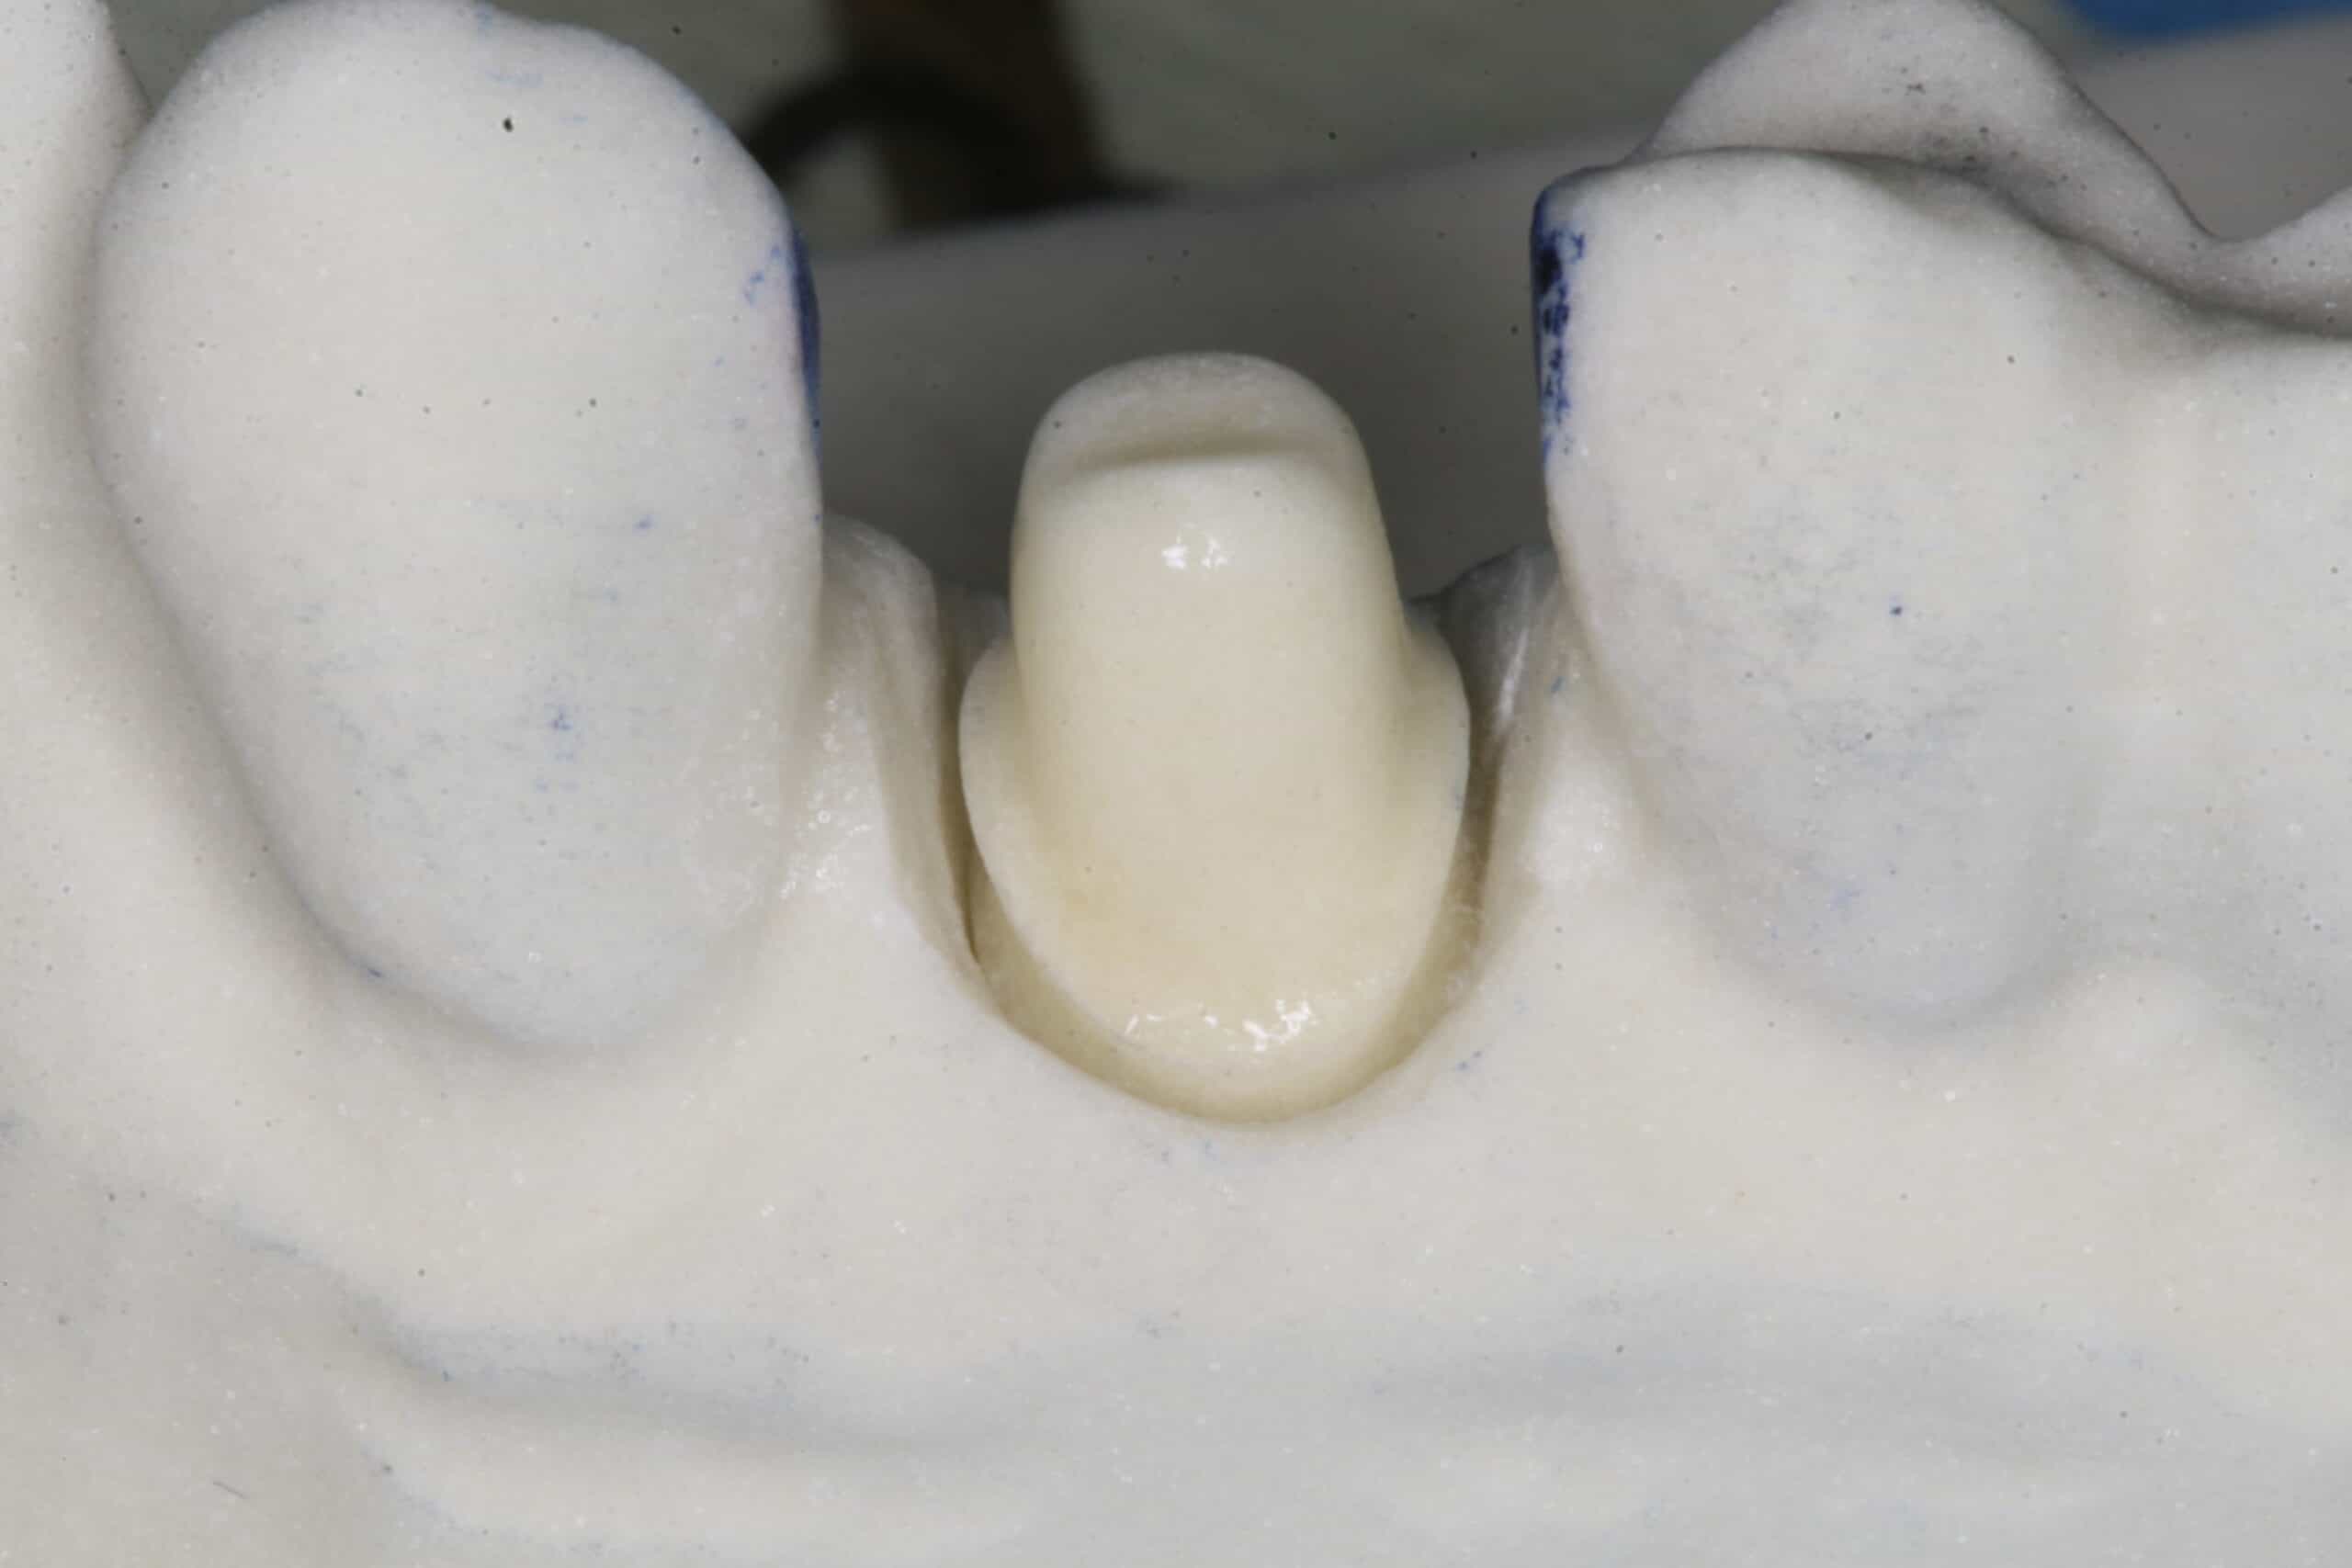
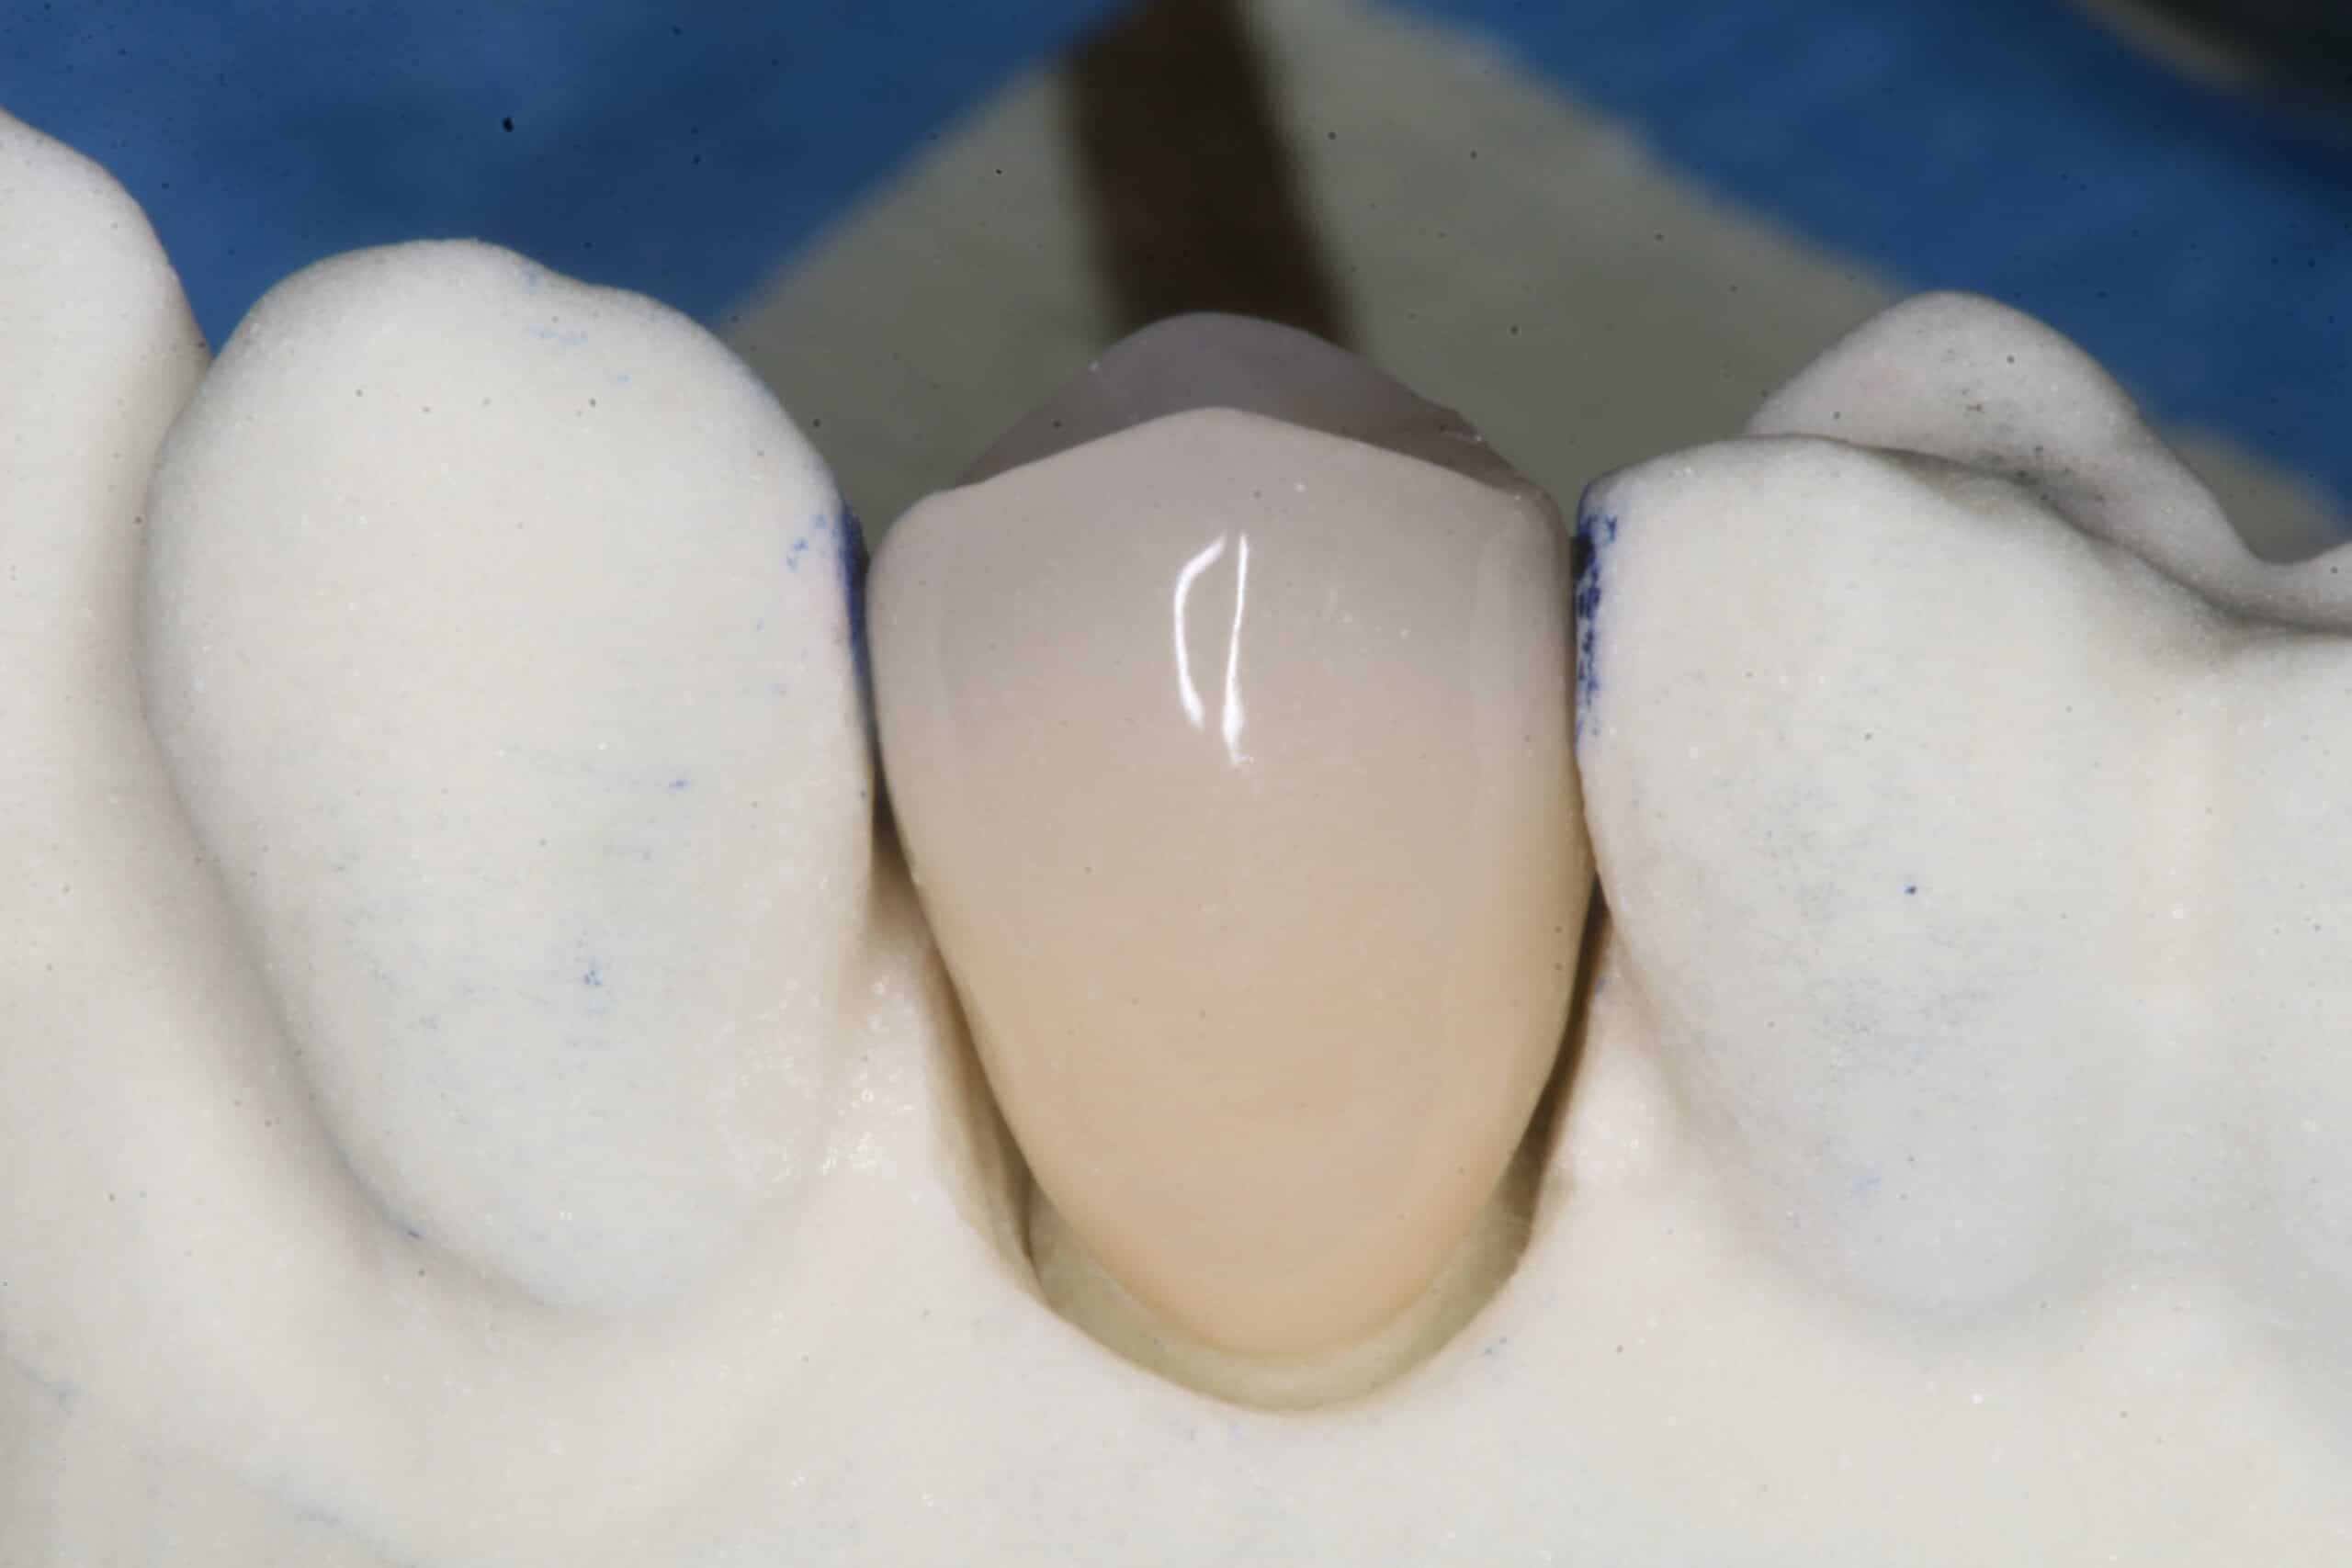
The custom abutment comes separate from the dye/model.

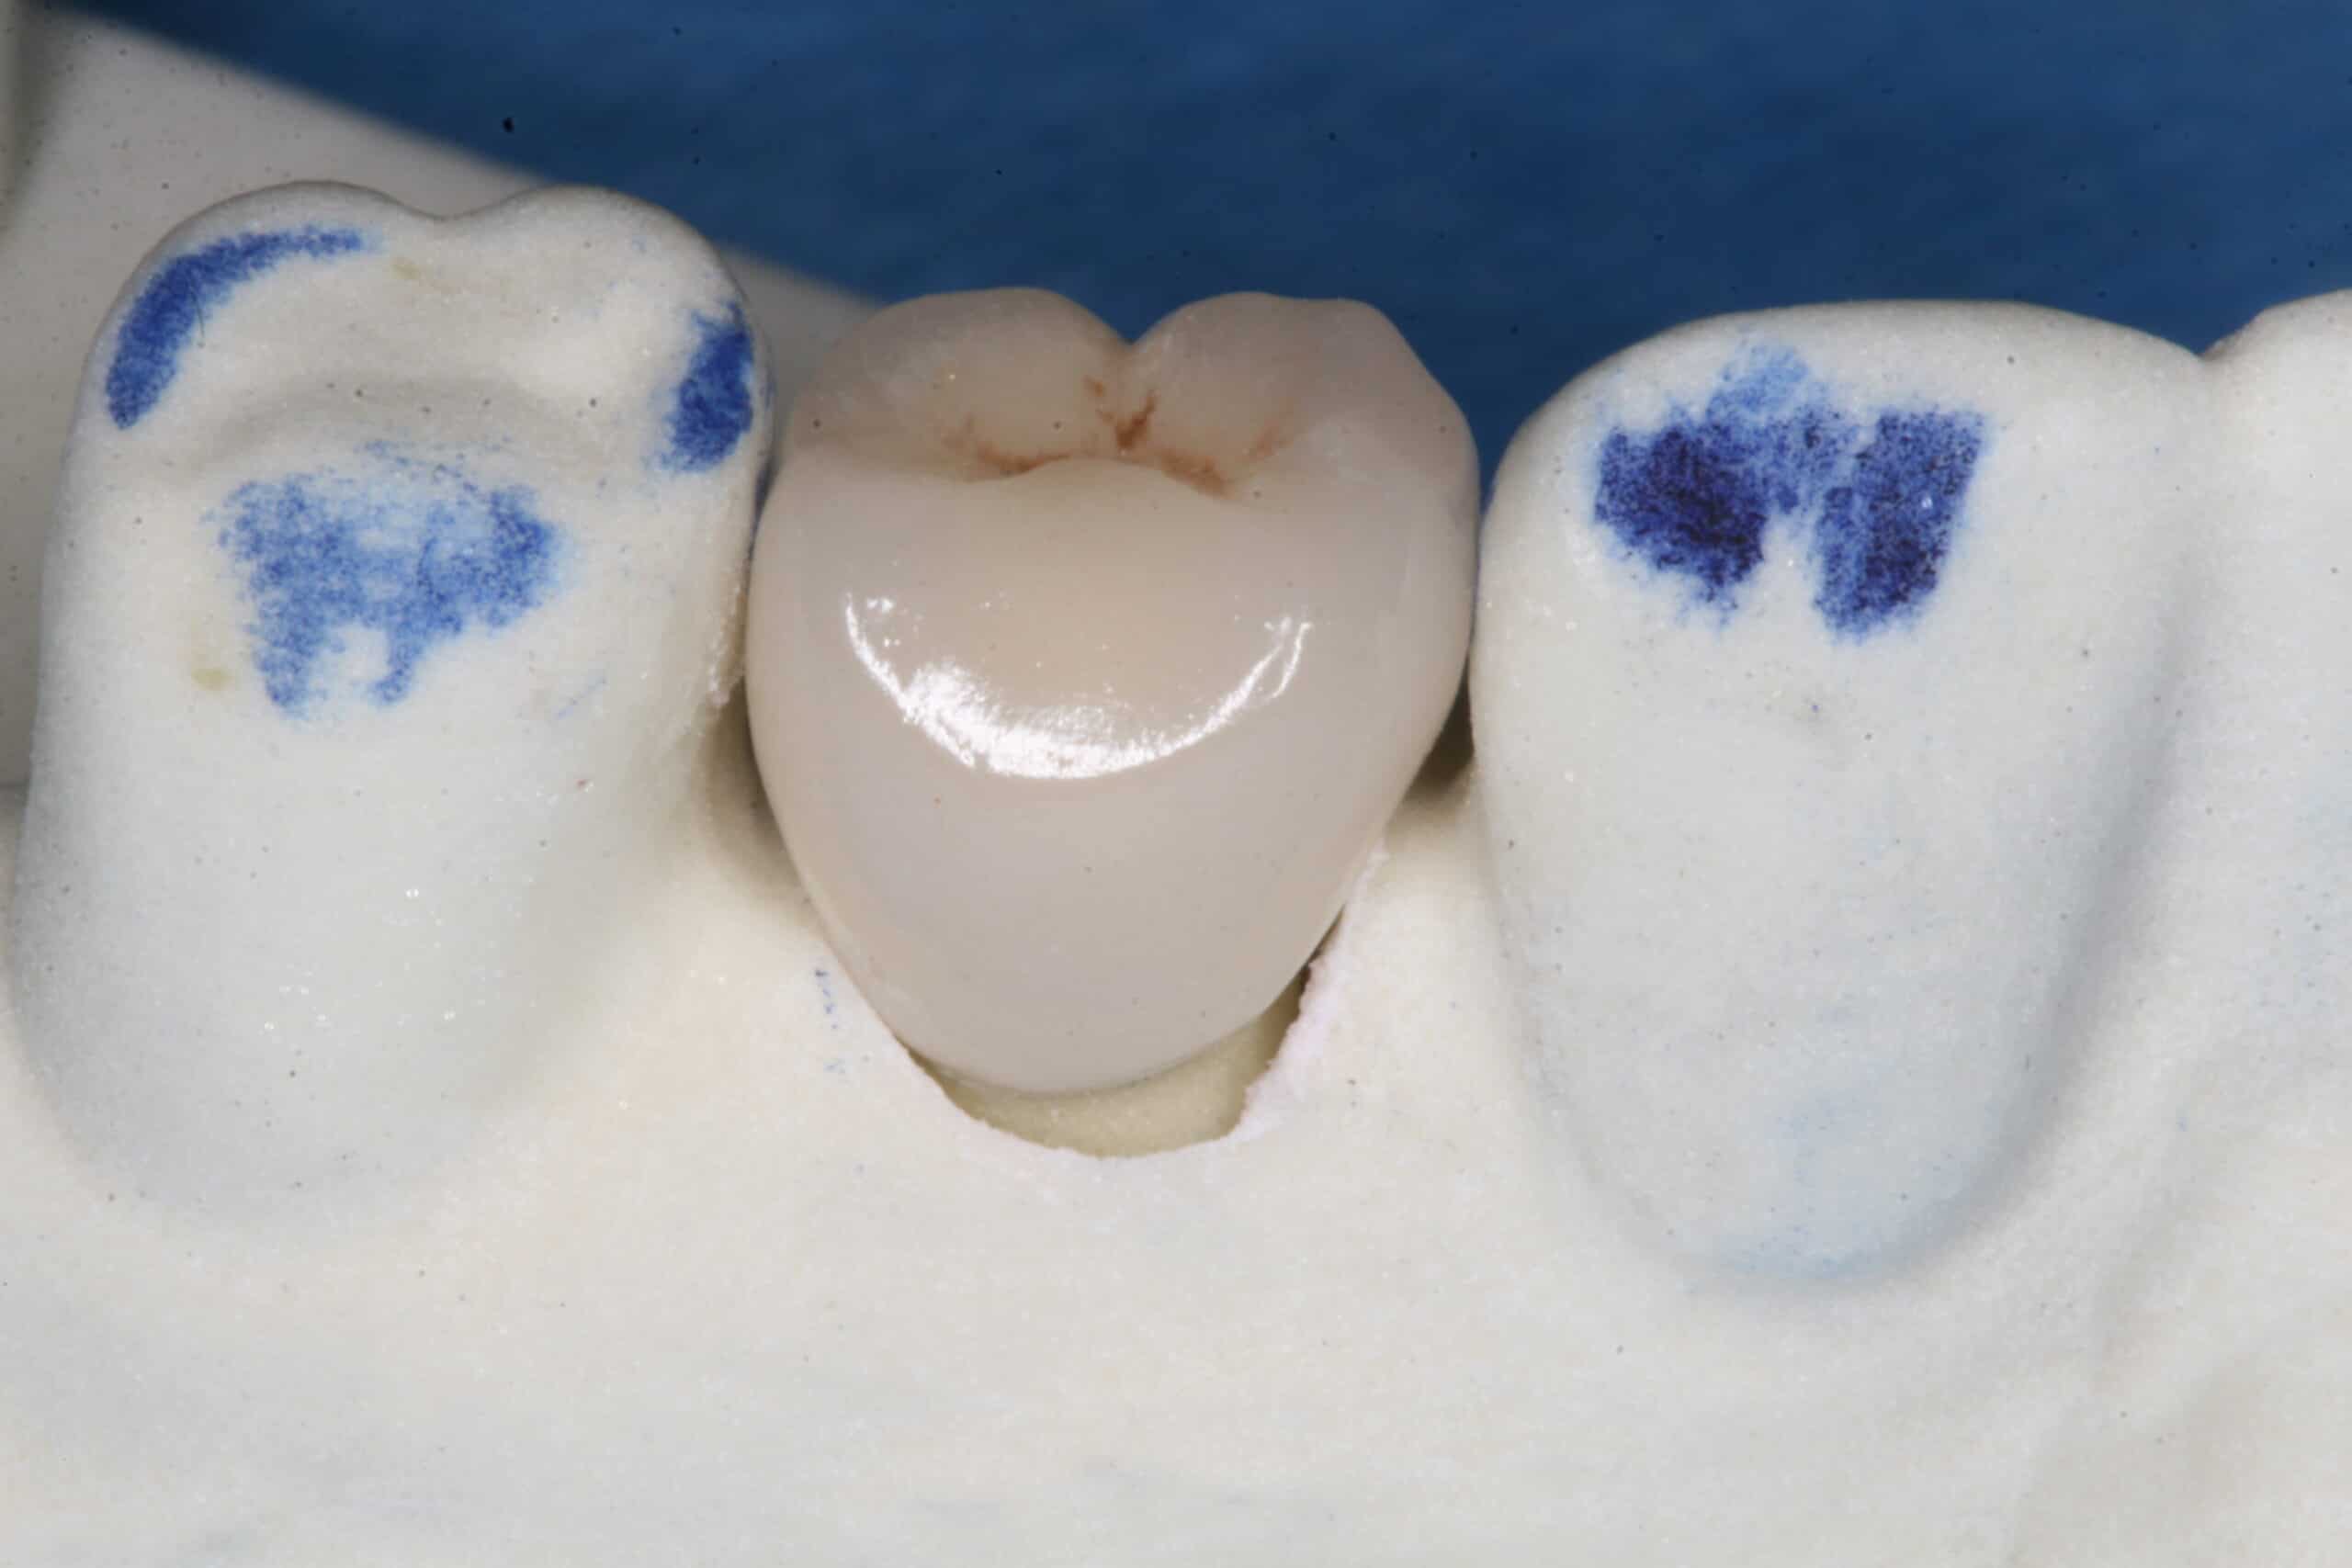
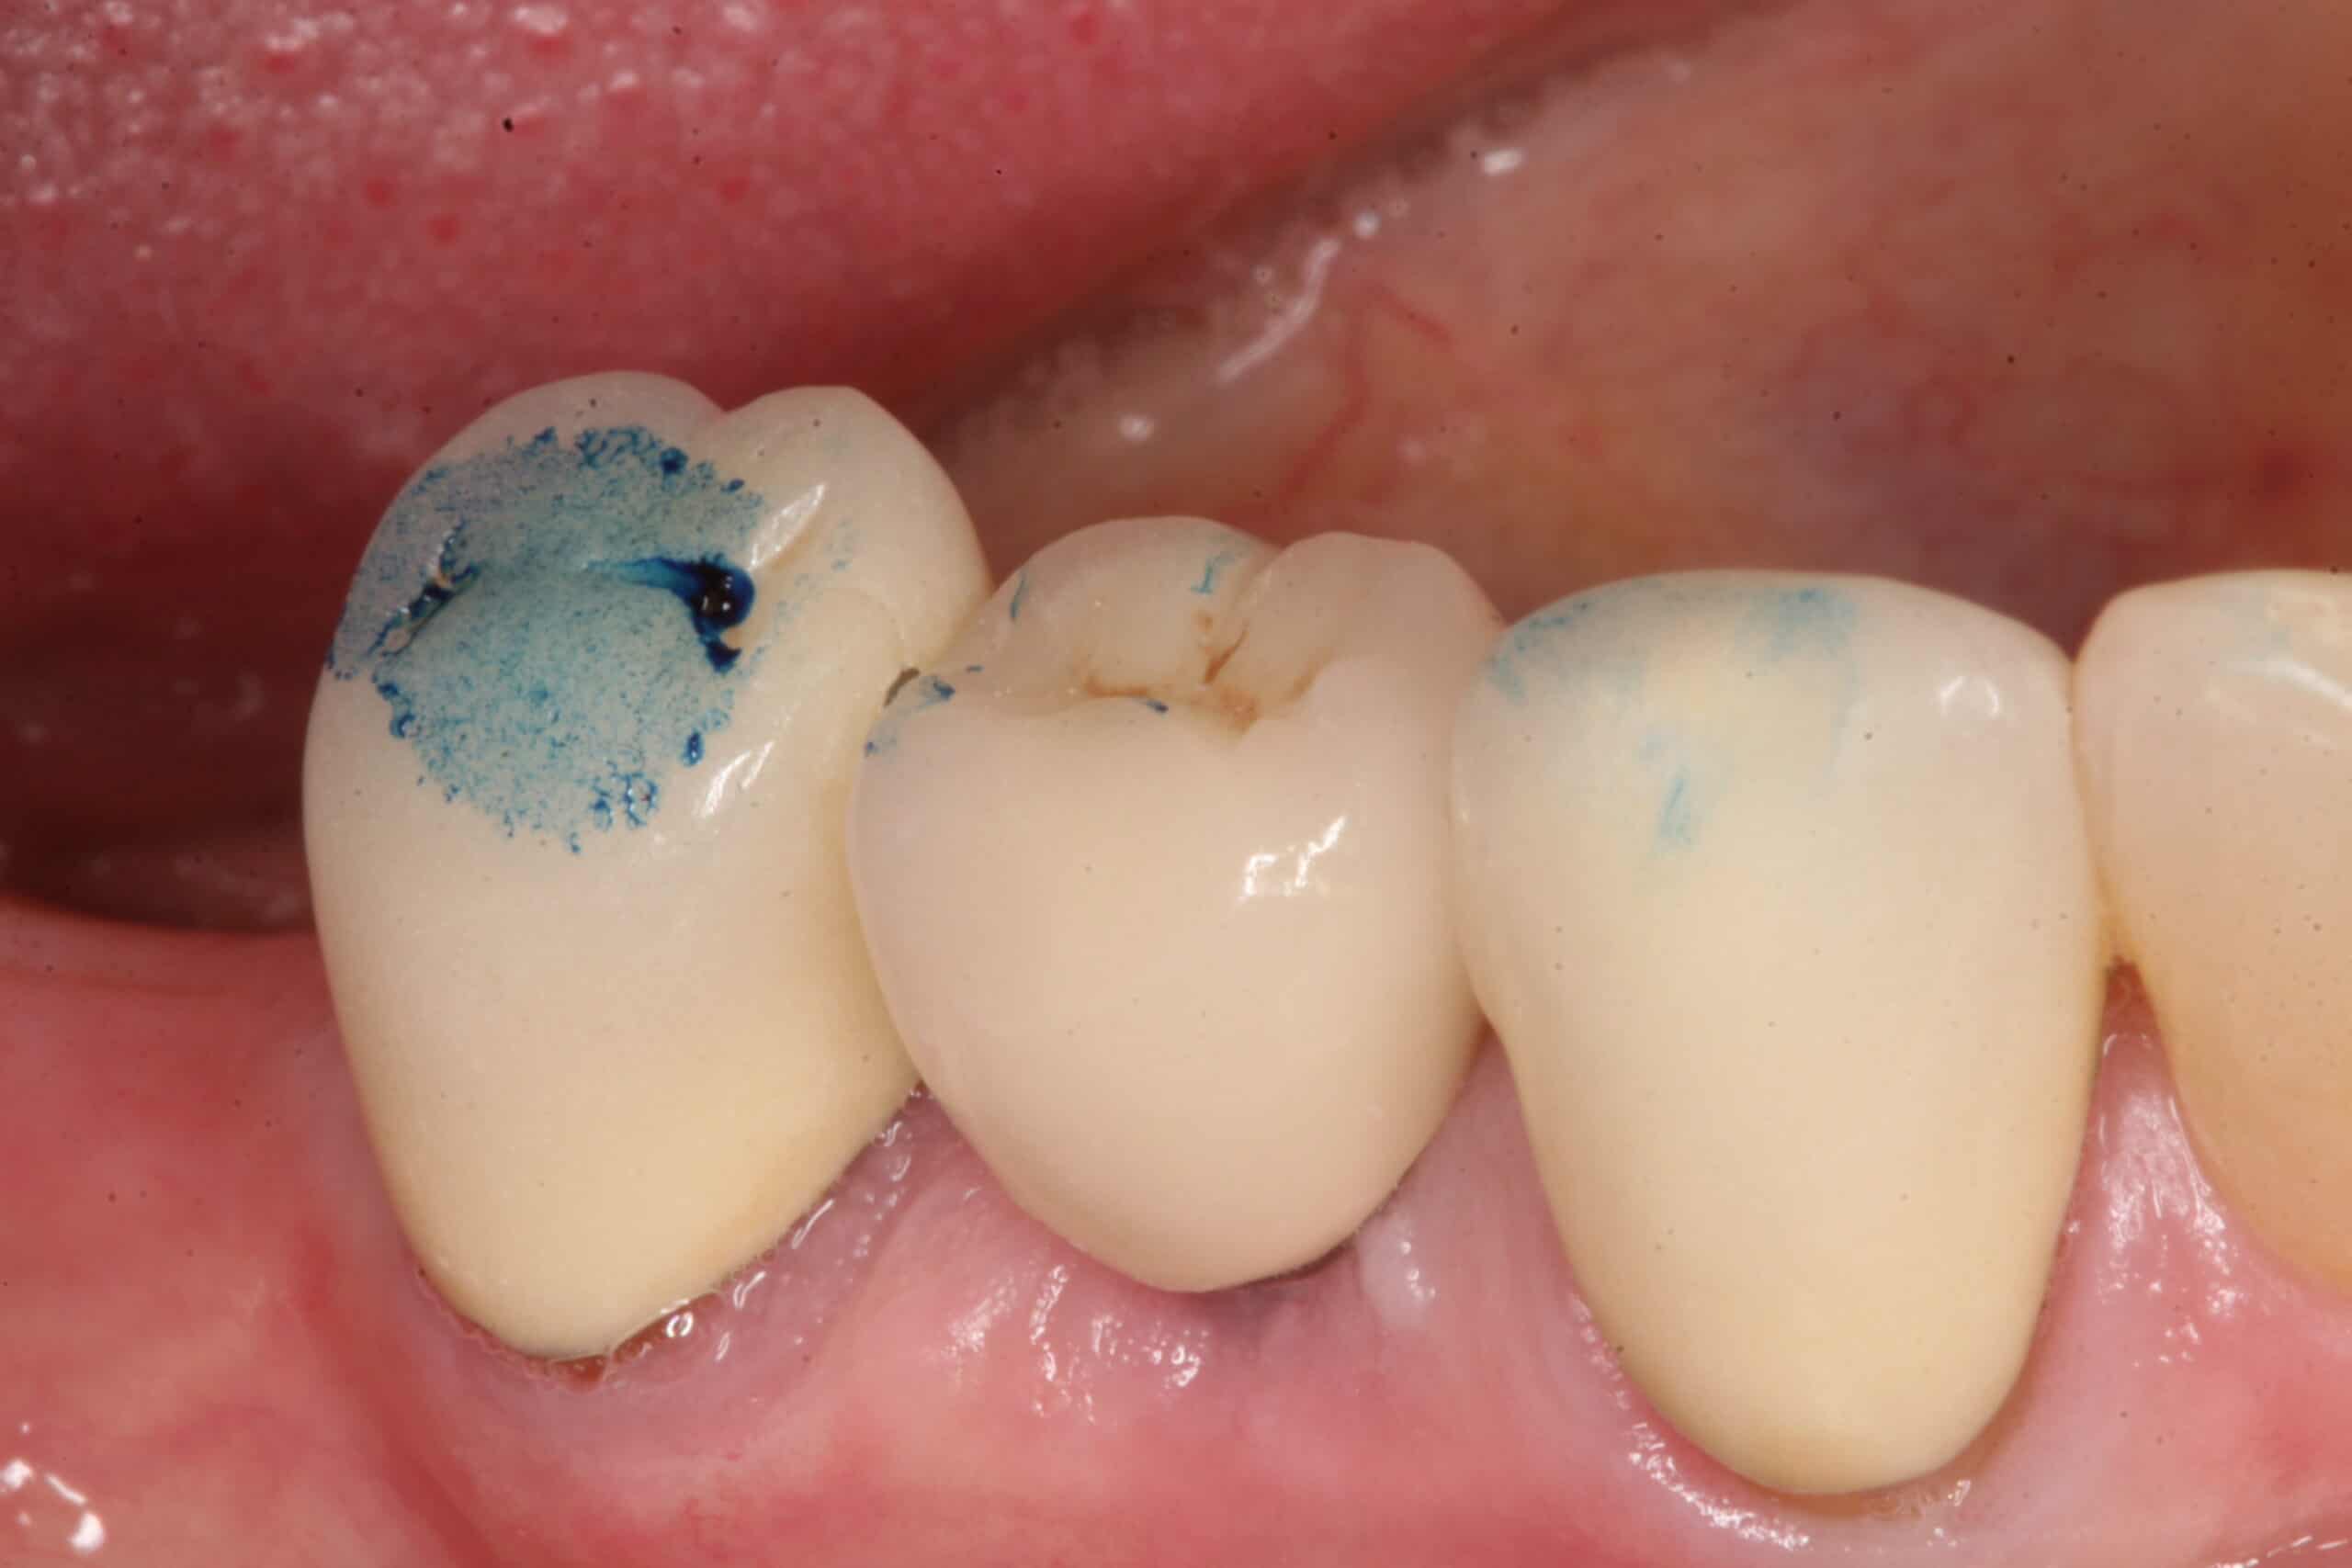

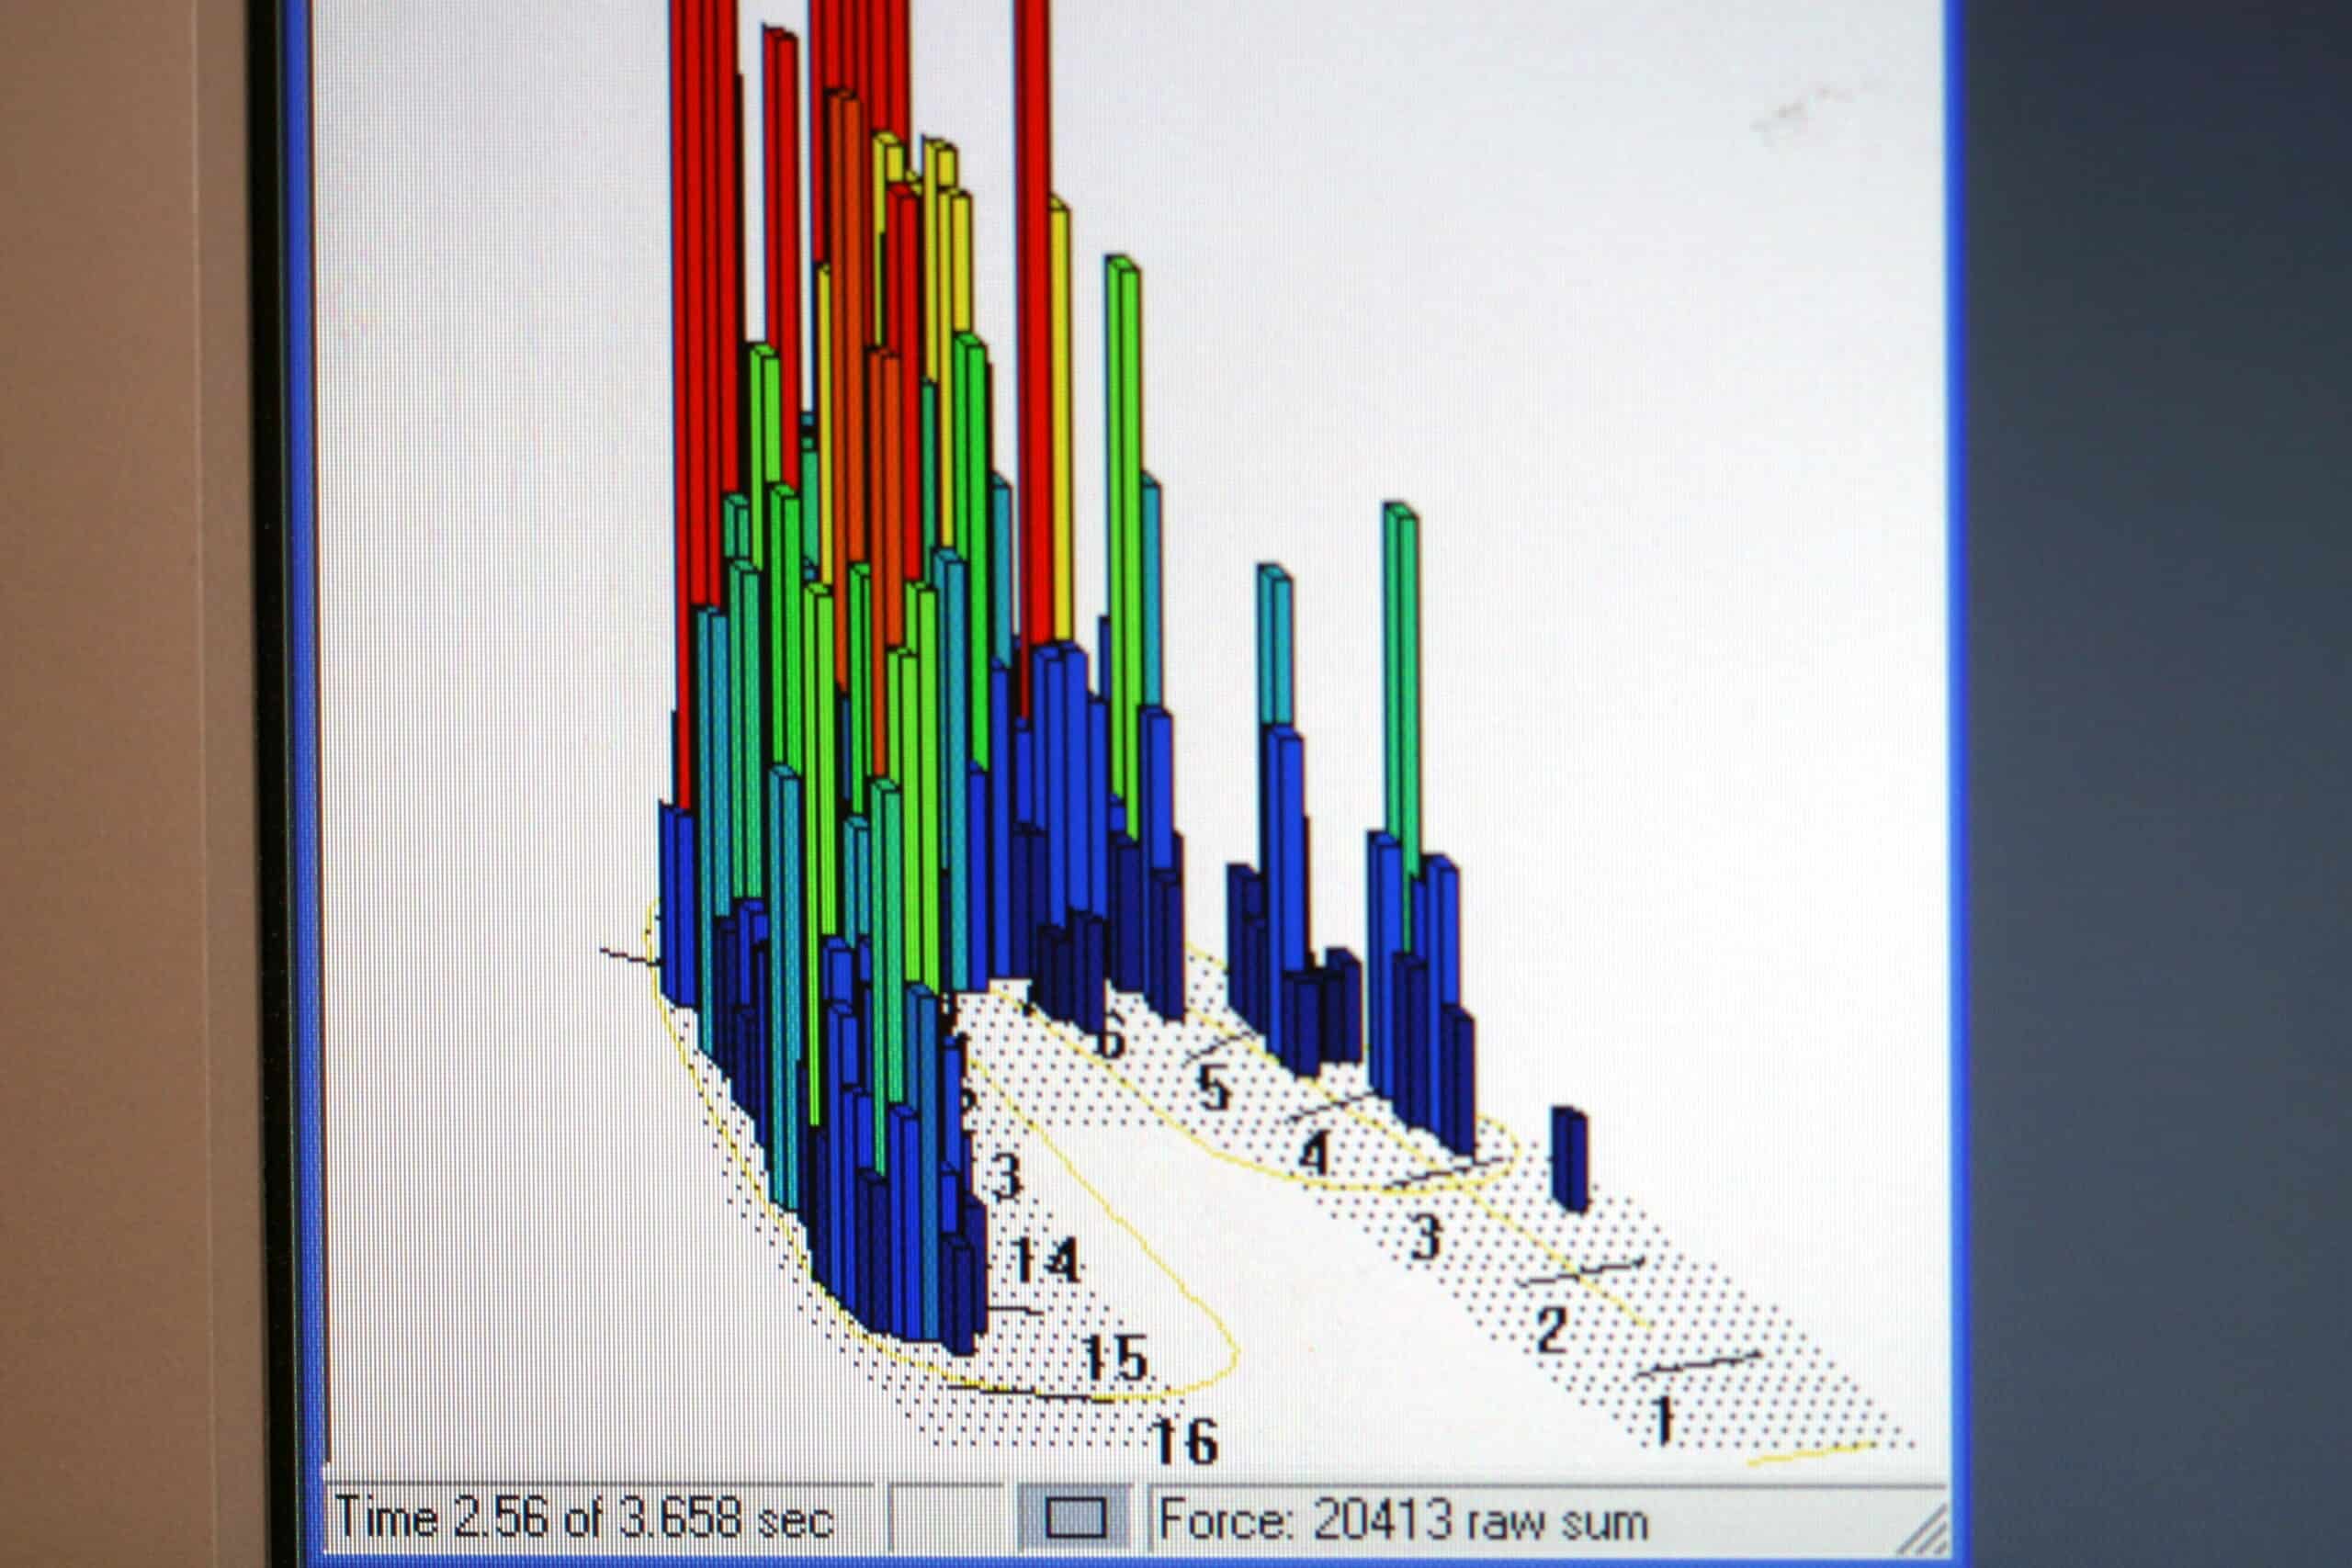
TekScan confirmed the progressive loading to protect the implant from heavy occlusal forces. This case was delivered without any crown adjustments, can’t beat that!
Case #3
64 y/o/w/f was visiting friends in Maine the week before we saw her at our office. She was very upset that she had to have an extraction by a strange dentist on her trip, and that she was missing a tooth. The dentist who extracted the tooth didn’t offer her a bone graft or immediate implant. I placed an Astra implant with a Hatch Reamer sinus lift and let it heal for 4 months.

Diode laser access to bone level implant then placed scanning jig.

X-ray verification
Raw iTero scan that is sent to Tel aviv via the internet.
This is what you see when the case is finished from Tel aviv.
Case is ready for delivery.
The custom abutments margin went under the facial tissue. I told the lab to push the gingival where it would look good on the model and I would laser the gingiva into place. I find the gingiva responds well to being pushed around like this.
One problem I found with this technique is that you have to look really hard at the model so to get the custom abutment screwed in at the right rotation orientation.
With the iTero model, what you see is what you get. If it is tight on the model, it will be tight in the mouth. Place the custom abutment in the mouth and then slide the crown on it to see if it is the right orientation before getting an x-ray verification or torquing it into place. This crown was delivered with only a slight adjustment on the distal contact that I did on the model because it fit too tight on the model (the lab man left it too tight because it is hard to get the feel for these iTero models unless you are actually working in the mouth with them).

The custom abutment was verified as all the way seated with a CBCT, and torqued to 25 Ncm. I took a CBCT because I didn’t have one on this case, and wanted to see how the sinus lifted with the Hatch Reamer technique. I use a Picasso diode laser to expose the margins on the custom abutment in a downward bevel, scrubbed tissue with regular strength H2O2, cemented the crown, and the patient loved it!

1 week post-op

TekScan at 50% maximum force showing #5 is just beginning to come in contact
TekScan at 97% maximum force. This patient has other issues with her occlusion but that is for another blog.
Case #4
This is a 32 y/o/h/f with a failing endodontically treated tooth #13. Placed an Astra Tech 5.0 X 15mm implant without sinus lift. Exposed the the implant and used a scanning jig to take an iTero digital impression.
This scanning jig barely missed #14 when placed. To scan the interproximal contacts simply remove the scanning jig after taking a scan of the scanning jig’s occlusal, facial, and lingual. Place your selected healing collar and complete the rest of the scans and the bite.
She is treatment planned to have treatment on #14 and #12, but she wants that space filled first!
X-ray verification of scanning jig
Raw iTero scan that is sent to Tel aviv via the internet.
More of this case will be presented here as it is finished…
Case #5
53 y/o/w/f with a non-restorable #11 that was extracted and bone grafted 6 month previously.
Informed Consent, Reviewed health history, Sterile Field Established, Skin/Mouth Prep-betadine & peridex, Elevated full thickness flap, sterile saline, Astra OsseoSpeed 3.5S 11mm in #11 area, Type 3 bone, bone level implant cover screw, 5.0 black silk suture, Post-op PA, Oral Hygiene Instructions, Topical anesthetic 20% lido/4% Tetra/2% phenylephrine with 1 carpule (36mg/1.7ml) of 2% Mepivacaine/1:20,000 NeoCobefrin infiltration, 1 carpule (68mg/1.7ml) 4% Articaine w/1:100000 epi infiltration, Pt informed not to eat food, bite or chew on lips or tongue while anesthetic is still working. Treatment was tolerated well. Next Visit: Suture removal in 1 week
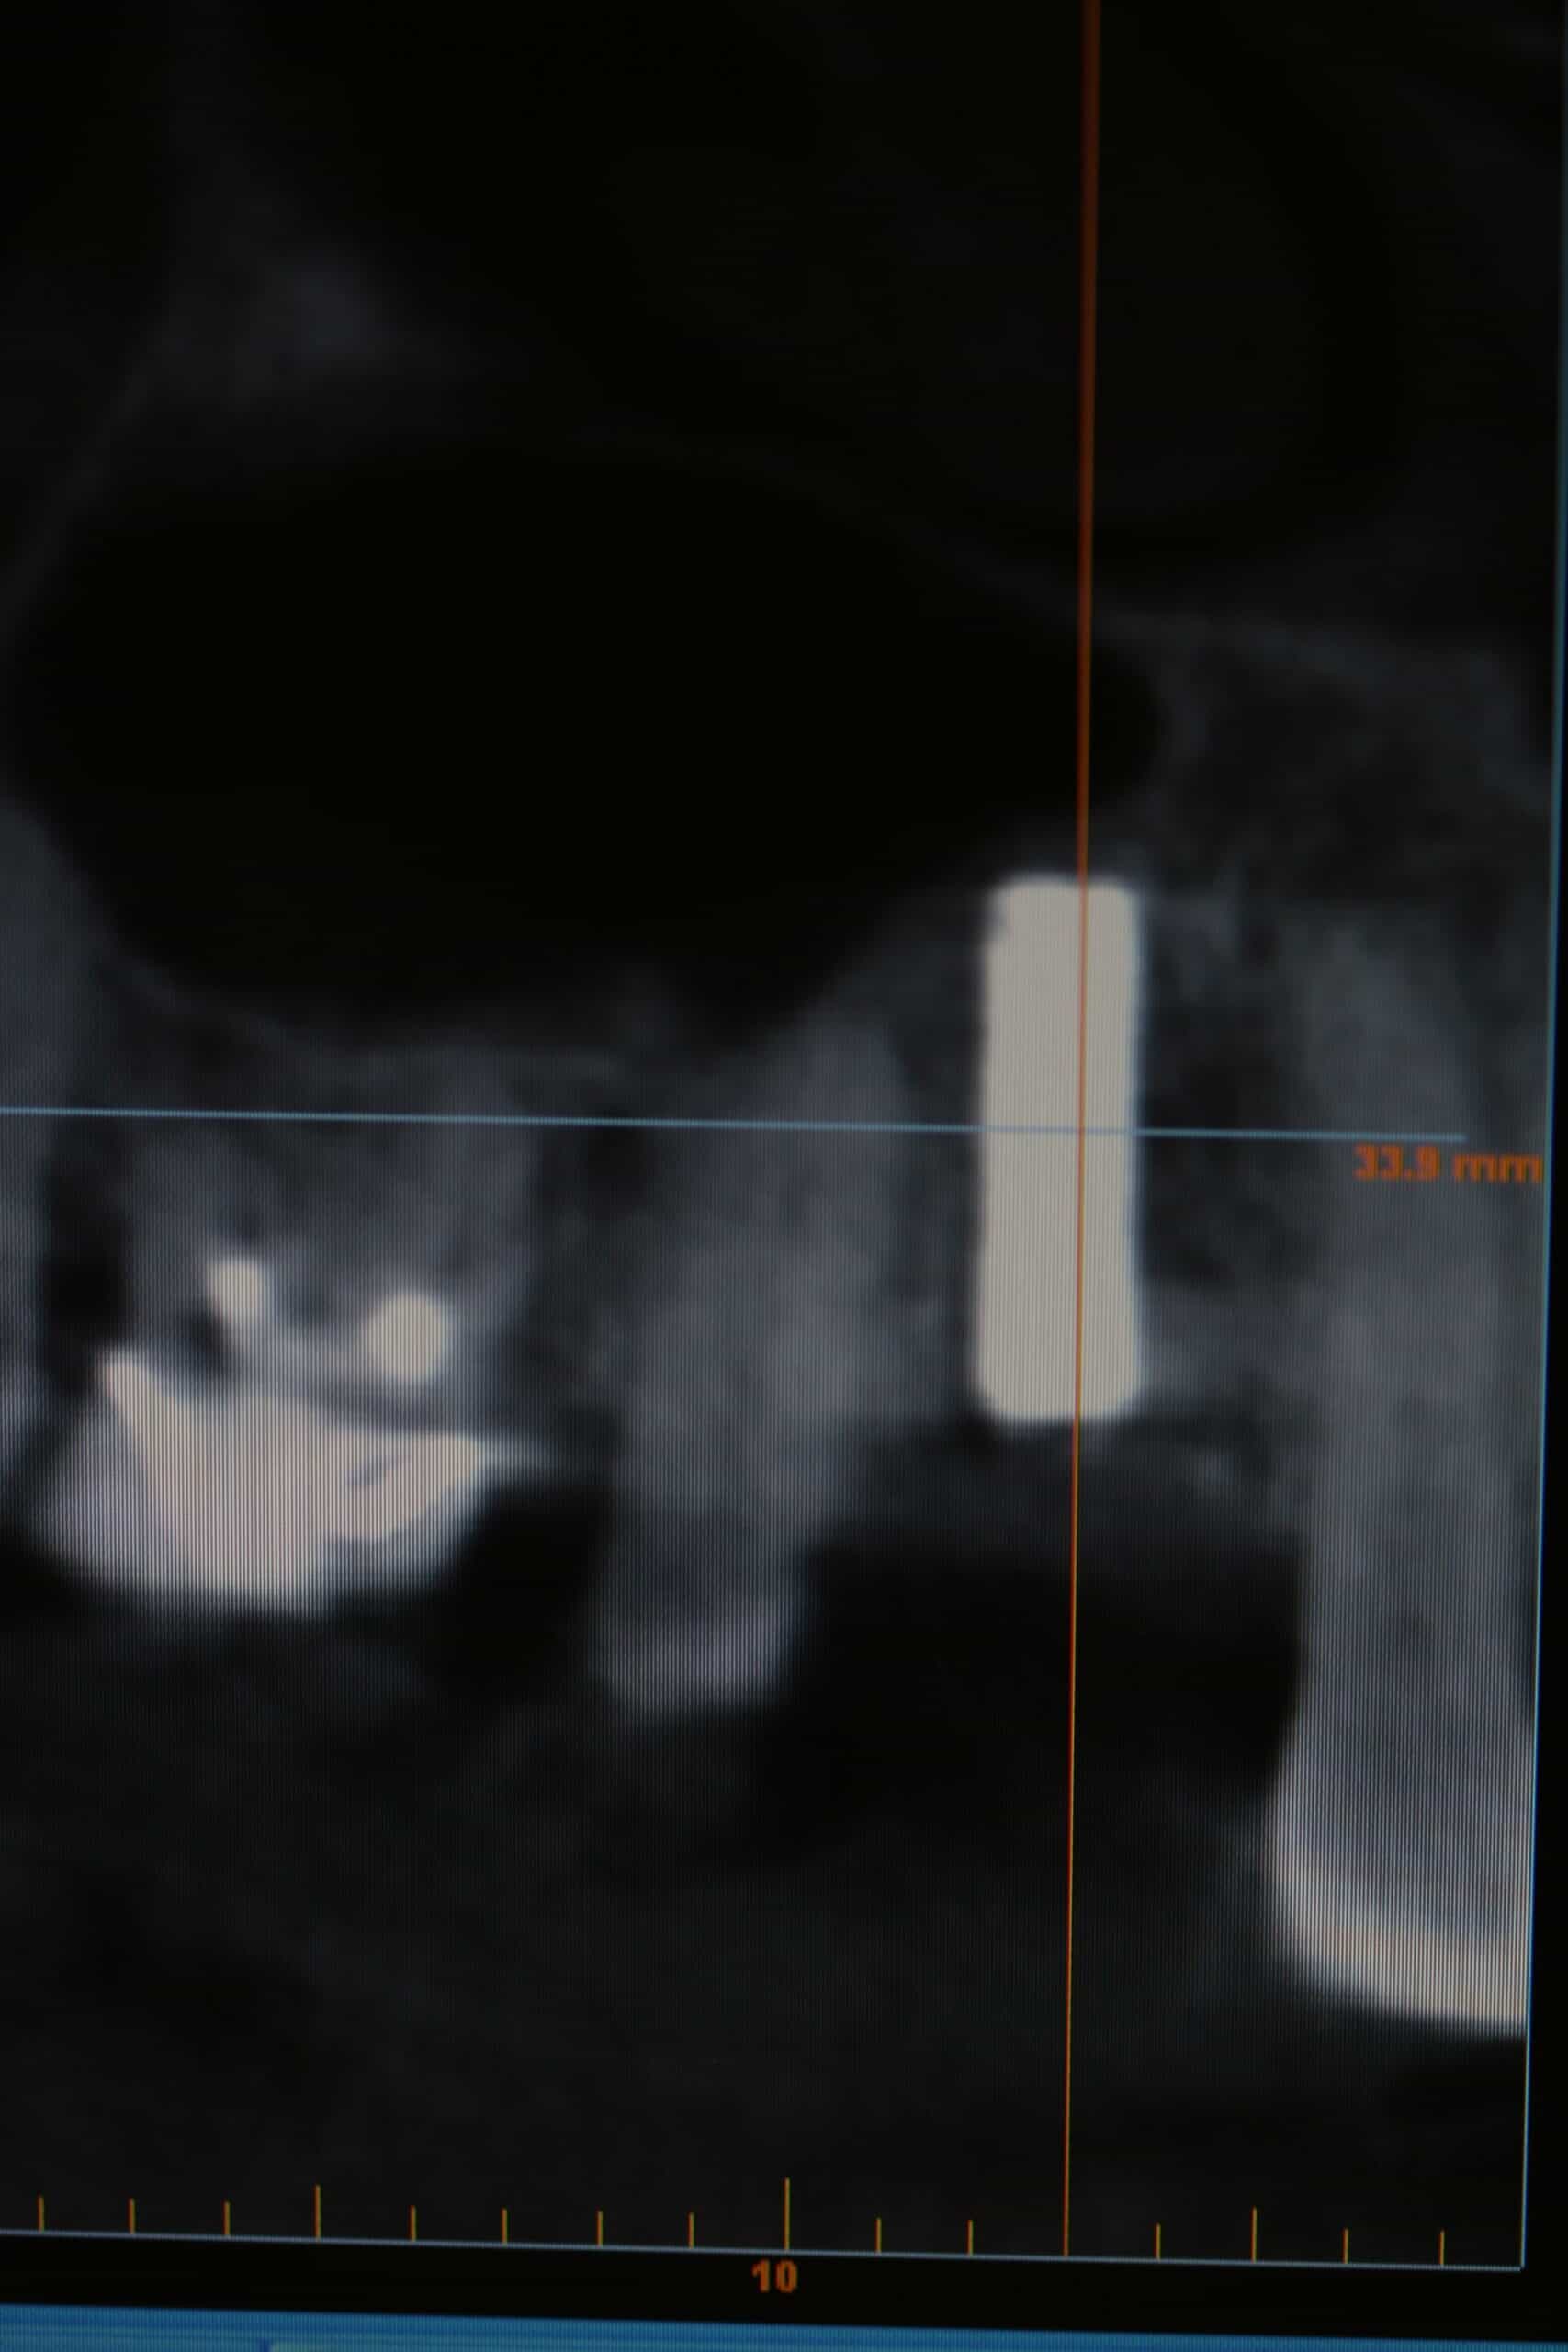
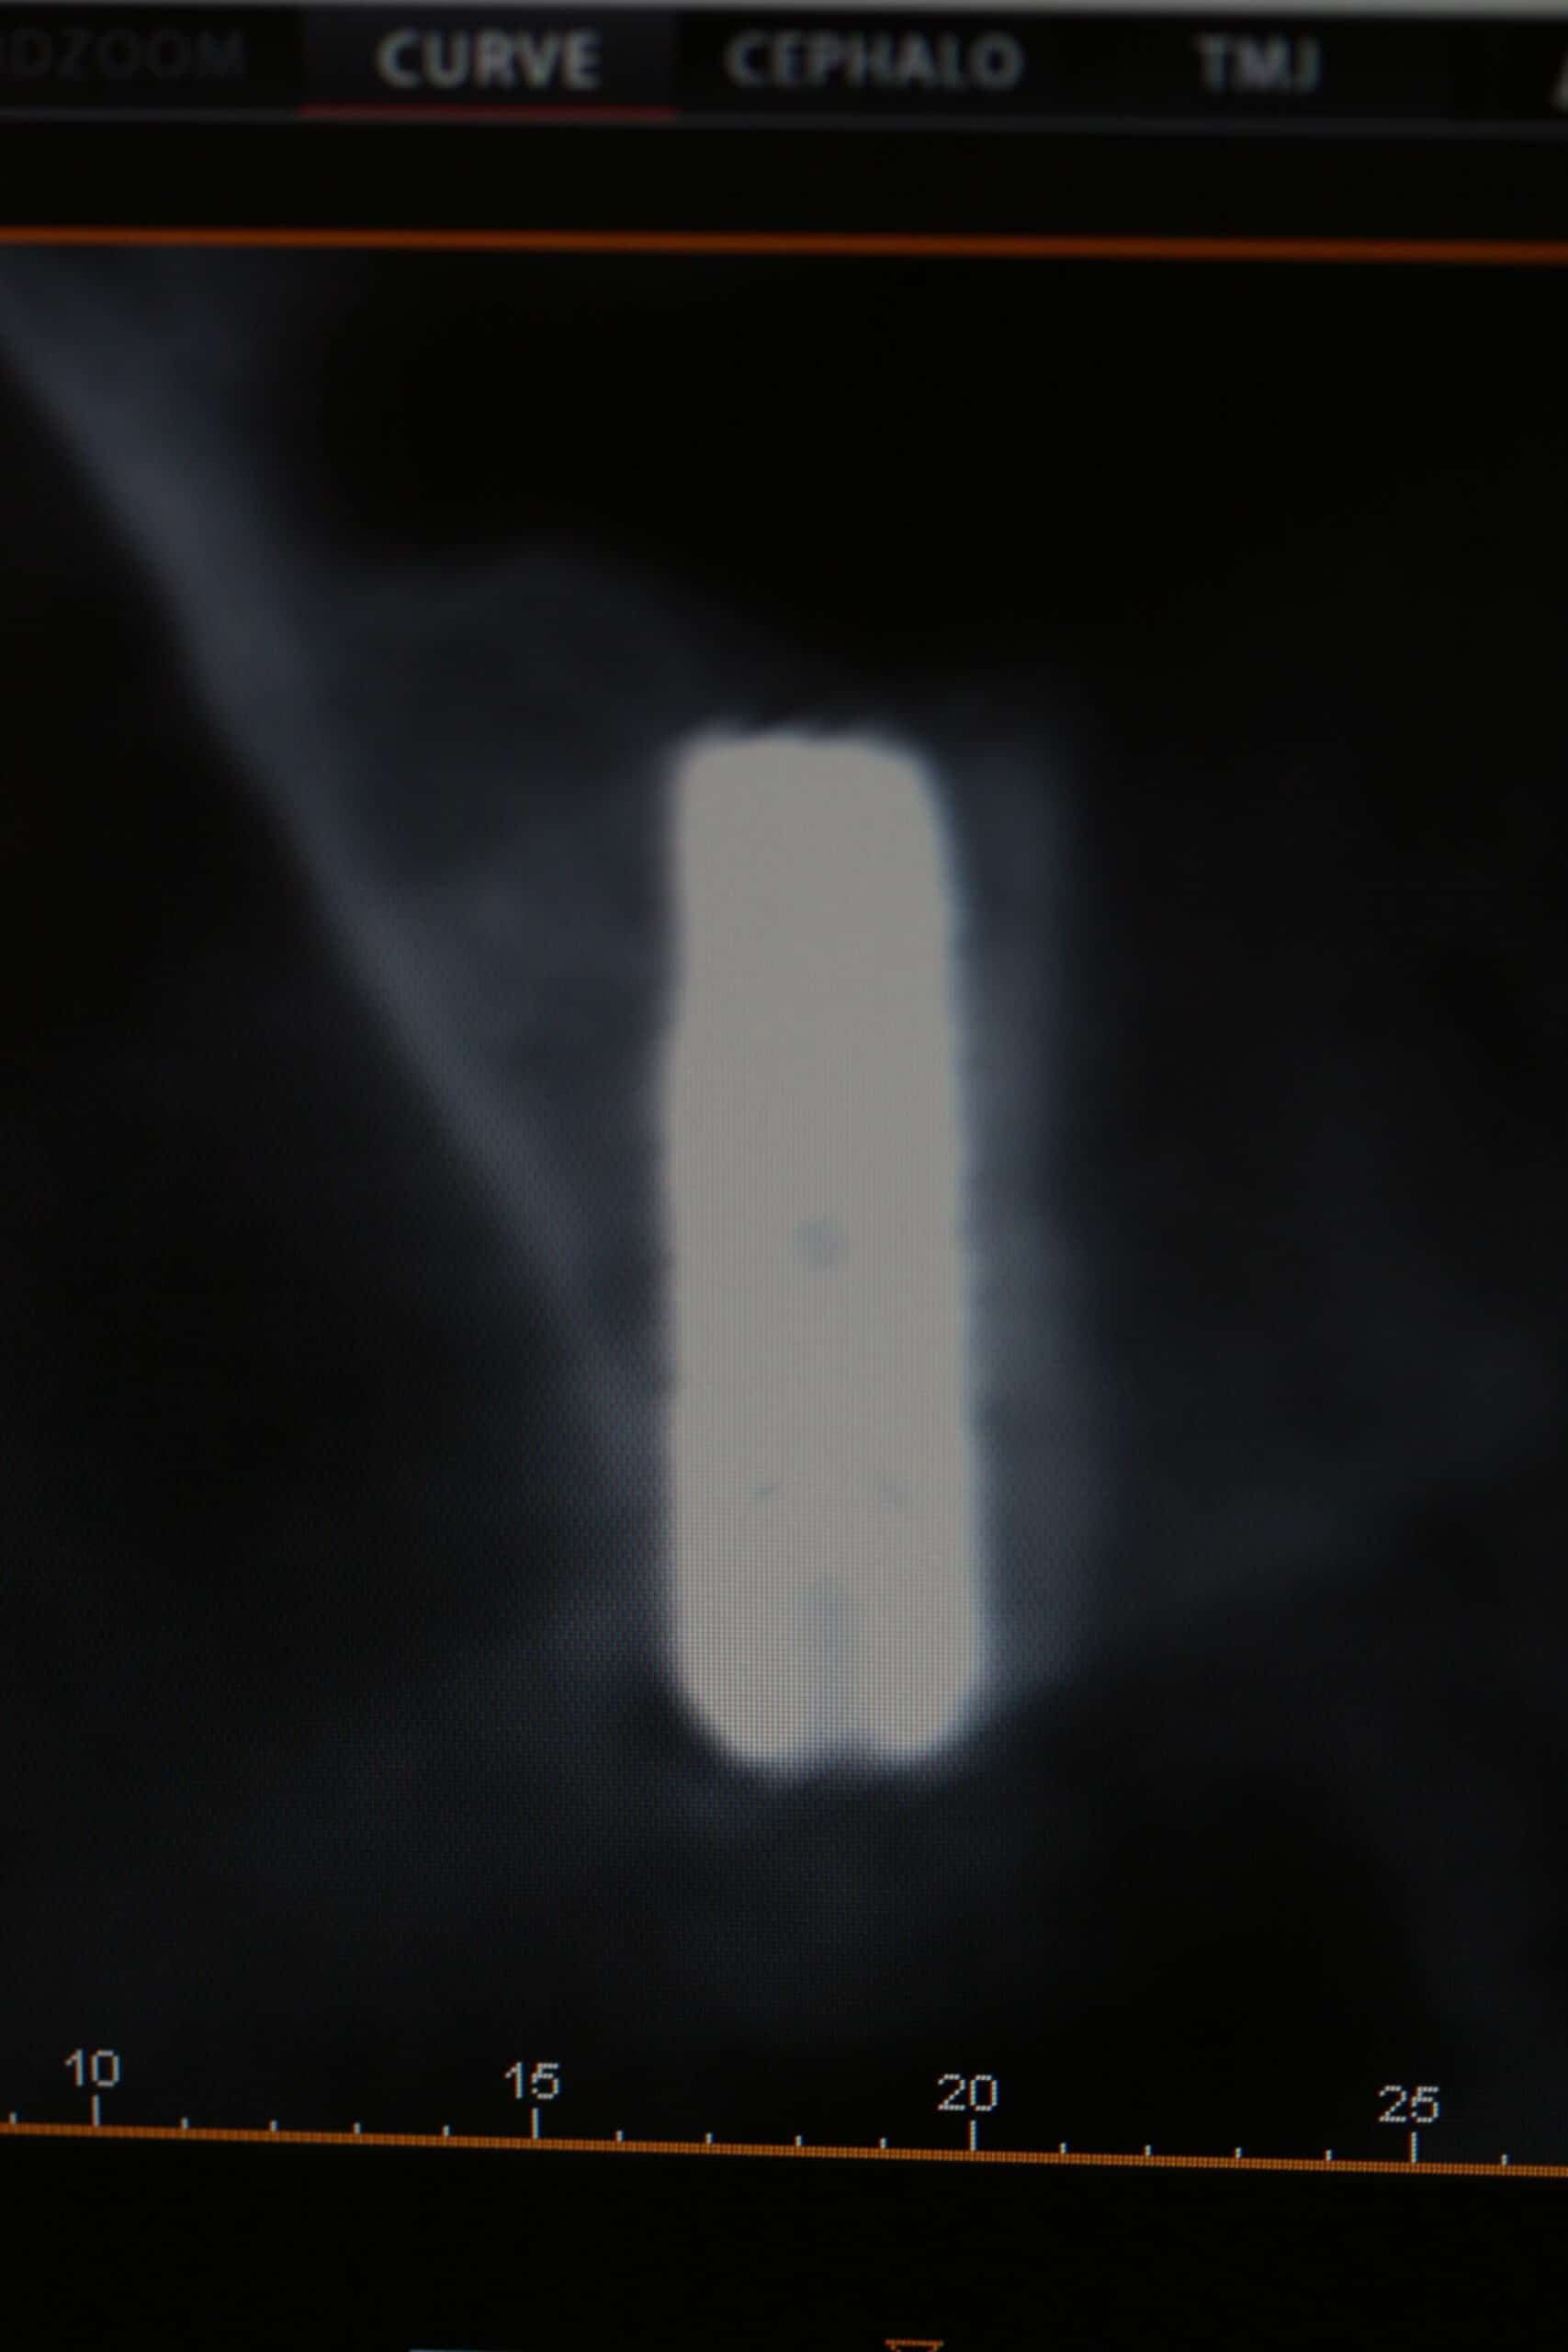
CBCT of #11 ready to restore.
Reviewed health history, Uncovered implant with diode laser w/ eye protection, removed healing cap, placed scanning jig, implant sounded good, x-ray verification, Cadent Itero digital impression, Virtual bite, 5 Axis Dental ON, Canada, shade C1, healing collar Astra 3.5/4.0 4.5-4mm, adjusted F/ denture, Oral Hygiene Instructions, Topical anesthetic 20% lido/4% Tetra/2% phenylephrine with 1 carpule (68mg/1.7ml) of 4% Articaine w/1:100000 epi (Onset/ 2 pain rating), infiltration, Pt informed not to eat food, bite or chew on lips or tongue while anesthetic is still working. Next Visit: place CAD/CAM, Cem crown
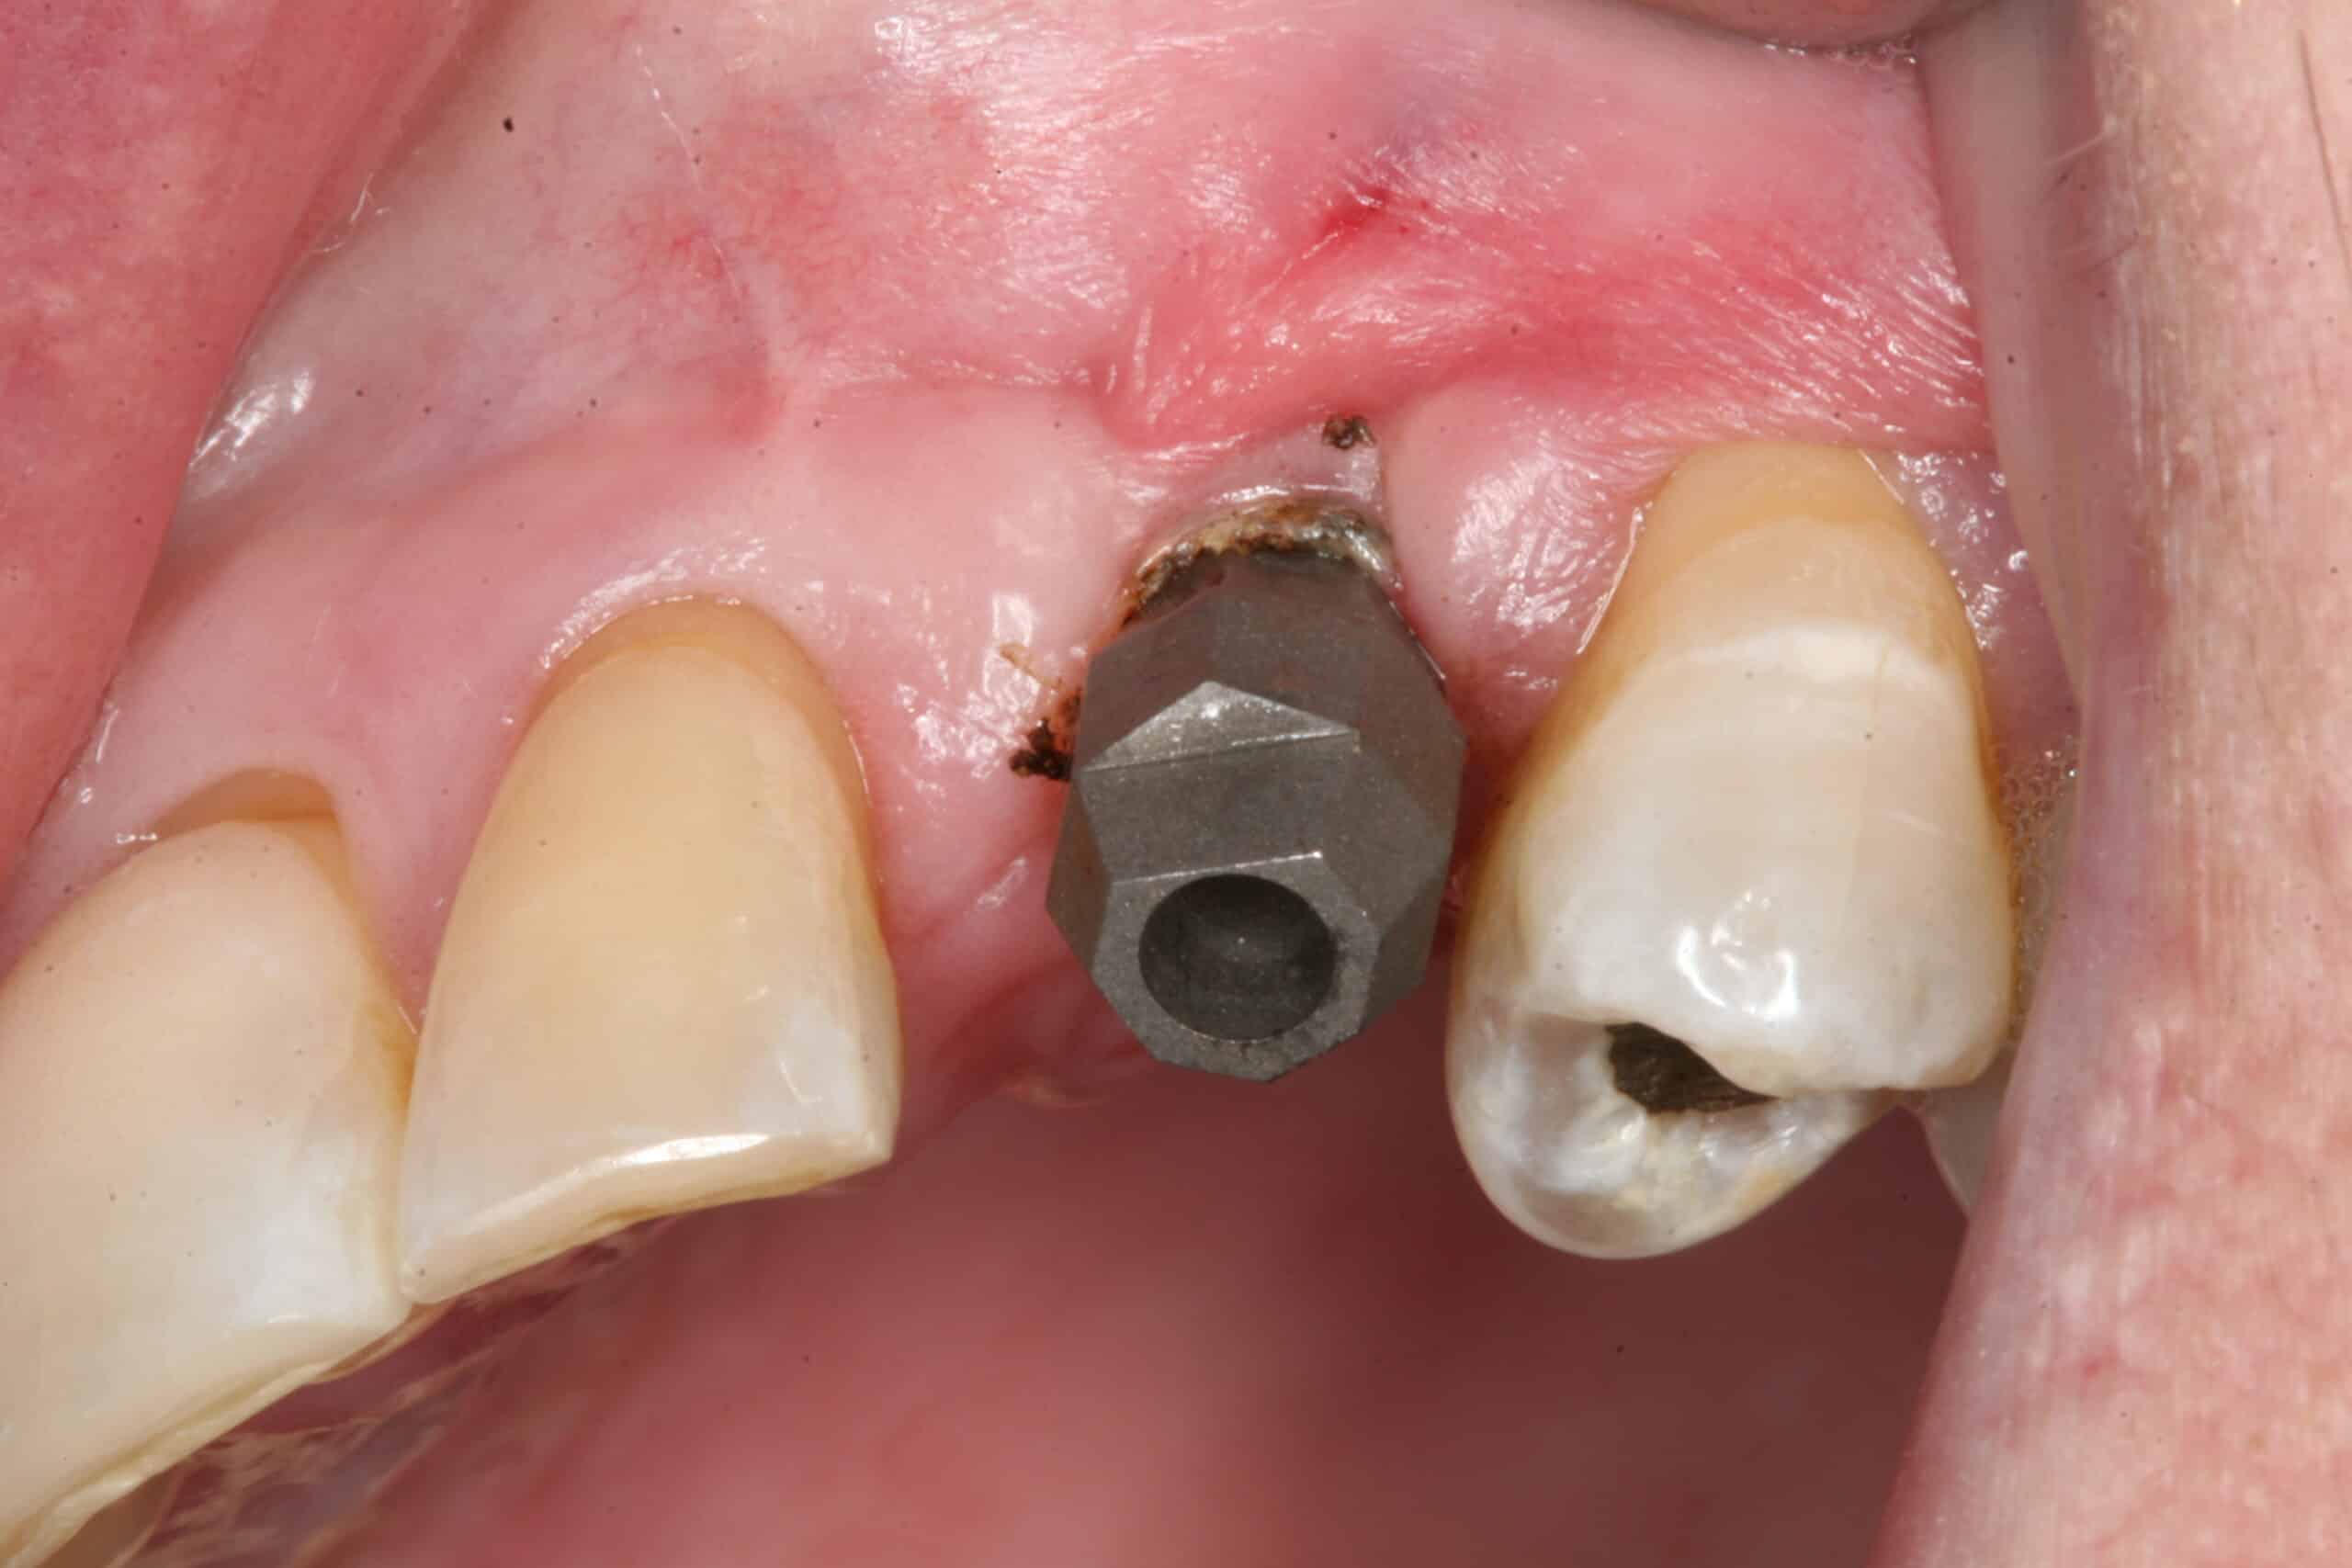
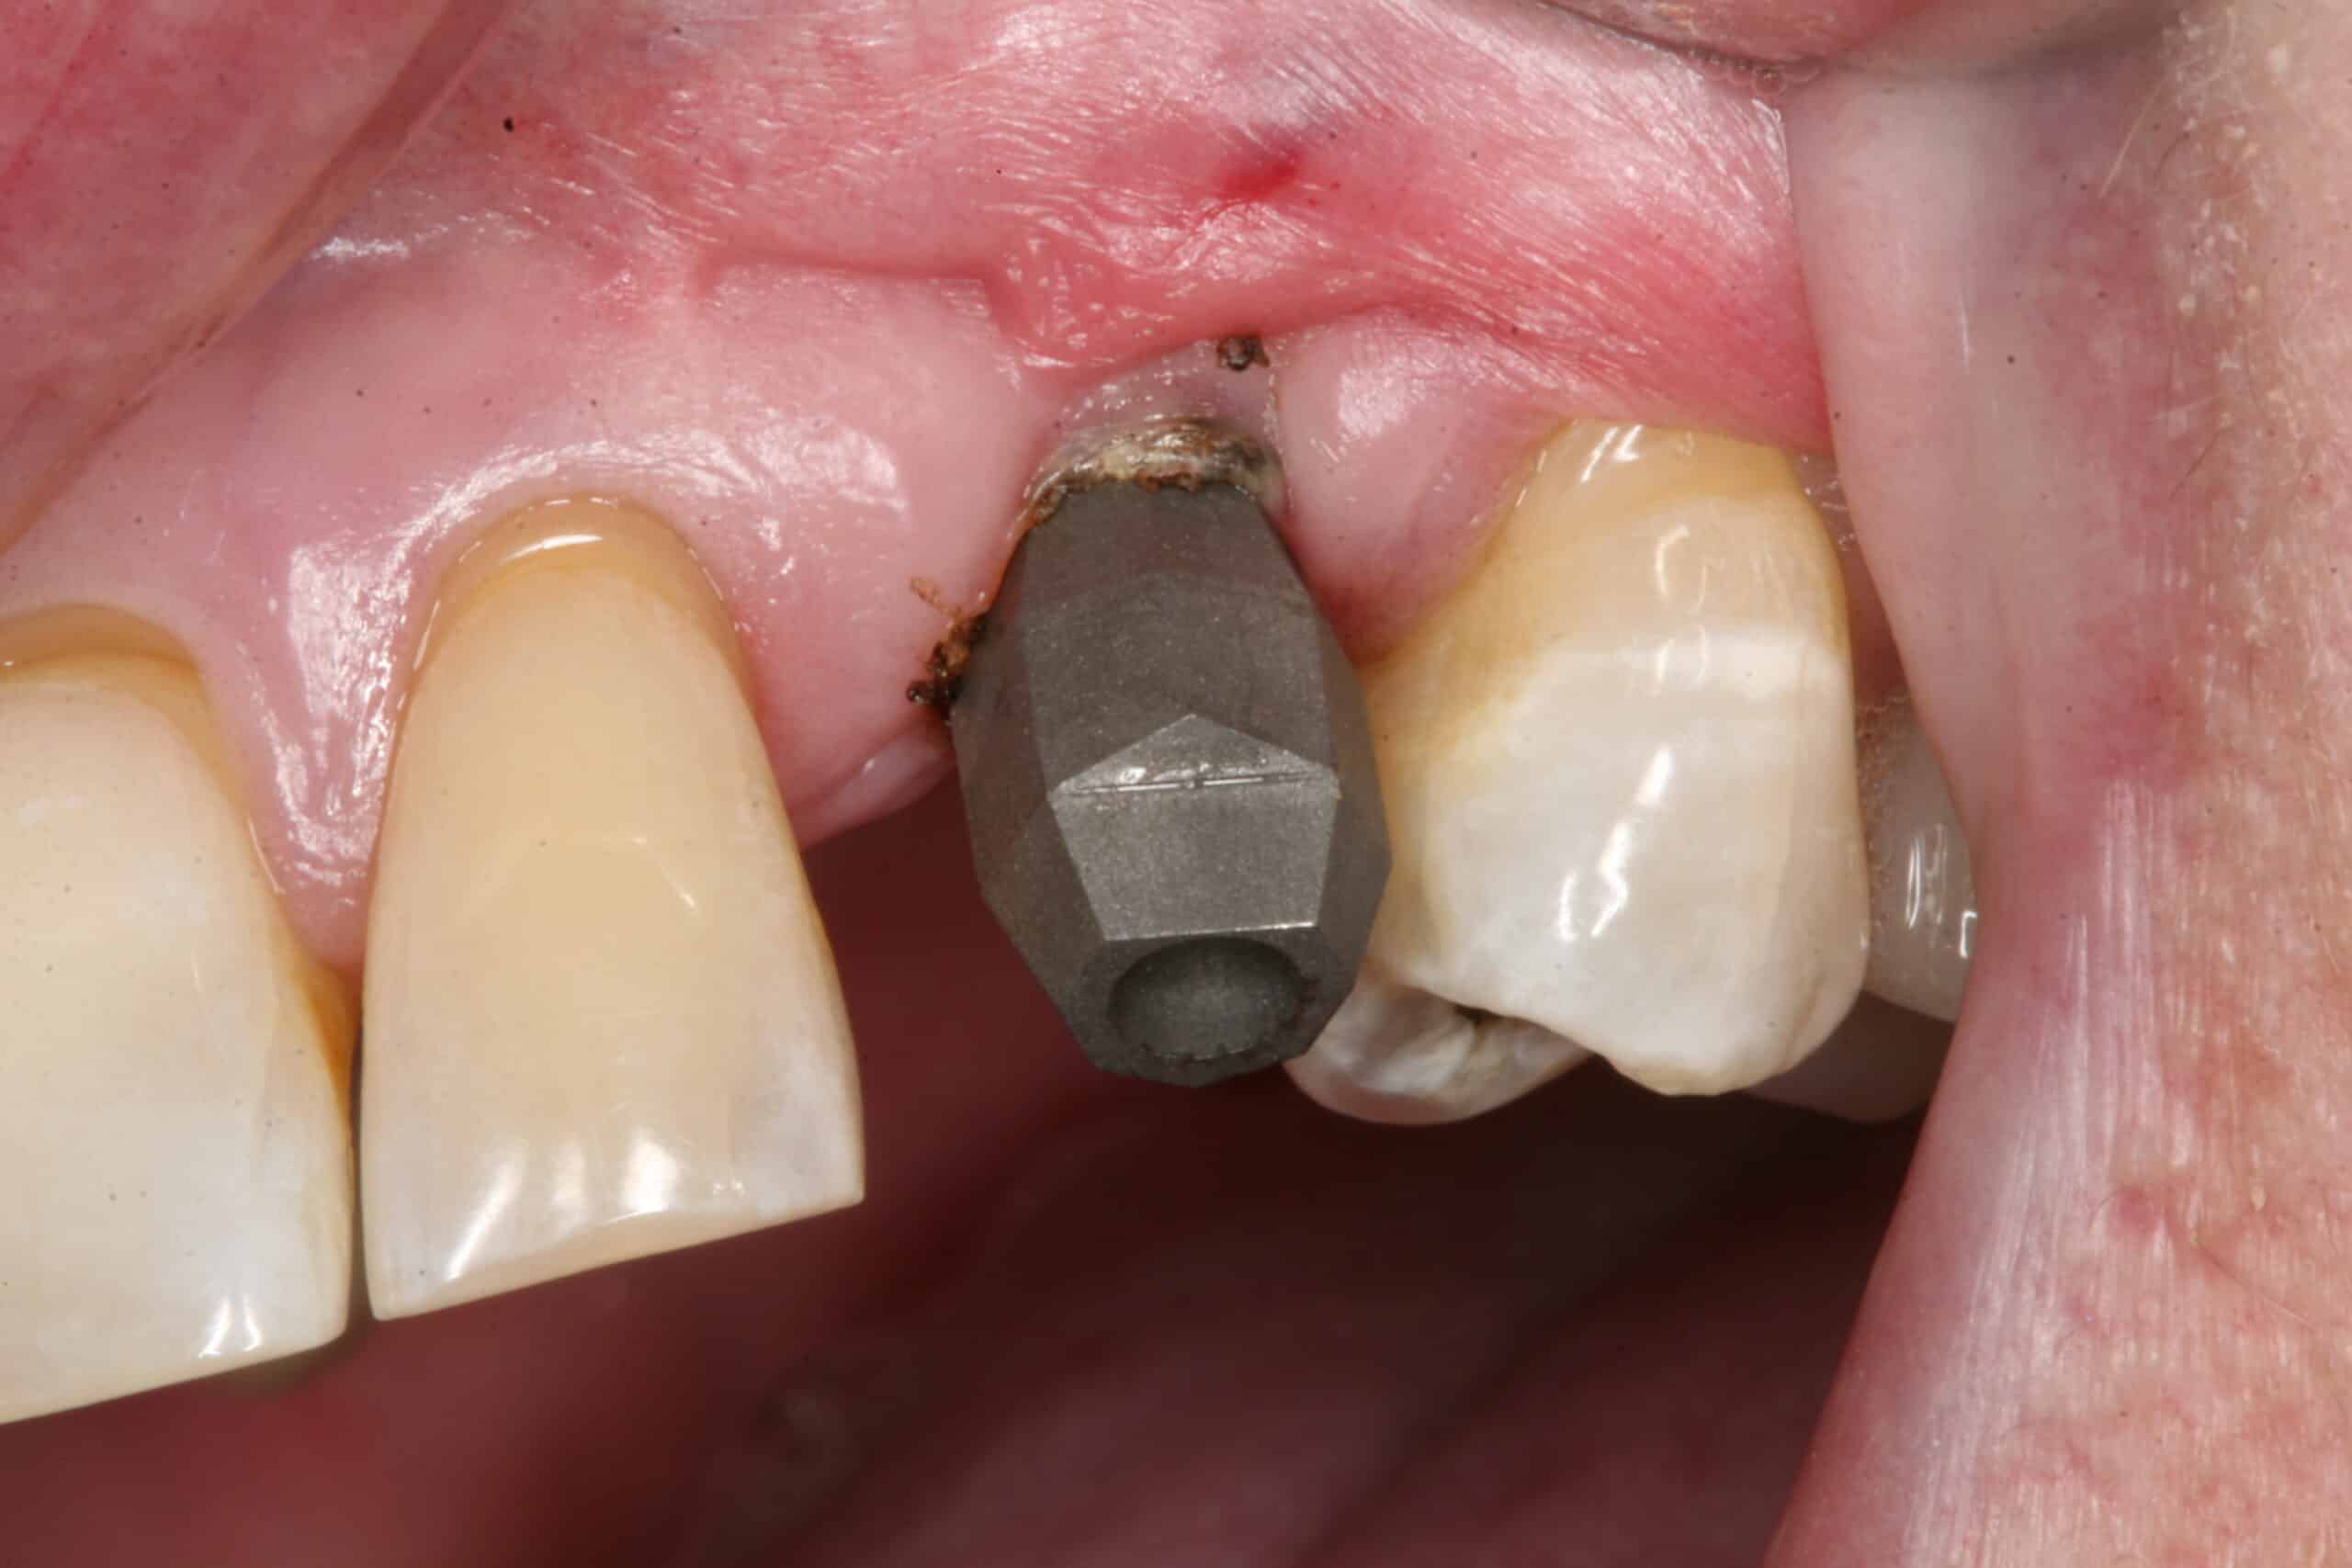
Not much keratinized tissue on the facial and will do a connective tissue graft with L-PRF membrane (another blog topic) after the implant/abutment/crown is placed. The lab will push the gingiva to where it will look good and I will laser it to fit. A hybrid zirconium custom abutment and zirconium crown was ordered.

X-ray verification of scanning jig
Raw iTero scan that is sent to Tel aviv via the internet.
More of this case will be presented here as it is finished…
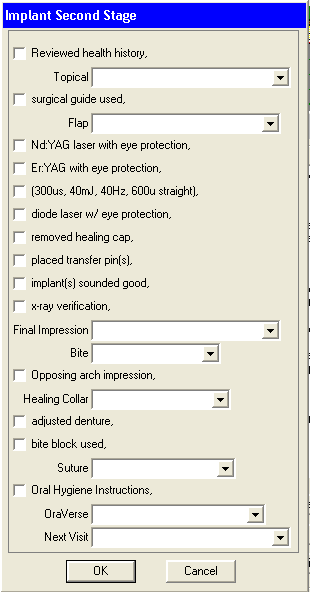
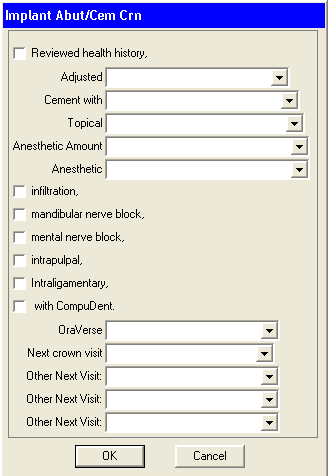
The Carestream/Kodak PracticeWorks code for my Implant Placement, Second Stage Implant and custom abutment/cement crown notes are as follows:
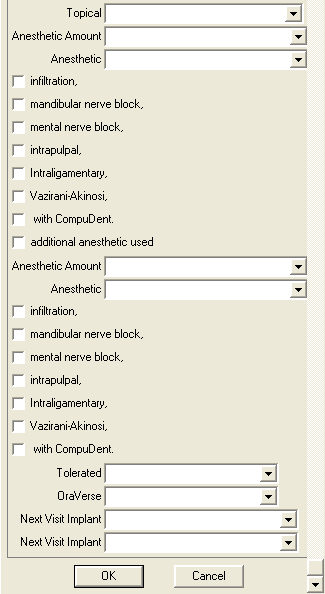
<Consent> <HlthHx> <Sterile Field 2> <Sterile field> <surgGuide> <iit> <biteBlock> <Flap> <saline> <osteotome> <hatch> <Bone Graft> <Type Implant> <Size Implant> <MDI Tooth> <Bone> <Type Implant> <Size Implant> <MDI Tooth> <Bone> <Type Implant> <Size Implant> <MDI Tooth> <Bone> <Type Implant> <Size Implant> <MDI Tooth> <Bone> <Type Implant> <Size Implant> <MDI Tooth> <Bone> <Type Implant> <Size Implant> <MDI Tooth> <Bone> <Type Implant> <Size Implant> <MDI Tooth> <Bone> bone level implant cover screw, <membrane> <Suture> <Pano checkin> <Pano> <midPA> <postPA> <Attachments> <Final imp> <OHI> <Access> Topical anesthetic <Topical> with <AnesNumMg> of <Anesthetic> <AnesthFil> <AnesthBlock> <AnesthMental> <AnesthPulp> <AnesthLig> <AnesthAkin><CompuDent> <addAnesth> <AnesNumMg> <Anesthetic> <AnesthFil> <AnesthBlock> <AnesthMental> <AnesthPulp> <AnesthLig> <AnesthAkin><CompuDent> Pt informed not to eat food, bite or chew on lips or tongue while anesthetic is still working. <Tolerated> <OraVerse> Next Visit: <Next Implant> <Next Implant>

<HlthHx> Topical anesthetic <Topical> with <surgGuide> <Flap> <exposeImpl> <ErYAG> <ErYAG2> <laser1> <RemHealCap> <transPin> <implSound> <xray Veri> <Final imp> <Bite> <OpposingCast> healing collar <HealCollar> <adjustDent><biteBlock> <Suture> <OHI> Pt informed not to eat food, bite or chew on lips or tongue while anesthetic is still working. <OraVerse> <Next Visit>
<HlthHx> Removed healing collar, placed CAD/CAM abutment, x-ray verification, torqued down abutment, Fermit-N in screw hole, diode laser, H2O2, <AdjustCrn>, <CemW/> tolerated well, OHI, Topical anesthetic <Topical> with <AnesNumMg> of <Anesthetic> <AnesthFil> <AnesthBlock> <AnesthMental> <AnesthPulp> <AnesthLig><CompuDent> Pt informed not to eat food, bite or chew on lips or tongue while anesthetic is still working. <OraVerse> <Next crown> <secNV><secNV><secNV>
CONS:
Our bill from 5 Axis Dental Design Center in Canada for the zirconium hybrid custom abutment, and a zirconium crown was $595 with a $20 postage fee! Not to mention the $80 scanning jig (re-usable).
No matter how cool this process may be, from a business standpoint, I think it will be less expensive to get a regular custom abutment made from a PVS impression of the impression pin, and then iTero scanning the custom abutment for a regular crown fee as seen in Implant Case Study #1: Dynablast, Astra, iTero, TekScan which would be the way to go if you had to garden the gingiva with a temporary crown/abutment around an esthetically challenging tooth in a gummy smile line. However, we find this scanning technology so accurate that it is addictive and that is why we continue to scan uncovered implants and place both the custom abutments and final restorations at the very same appointment when we can. After all, time is money (for both the dental office and the patient)!
Sometimes using the iTero is frustrating! They don’t have a very expansive computerized lab slip. I mean, if they are smart enough to put together a machine that takes great digital impressions, then it should be a piece of cake for them to write a better lab slip program. Sure they have a field that you can punch out text directions to the lab, but the keyboard requires you to push hard on every key with one finger, and that gets old when you are doing crown after crown all day long. They finally got a scanning jig on the pull down list, but it is only for Straumann. I use Astra Tech and we have to write that in the text field. Of course you can select the type of crown, but you cannot select the material for the custom abutment. So when I tell the lab (5 Axis) to use zirconium, you would assume that was for both the crown and custom abutment. Everyone has heard the old saying about assuming? Well they have now sent me titanium custom abutments twice when I asked for zirconium. The last patient flat out rejected the very slight metal look on the facial and the very large metal collar on the lingual when I showed it to her, and I didn’t blame her because it should have been invisible with the custom hybrid zirconium abutment. Part of the fault is iTero’s for not having all the right categories on the lab slips, and part 5 Axis for not following my standard instruction for when I order a zirconium crown, and partly mine for not writing a laborious text paragraph of instruction every time I do a crown.
I’m going to chalk it up to growing pains. New technologies like this will have difficulties settling into a standard format, and I’ll just have to help them work through those growing pains.
I’ll keep you informed about how things work out!